

Learn how to save seeds for next year with these easy seed-saving tips. Save heirloom tomato seeds and other vegetable, flower, and herb seeds to plant in the future. Anyone can save money by gathering and saving seeds for next year’s garden or to exchange. Get the easy tips for saving and storing seeds successfully. You can even participate in seed exchanges (get the guidelines here) to expand the variety of your plants. It’s easier than you might think!

The Seed Saving Backstory
Every summer, I tell myself I’m going to save the seeds from successful plants. Then, fall arrives, the rain hits, and saving seeds seems like an unrealistic fantasy. It’s tough to get motivated to muck around outside when everything is so soggy. The payoff is tremendous though. Here are some of my favorite easy-to-save seeds I try to gather each season. If I’m motivated, I can get it done before the weather turns too nasty. Learn how easy saving seeds can be by reading through this list of seed-saving options. Chances are, you have some or all of these plants in your yard or garden.
This post contains affiliate links, which means I may earn a small commission from qualifying purchases at no additional cost to you. Please read my Policies page for more information.
Seed Selection
The seeds I most like to save are the seeds I can gather easily. Gathering seeds from echinacea, marigolds, cosmos and sunflowers is quick and simple, because the seeds are large. Smaller seeds, like those from foxgloves, can be easy to save as well, if you know the tricks. I learned to save seeds from tomatoes from a master gardener who is in my Model A club. If you grow flowers or vegetables, there are seeds to be saved. Read on for the step-by-step instructions.
Gather Seed Saving Supplies
You’ll need some basic supplies for seed harvesting, including scissors or pruners, a container to collect the seed pods, a paper bag or envelope for seed storage, and a fine-mesh sieve or strainer. I give a list of the best containers for saving seeds further on down.
Harvesting and Saving Seeds from Plants
I usually only save seeds from plants that will have enough time to sprout from seed and produce a flower, fruit, or vegetable. To gather marigold and cosmos seeds, I just pull the seeds out of the flower head. Dry weather is nice, but when that’s not a possibility, I gather the flower heads and bring them inside to dry before harvesting the seeds. Two other types of flower seeds that are easy to save are hollyhock seeds and poppy seeds.
Harvesting Flower Seeds
Harvesting flower seeds is a rewarding process that allows you to collect seeds from your garden flowers for future planting or sharing with other gardening enthusiasts. Here are some different kinds of flower seeds that are easy to harvest.
Harvesting Cosmos Seeds

Harvesting cosmos seeds is a relatively simple process, and it allows you to save seeds from your cosmos flowers for future planting. Here are the steps to harvest cosmos seeds:
Wait for the Right Time:
Allow the cosmos flowers to fully bloom and then fade.
The seeds will develop in the faded flower heads, so it’s essential to let them mature on the plant.
Select Healthy Flowers:
Choose flowers that appear healthy and free from disease or damage for seed harvesting.
Gather the Seed Heads:
When the cosmos flower heads have dried up and turned brown, it’s time to harvest the seeds.
Use scissors or pruners to cut the seed heads from the plant. Leave a short stem attached to each seed head to make handling easier.
Remove the Seeds:
Take the dried seed heads and gently crush them to release the seeds. You can do this by hand or by rubbing the seed heads between your palms.
You may also place the seed heads in a paper bag and gently shake it to release the seeds.
Separate Seeds from Chaff:
Cosmos seeds are relatively large and easy to distinguish from the chaff (dried flower bits and debris).
To separate the seeds from the chaff, you can use a fine-mesh sieve, a seed cleaning screen, or simply blow gently on the mixture, allowing the lighter chaff to blow away while the heavier seeds remain.
Store the Seeds:
Once you have separated the seeds from the chaff, store the cosmos seeds in a cool, dry place.
Use paper envelopes or small airtight containers to store the seeds. Label each container with the date and the cosmos variety (if applicable).
Properly stored cosmos seeds can remain viable for several years.
Maintain Seed Viability:
To maintain the viability of your cosmos seeds, store them in a cool, dark place with low humidity. A refrigerator or freezer can be a good option for long-term storage.
Avoid exposing the seeds to moisture, extreme temperature fluctuations, or direct sunlight.
Test Germination: Before planting the seeds in the future, you may want to perform a germination test to check the viability of the seeds. To do this, sow a few seeds in a small pot or tray of potting soil and observe how many sprout.
Harvested cosmos seeds can be a rewarding way to propagate these beautiful flowers year after year. Additionally, sharing seeds with fellow gardeners can be a delightful way to spread the beauty of cosmos in your community.
Harvesting Dahlia Seeds

We usually increase the number of dahlias by dividing the tubers, but you can also propagate dahlias by saving seeds. Saving seeds from dahlias allows you to propagate these beautiful flowering plants and preserve specific varieties for future gardens. Here’s how to save seeds from dahlias:
Select Suitable Dahlias:
Choose healthy dahlia plants that have produced flowers with desirable characteristics. Look for fully developed, healthy flowers that are free from disease or damage.
Timing:
Wait until the dahlia flowers have fully bloomed, and the petals have started to wilt and fall off. The seed pods will form at the base of the flower where the petals were attached.
Harvest Seed Pods:
Use scissors or pruners to carefully cut off the seed pods from the plant. Leave a short stem attached to each seed pod for easier handling.
Dry the Seed Pods:
Place the harvested dahlia seed pods in a dry, well-ventilated area, preferably indoors, to continue drying. You can hang them upside down by their stems or spread them out on a tray or newspaper.
Allow the seed pods to air dry for several weeks or until they are completely dry and brittle. Drying helps the seeds inside mature and become easier to extract.
Remove the Seeds:
Once the dahlia seed pods are fully dry, gently crush or rub them to release the seeds. You can do this by hand or by using a small brush or your fingers to strip the seeds from the pods.
Clean the Seeds:
Dahlia seeds are relatively large and easy to separate from any remaining bits of chaff or plant material. However, you can use a fine-mesh sieve or strainer to remove any remaining debris.
Store the Seeds:
Place the cleaned dahlia seeds in a paper envelope or small airtight container. Label the container with the date and any specific dahlia variety information (if applicable).
Store the seeds in a cool, dry place away from moisture, extreme temperature fluctuations, and direct sunlight. Properly stored dahlia seeds can remain viable for several years.
Plant the Seeds:
When you’re ready to plant the dahlia seeds, do so in the appropriate season, typically in the spring after the last frost. Plant them in well-draining soil and follow the specific care requirements for dahlias.
Growing dahlias from saved seeds can be an exciting way to explore new dahlia varieties or preserve the characteristics of your favorite dahlias. Keep in mind that dahlia seeds may not always produce plants that are identical to the parent, as dahlias are known for their genetic diversity and variations in flower forms and colors.
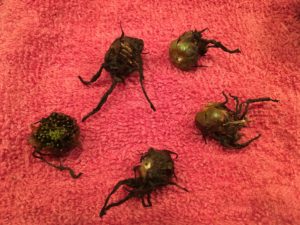
Harvesting Echinacea Seeds
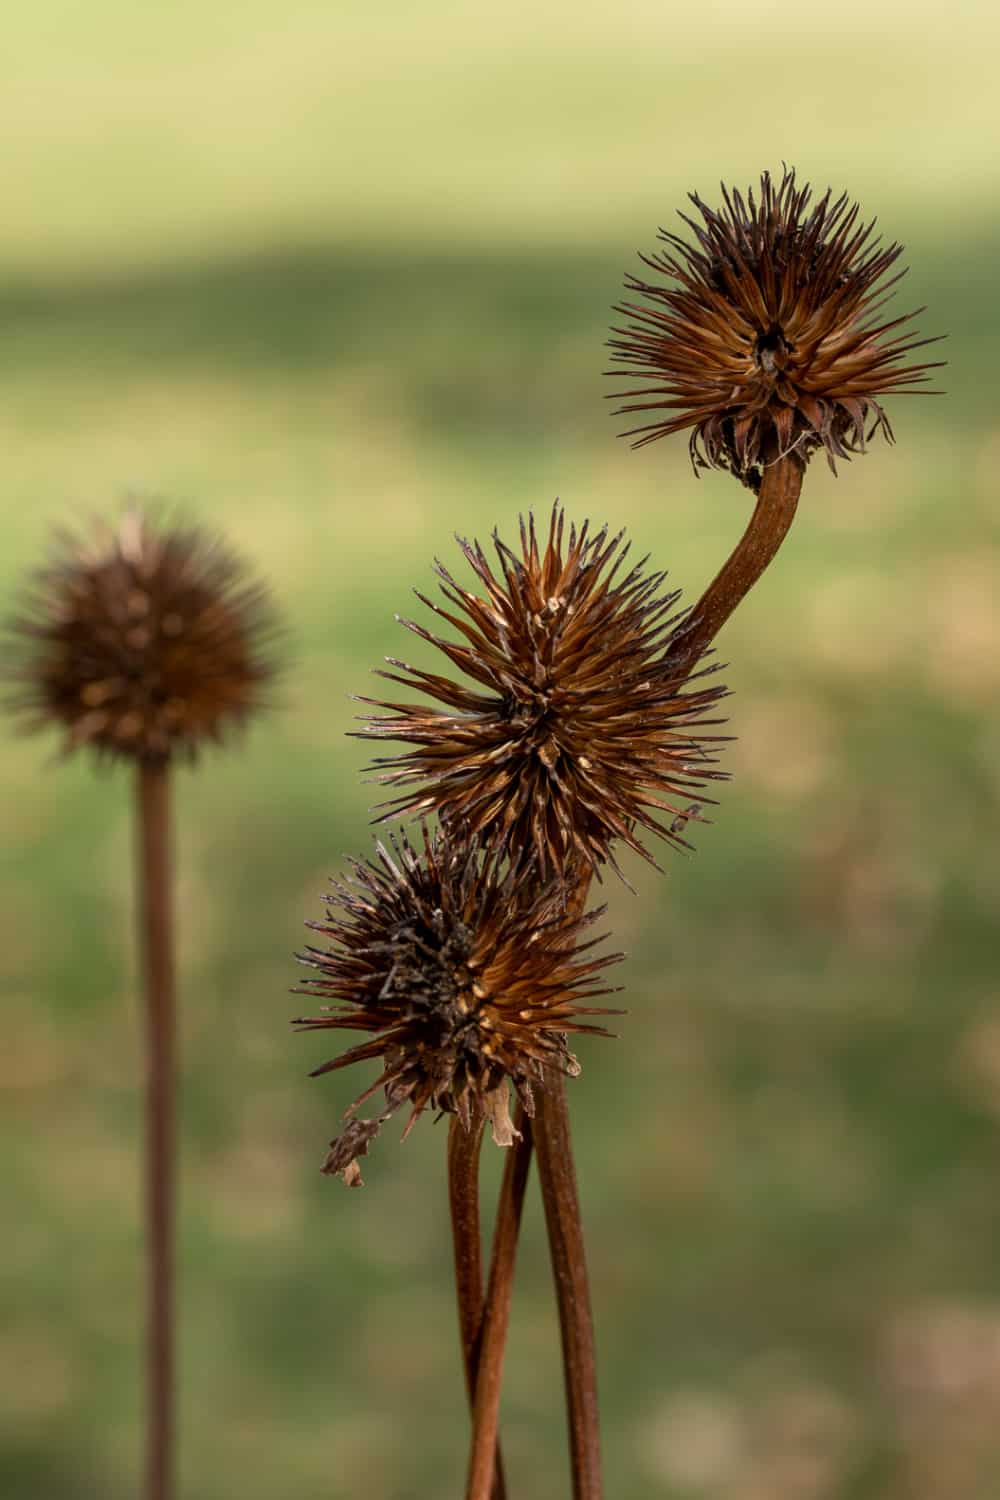
Harvesting echinacea (commonly known as coneflower) seeds is a straightforward process that allows you to collect seeds from your garden plants for future propagation. We were given some echinacea seeds a few years ago and first added them to our perennial garden. Now that we know about saving the seeds, we have echinacea growing in other parts of our yard as well. Here’s how to harvest echinacea seeds:
Timing:
Wait until the echinacea flowers have fully bloomed and the petals have wilted and dried up. The seed heads will develop in the center cone of the flower.
Select Healthy Flowers:
Choose echinacea flowers that are healthy and free from disease or damage for seed harvesting.
Harvest the Seed Heads:
Using scissors or pruners, carefully cut the seed heads from the plant. Leave a short stem attached to each seed head to make handling easier.
Dry the Seed Heads:
Place the harvested echinacea seed heads in a dry, well-ventilated area out of direct sunlight. Allow them to air dry for several weeks or until the seed heads are completely dry and brittle.
Remove the Seeds:
Once the seed heads are dry, gently crush or rub them to release the seeds. You can do this by hand or by using a small brush or your fingers to strip the seeds from the cone.
Clean the Seeds:
Echinacea seeds are relatively large and easy to separate from the chaff (dried flower bits and debris). To do this, you can use a fine-mesh sieve, a seed cleaning screen, or simply blow gently on the mixture, allowing the lighter chaff to blow away while the heavier seeds remain.
Store the Seeds:
Place the cleaned echinacea seeds in a paper envelope or small airtight container. Label the container with the date and the echinacea variety (if applicable).
Store the seeds in a cool, dry place away from moisture, extreme temperature fluctuations, and direct sunlight. A cool, dark place like a refrigerator or freezer can be suitable for long-term storage.
Harvested echinacea seeds can be used to grow new plants in your garden or shared with other gardening enthusiasts. Echinacea is a popular perennial flower known for its vibrant colors and potential health benefits, so growing your own from collected seeds can be a rewarding experience.
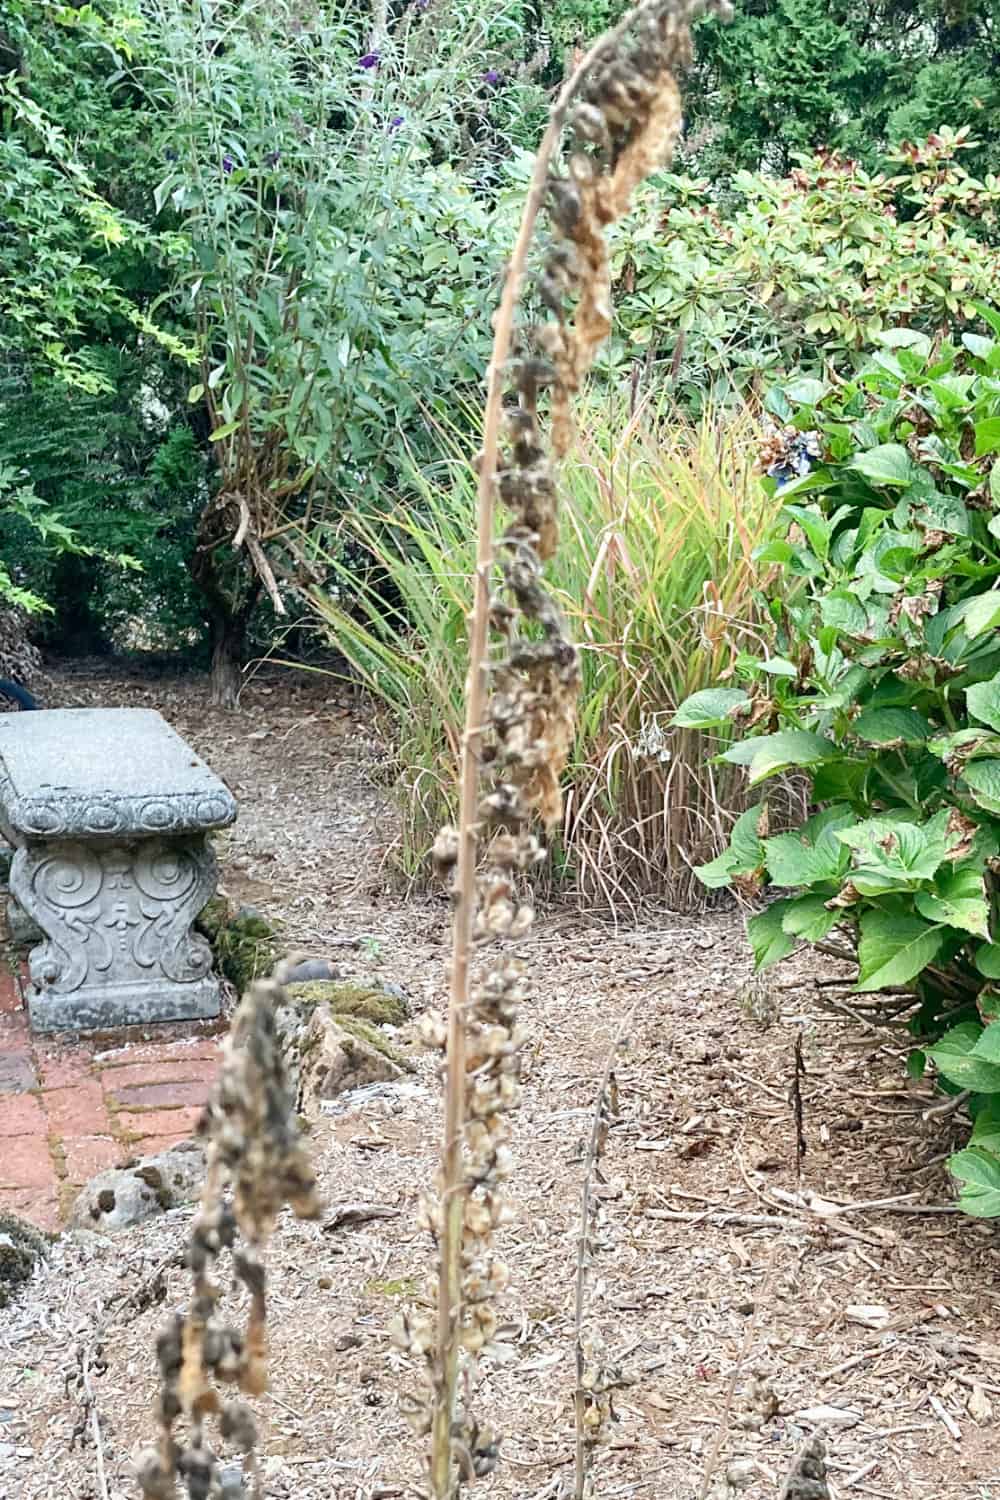
Harvesting Foxglove Seeds

Harvesting foxglove seeds allows you to collect seeds from your foxglove plants for future planting or propagation. Foxgloves (Digitalis spp.) are known for their tall spikes of tubular flowers and are often grown for their ornamental beauty. Here’s how to harvest foxglove seeds:
Timing:
Wait until the foxglove flowers have fully bloomed and the seed pods have formed. The seed pods will be located where the flowers once bloomed.
Select Healthy Seed Pods:
Choose seed pods that are mature and brown, as these will contain ripe seeds.
Harvest the Seed Pods:
Using scissors or pruners, carefully cut the seed pods from the plant. Leave a short stem attached to each seed pod to make handling easier.
Dry the Seed Pods:
Place the harvested foxglove seed pods in a dry, well-ventilated area, preferably indoors, to continue drying. You can hang them upside down by their stems or spread them out on a tray or newspaper.
Allow the seed pods to air dry for several weeks or until they are completely dry. Drying helps the seeds inside the pods mature and become easier to extract.
Extract the Seeds:
Once the seed pods are fully dry, gently crush or rub them to release the seeds. You can do this by hand or by using a small brush or your fingers to strip the seeds from the pods.
Shortcut to Extracting Foxglove Seeds if You Have Many Foxgloves:
We have a lot of foxgloves that grow around the perimeter of our large eastern field. To speed up the foxglove seed harvesting process, I walk around with a large paper bag. I bend the foxglove stalks with the seed pods attached and hold the paper bag over the plant as I bend the stalks so the seed pods are upside down inside of the bag. The seeds fall out quite easily. I shake the seeds into the bag and then move on to the next foxglove plant. No cutting involved!
Clean the Seeds:
Foxglove seeds are tiny and may be mixed with bits of chaff or plant material. To separate the seeds from the chaff, use a fine-mesh sieve or strainer. Shake the sieve or strainer to allow the lighter chaff to blow or sift away, leaving the heavier seeds behind.
Store the Seeds:
Place the cleaned foxglove seeds in a paper envelope or small airtight container. Label the container with the date and any specific variety information (if applicable).
Store the seeds in a cool, dry place away from moisture, extreme temperature fluctuations, and direct sunlight. Properly stored foxglove seeds can remain viable for several years.
Harvested foxglove seeds can be used to grow new plants in your garden, and they are an excellent way to propagate these beautiful flowering perennials. Please note that foxglove plants contain compounds that can be toxic if ingested, so take care when handling them, and keep them out of reach of children and pets.
Harvesting Hollyhock Seeds

Harvesting hollyhock seeds is a straightforward process that allows you to collect seeds from your hollyhock plants for future planting. Here’s how to harvest hollyhock seeds:
Timing:
Wait until the hollyhock flowers have fully bloomed, and the petals have wilted and dried up. The seed heads will develop in the center of the flower where the petals were attached.
Select Healthy Flowers:
Choose hollyhock flowers that are healthy and free from disease or damage for seed harvesting.
Harvest the Seed Heads:
Using scissors or pruners, carefully cut the seed heads from the plant. Leave a short stem attached to each seed head to make handling easier.
Dry the Seed Heads:
Place the harvested hollyhock seed heads in a dry, well-ventilated area out of direct sunlight. Allow them to air dry for several weeks or until the seed heads are completely dry and brittle.
Remove the Seeds:
Once the seed heads are dry, gently crush or rub them to release the seeds. You can do this by hand or by using a small brush or your fingers to strip the seeds from the center of the seed head.
Clean the Seeds:
Hollyhock seeds are relatively large and easy to separate from any chaff or debris. To do this, you can use a fine-mesh sieve, a seed cleaning screen, or simply blow gently on the mixture, allowing the lighter chaff to blow away while the heavier seeds remain.
Store the Seeds:
Place the cleaned hollyhock seeds in a paper envelope or small airtight container. Label the container with the date and any specific variety information (if applicable).
Store the seeds in a cool, dry place away from moisture, extreme temperature fluctuations, and direct sunlight. A cool, dark place like a refrigerator or freezer can be suitable for long-term storage.
Harvested hollyhock seeds can be used to grow new plants in your garden or shared with other gardening enthusiasts. Hollyhocks are known for their tall, stately spikes of colorful flowers, and collecting seeds can be a rewarding way to ensure their presence in your garden year after year.

Harvesting Lupine Seeds
Harvesting Marigold Seeds
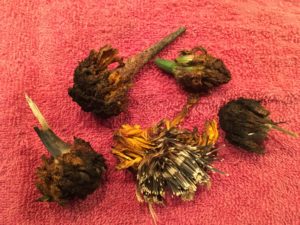
Harvesting marigold seeds is a relatively simple process that allows you to collect seeds from your marigold flowers for future planting or sharing with other gardeners. Here’s how to harvest marigold seeds:
Timing:
Wait until the marigold flowers have fully bloomed and started to fade. The seed heads will develop after the flowers have wilted.
Select Healthy Seed Heads:
Choose seed heads that are mature, fully developed, and free from disease or damage for seed harvesting.
Harvest the Seed Heads:
Using scissors or pruners, carefully cut the seed heads from the marigold plant. Leave a short stem attached to each seed head, as this makes handling easier.
Dry the Seed Heads:
Place the harvested marigold seed heads in a dry, well-ventilated area, preferably indoors, to continue drying. You can hang them upside down by their stems or spread them out on a tray or newspaper.
Allow the seed heads to air dry for several weeks or until they are fully dry. Drying helps the seeds inside mature and become easier to extract.
Extract the Seeds:
Once the marigold seed heads are fully dry, gently crush or rub them to release the seeds. You can do this by hand or by using a small brush or your fingers to strip the seeds from the seed head.
Marigold seeds are relatively large and easy to extract from the dried flower head.
Clean the Seeds:
To separate the marigold seeds from any chaff or plant material, use a fine-mesh sieve or strainer. Shake the sieve or strainer to allow the lighter chaff to blow or sift away, leaving the heavier seeds behind.
Store the Seeds:
Place the cleaned marigold seeds in a paper envelope or small airtight container. Label the container with the date and any specific marigold variety information (if applicable).
Store the seeds in a cool, dry place away from moisture, extreme temperature fluctuations, and direct sunlight. Properly stored marigold seeds can remain viable for several years.
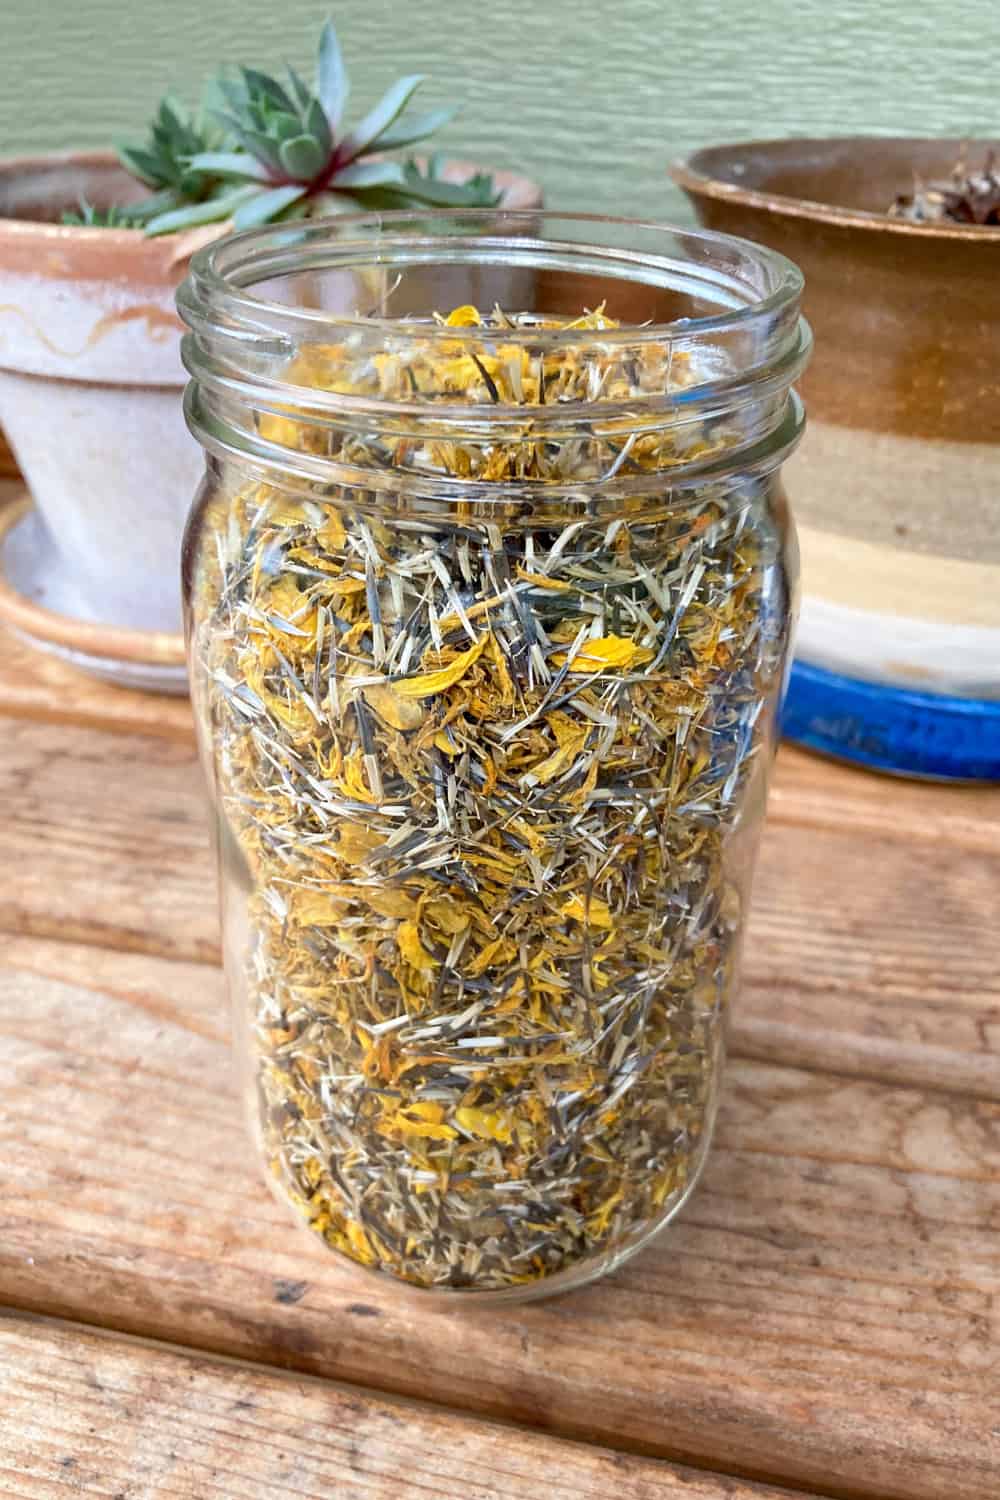
Harvested marigold seeds can be used to grow new plants in your garden, share with other gardeners, or preserve the genetic diversity of your marigold varieties for future plantings. Jars of marigold seeds make great gifts.
Harvesting Poppy Seeds
Harvesting poppy seeds is a relatively simple process, and it allows you to collect seeds from your poppy plants for various culinary and gardening uses. Here’s how to harvest poppy seeds:
Timing:
Wait until the poppy pods have fully ripened. The pods will turn brown and begin to dry out when they are ready for harvesting. The seeds should rattle inside the pods when they are mature.
Select Healthy Pods:
Choose poppy pods that are healthy, fully ripened, and free from disease or damage for seed harvesting.
Harvest the Pods:
Using scissors or pruners, carefully cut the poppy pods from the plant. Leave a short stem attached to each pod to make handling easier.
Dry the Pods:
Place the harvested poppy pods in a dry, well-ventilated area, preferably indoors, to continue drying. You can hang them upside down by their stems or spread them out on a tray or newspaper.
Allow the pods to air dry for several weeks or until they are completely dry and brittle. This will help the seeds loosen inside the pods.
Collect the Seeds:
Once the poppy pods are fully dry, place them in a bag or container and gently shake or rub them. The seeds will naturally fall out of the pods as they dry and mature.
Alternatively, you can cut the pods open to release the seeds manually.
Clean the Seeds:
Poppy seeds are very small, so they may be mixed with bits of chaff or plant material. To separate the seeds from the chaff, use a fine-mesh sieve or strainer. Shake the sieve or strainer to allow the lighter chaff to blow or sift away, leaving the heavier seeds behind.
Store the Seeds:
Place the cleaned poppy seeds in a paper envelope or small airtight container. Label the container with the date and any specific variety information (if applicable).
Store the seeds in a cool, dry place away from moisture, extreme temperature fluctuations, and direct sunlight. Properly stored poppy seeds can remain viable for several years.
Harvested poppy seeds can be used in a variety of recipes, including baking and cooking, and they can also be used for replanting and growing more poppy plants in your garden.

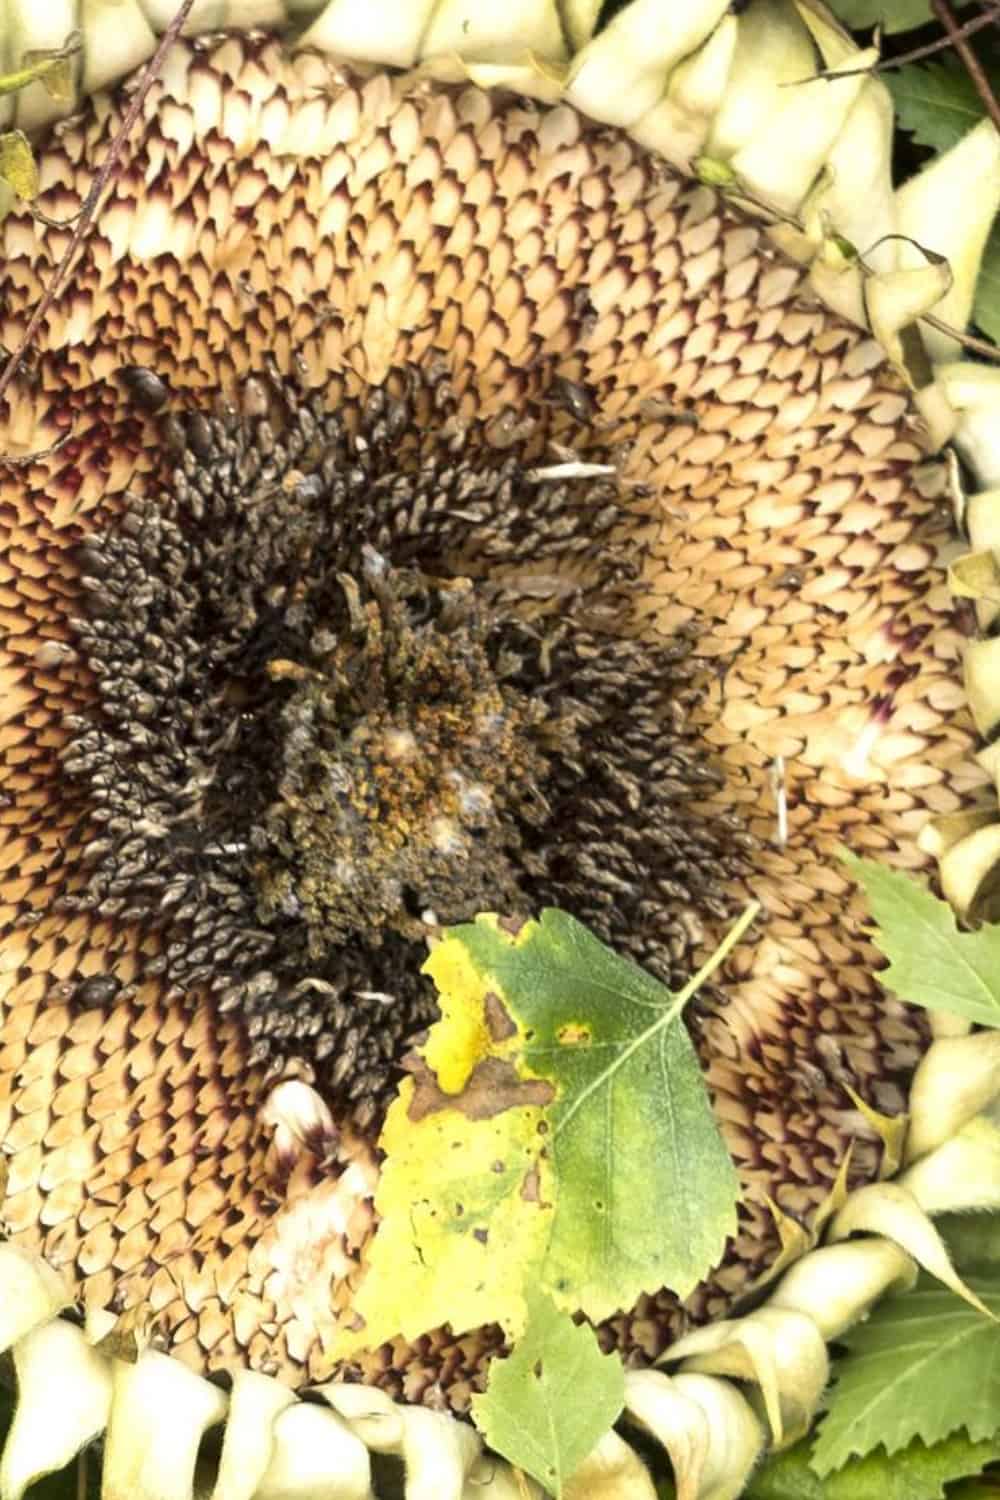
Harvesting Sunflower Seeds
Sunflower seeds are fun for kids to harvest, as they pick apart the giant heads of the sunflowers. It makes a great sunflower party activity. Harvesting sunflower seeds is a rewarding process that allows you to collect seeds from your sunflower plants for eating or replanting. Here’s how to harvest sunflower seeds:
Timing:
Wait until the sunflower heads have fully matured and the back of the flower head has turned brown or yellowish. The seeds should appear plump and mature.
Select Healthy Heads:
Choose sunflower heads that are healthy, fully matured, and free from disease or damage for seed harvesting.
Harvest the Heads:
Using pruners or scissors, cut the sunflower heads from the plant, leaving a substantial stem attached. The stem will make handling the heads easier during the drying process.
Dry the Heads:
Hang the harvested sunflower heads upside down in a dry, well-ventilated area, such as a garage, shed, or airy room. You can tie them together with twine or use hooks to hang them.
Allow the heads to air dry for about 2-3 weeks or until they are fully dry. Drying helps the seeds shrink away from the head, making them easier to remove.
Remove the Seeds:
Once the sunflower heads are dry, take them down and place them in a large bowl.
Use your fingers or a tool to remove the seeds from the head. You can rub the seeds out by hand or use a fork or your fingers to scrape them out.
As you remove the seeds, you may notice some chaff (the dried flower bits) mixed in. This is normal, and you can separate the seeds from the chaff later.
Clean the Seeds:
To separate the seeds from the chaff, place them in a shallow dish or tray and gently blow on them or use a fan to blow away the lightweight chaff. Alternatively, you can use a fine-mesh sieve or strainer to separate the seeds from the chaff.
Store the Seeds:
Place the cleaned sunflower seeds in a paper envelope or airtight container. Label the container with the date and any specific variety information (if applicable).
Store the seeds in a cool, dry place away from moisture, extreme temperature fluctuations, and direct sunlight. Properly stored sunflower seeds can remain viable for planting or consumption for several months.
Roasting (Optional):
If you intend to eat the sunflower seeds, you can roast them for added flavor. Spread the cleaned seeds on a baking sheet, drizzle with a bit of oil and salt, and roast in the oven at 300°F (150°C) for about 30-40 minutes, stirring occasionally, until they turn golden brown.
Harvested sunflower seeds can be enjoyed as a snack, added to recipes, or used for replanting and growing more sunflowers in your garden.
Harvesting Fruit, Herb, and Vegetable Seeds
Harvesting fruit and vegetable seeds is a cost-effective way to grow your favorites in subsequent growing seasons. Here are some vegetable seeds that are easy to save.
Harvesting Bean Seeds

One thing I am looking forward to saving this year are my scarlet runner bean seeds. They’re a beautiful dark pinkish-purple and may also be used for eating. Harvesting bean seeds is a straightforward process that allows you to collect seeds from your bean plants for future planting. Here’s how to harvest bean seeds:
Timing:
Wait until the bean pods have fully matured on the plant. The pods should be dry and have a papery texture. For seed-saving purposes, it’s best to allow the pods to remain on the plant until they are almost completely dry.
Select Healthy Pods:
Choose bean pods that are fully mature, free from disease or damage, and have turned brown or tan in color.
Harvest the Pods:
Using scissors or pruners, carefully cut the bean pods from the plant. Leave a short stem attached to each pod to make handling easier.
Dry the Pods:
Place the harvested bean pods in a dry, well-ventilated area, preferably indoors, to continue drying. You can hang them upside down by their stems or spread them out on a tray or newspaper.
Allow the pods to air dry for several weeks or until they are completely dry and brittle. Drying helps the seeds inside mature and become easier to extract.
Remove the Seeds:
Once the bean pods are fully dry, gently open the pods to release the seeds. You can do this by hand or by using a small brush or your fingers to strip the seeds from the pods.
Some bean pods may split open naturally as they dry, making it easier to access the seeds.
Clean the Seeds:
Bean seeds are typically easy to separate from any remaining bits of pod or debris. However, you can use a fine-mesh sieve or strainer to remove any remaining chaff or plant material.
Store the Seeds:
Place the cleaned bean seeds in a paper envelope or small airtight container. Label the container with the date and the bean variety (if applicable).
Store the seeds in a cool, dry place away from moisture, extreme temperature fluctuations, and direct sunlight. Properly stored bean seeds can remain viable for several years.
Harvested bean seeds can be used to grow new bean plants in your garden or shared with other gardeners. Saving seeds from your bean plants can also help preserve the genetic diversity of specific bean varieties.

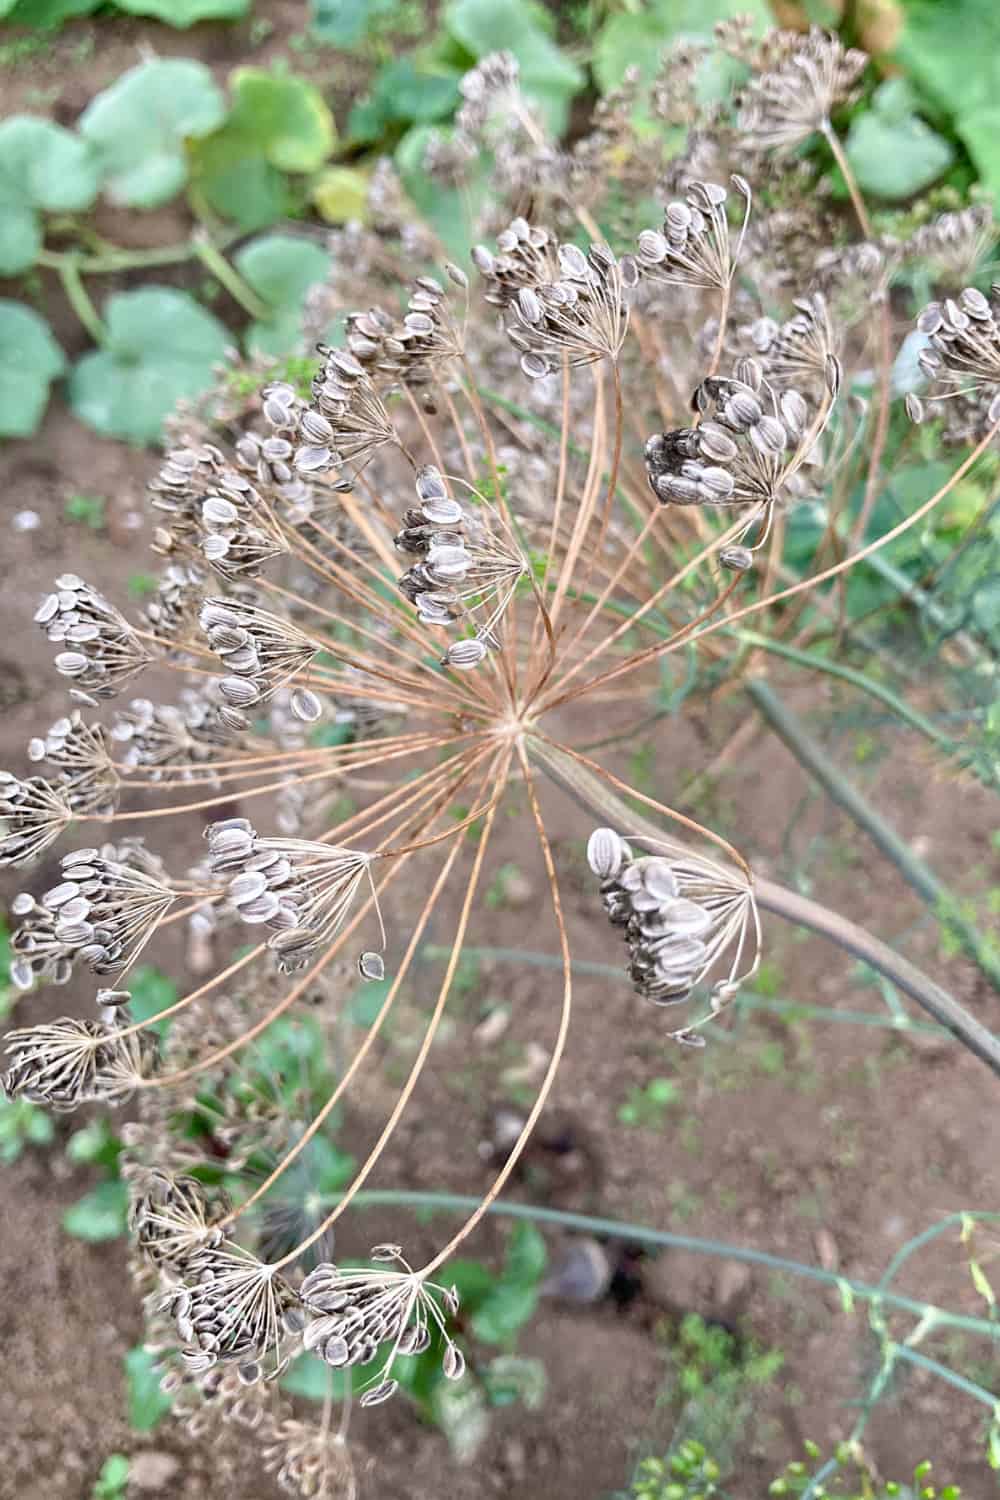
Harvesting Dill Seeds
I use dill to make my favorite quick dill pickles, so it’s always nice to have some dill on hand to save a trip to the grocery store. However, dill seeds prolifically, so if you want to control where you have your dill sprout up, saving seeds and planting them on purpose in a specific area is one way to control the dill population. Then you don’t have to feel badly about pulling up all of the rest of the volunteer dill plants. Here’s how to save dill seeds easily:
Timing:
Allow your dill plants to grow until they produce mature seed heads. The seed heads are the umbrella-shaped clusters of small yellow flowers that form after the dill has finished producing its aromatic foliage. It’s essential to wait until the seeds are fully mature before harvesting.
Harvest the Seed Heads:
Using scissors or pruners, carefully cut the mature dill seed heads from the plant. Leave a short stem attached to each seed head to make handling easier.
Dry the Seed Heads:
Place the harvested dill seed heads in a dry, well-ventilated area, preferably indoors, to continue drying. You can hang them upside down by their stems or spread them out on a tray or newspaper.
Allow the seed heads to air dry for several weeks or until they are completely dry and the seeds inside are easy to release.
Remove the Seeds:
Once the dill seed heads are fully dry, gently crush or rub them to release the seeds. You can do this by hand or by using a small brush or your fingers to strip the seeds from the seed head.
Clean the Seeds:
Dill seeds are relatively large and easy to separate from any remaining bits of chaff or plant material. However, you can use a fine-mesh sieve or strainer to remove any remaining debris.
Store the Seeds:
Place the cleaned dill seeds in a paper envelope or small airtight container. Label the container with the date and seed type.
Store the seeds in a cool, dry place away from moisture, extreme temperature fluctuations, and direct sunlight. Properly stored dill seeds can remain viable for several years.
Use the Seeds:
You can use your saved dill seeds for culinary purposes, such as flavoring pickles, salads, or various dishes. Be sure to adjust the amount you use according to your taste preferences, as the flavor of dill seeds can be strong.
Saving dill seeds allows you to have a ready supply of this aromatic herb for your culinary endeavors and for planting in future growing seasons. It’s a practical way to enjoy the flavors of dill year-round.
Harvesting Pumpkin Seeds
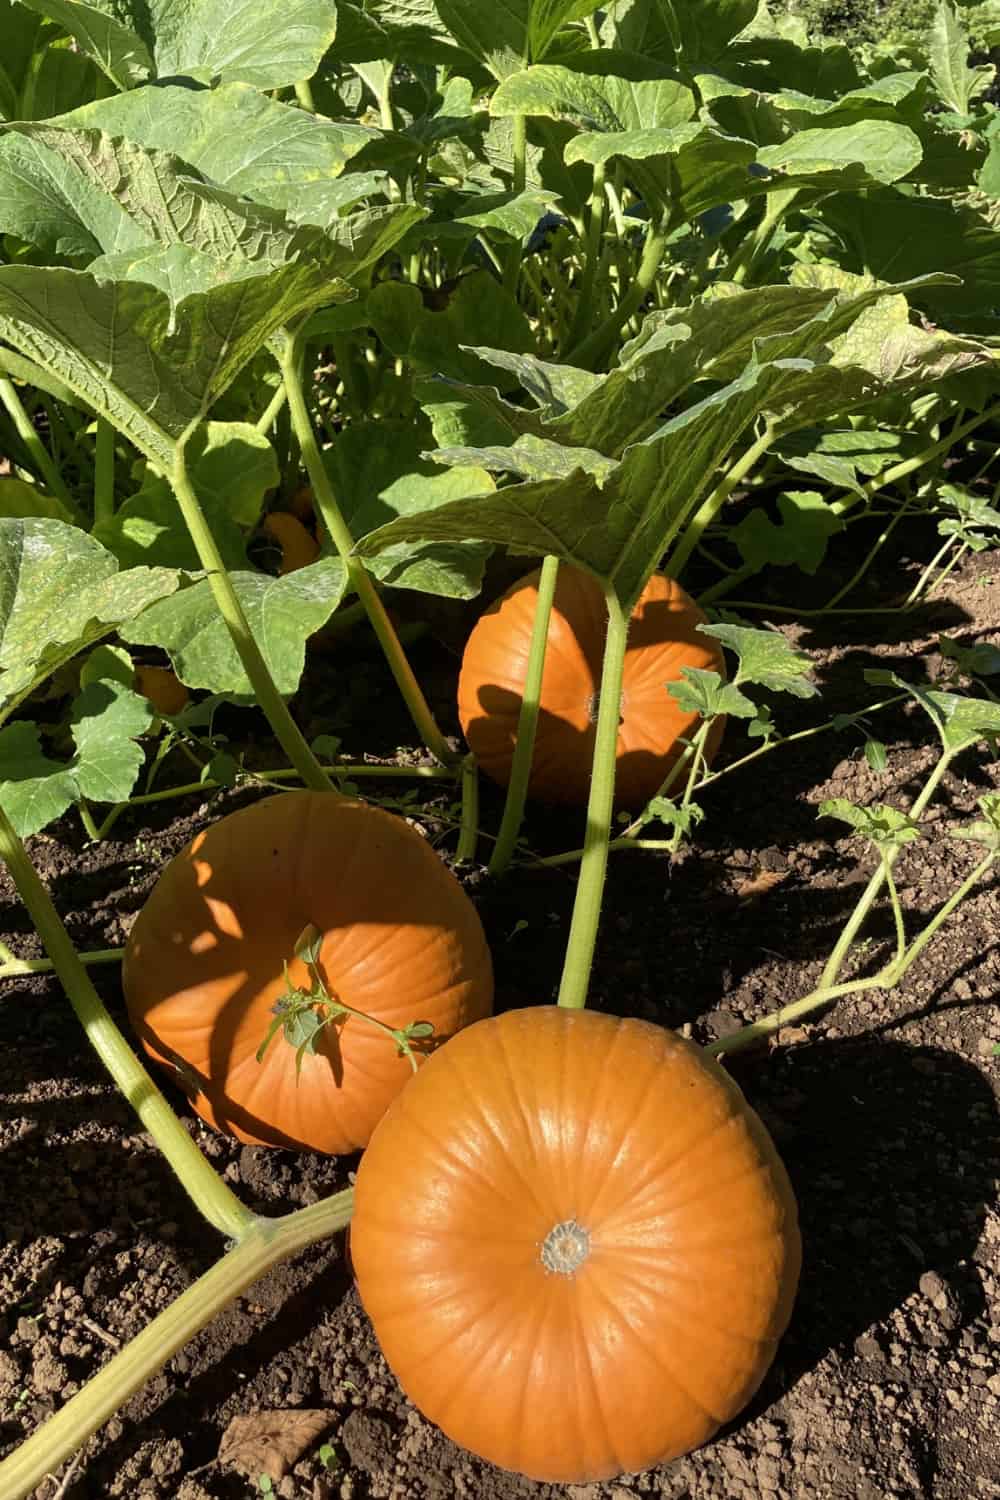
I adore growing pumpkins so much I even gathered over 100 ideas for pumpkin parties. Harvesting pumpkin seeds is a great way to save seeds for replanting, roasting, or using in recipes. Here’s how to harvest pumpkin seeds:
Timing:
Wait until the pumpkin is fully mature and the skin has hardened. You can tell a pumpkin is ready for harvest when it reaches its full color and sounds hollow when you tap it. Typically, this is in the late summer or fall.
Cut Open the Pumpkin:
Start by carefully cutting the pumpkin open. You can do this by cutting around the stem area and removing the top or by cutting the pumpkin in half.
Remove the Seeds:
Use a spoon or your hands to scoop out the seeds and the surrounding pulp from the pumpkin. Try to separate as much pulp as possible from the seeds.
Rinse the Seeds:
Place the seeds in a bowl of water and gently agitate them with your hands. This will help separate the seeds from any remaining pulp.
Remove Remaining Pulp:
After rinsing, use your hands or a strainer to remove any remaining pulp from the seeds. Rinse the seeds again if necessary to ensure they are clean.
Dry the Seeds:
Lay the cleaned pumpkin seeds on a paper towel or a clean, dry surface in a single layer. Allow them to air dry for at least 24 hours or until they are completely dry.
Store the Seeds:
Place the dried pumpkin seeds in an airtight container or a paper envelope. Label the container with the date and any specific pumpkin variety information (if applicable).
Store the seeds in a cool, dry place away from moisture, extreme temperature fluctuations, and direct sunlight. Properly stored pumpkin seeds can remain viable for several years.
Roasting (Optional):
If you want to roast the pumpkin seeds for a tasty snack, preheat your oven to 300°F (150°C). Toss the cleaned and dried seeds with a bit of oil and your choice of seasonings (e.g., salt, garlic powder, paprika). Spread them in a single layer on a baking sheet and roast for about 20-30 minutes or until they are golden brown, stirring occasionally.
Harvested pumpkin seeds can be planted in your garden for the next growing season or used in various recipes, including salads, trail mix, or as a crunchy snack. If you plan to plant them, make sure to store them in a cool, dry place until it’s time for planting next year.
Harvesting Radish Seeds
I always plant a row of radishes for my husband. He is the only person in our family who likes them. They always do well in our zone 8 vegetable garden, but I only remember to harvest a few. The rest usually go to seed. Can you relate? Here’s how to harvest radish seeds for next year.
Timing:
Wait until your radish plants have fully matured and produced seed pods. Radishes are typically grown for their roots, but if left in the ground long enough, they will bolt (produce flowering stalks) and set seed.
Select Suitable Radishes:
Choose radishes that have bolted and produced flowering stalks. Look for plants that have well-developed seed pods.
Harvest the Seed Pods:
Using scissors or pruners, carefully cut the seed pods from the plant. Leave a short stem attached to each seed pod to make handling easier.

Dry the Seed Pods:
Place the harvested radish seed pods in a dry, well-ventilated area, preferably indoors, to continue drying. You can hang them upside down by their stems or spread them out on a tray or newspaper.
Allow the seed pods to air dry for several weeks or until they are completely dry and brittle.
Remove the Seeds:
Once the radish seed pods are fully dry, gently crush or rub them to release the seeds. You can do this by hand or by using a small brush or your fingers to strip the seeds from the pods.
Clean the Seeds:
Radish seeds are relatively large and easy to separate from any remaining bits of chaff or plant material. However, you can use a fine-mesh sieve or strainer to remove any remaining debris.
Store the Seeds:
Place the cleaned radish seeds in a paper envelope or small airtight container. Label the container with the date and any specific radish variety information (if applicable).
Harvested radish seeds can be used to grow new radish plants in your garden, share with other gardeners, or preserve the genetic diversity of specific radish varieties for future plantings.
Harvesting Tomato Seeds
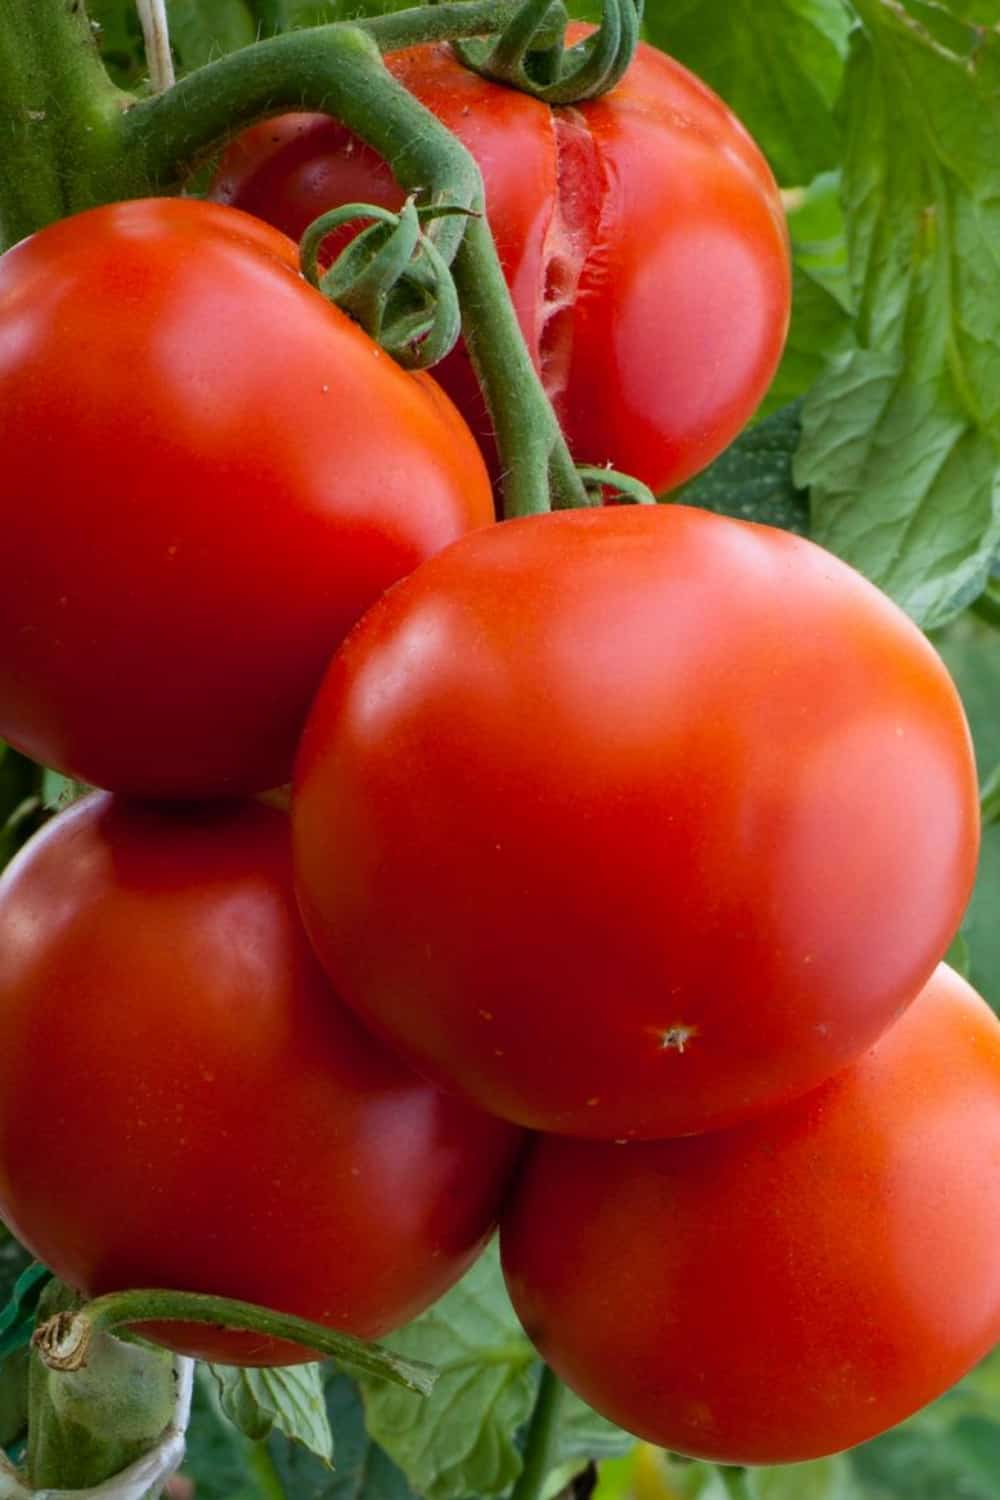
Harvesting seeds from tomatoes is entirely different. I would not have even attempted it were it not for a conversation I had with a friend who happens to be a master gardener. (She isn’t fond of that term, by the way. In her opinion, it implies the master gardener knows everything about gardening, which isn’t the case.) Anyway, my friend made harvesting tomato seeds seem so easy, I decided to give it a try.
I had a few ripe tomatoes (not many), and some had been in the refrigerator. I selected one tomato from the fridge and one freshly picked from the garden. In a side-by-side test, I cut each tomato in half. I took out the seeds in their pulp, put the seeds from the refrigerated tomato in one jelly jar and the seeds from the garden-fresh tomato in another. Filling each jar about half full of water, I set them on the counter to see what would happen.

Sure enough, a few days later, the pulp had risen to the top, just as my friend had said it would.

The good seeds were lying at the bottom of both jars. I skimmed off the pulp, then drained the water through a fine mesh strainer. I kept the seeds from the refrigerated tomato separate from the other tomato seeds, and set them carefully on a paper towel to dry. Here are the formal steps to harvesting tomato seeds for next year:
Choose Ripe Tomatoes:
Select fully ripe tomatoes from healthy plants. It’s essential to start with healthy and disease-free tomatoes.
Cut the Tomatoes:
Cut the ripe tomatoes in half horizontally, exposing the seed-filled cavities.
Squeeze Out Seeds:
Gently squeeze or scoop out the seeds and surrounding gel into a container. This gel contains enzymes that inhibit germination, so it’s essential to remove it for successful seed saving.
Ferment the Seeds:
Place the seeds and gel mixture in a clean container (e.g., a glass jar). Add a little water to the container, just enough to cover the seeds and gel.
Loosely cover the container with a lid or plastic wrap to allow airflow. This step initiates the fermentation process, which helps to break down the gel coating and any potential pathogens on the seeds.
Keep the container at room temperature, out of direct sunlight, for about 2-4 days. During this time, you’ll notice bubbles forming, and the mixture will become slightly foamy and develop a fermented odor.
Rinse and Clean the Seeds:
After the fermentation period, fill the container with water and stir the mixture gently. The good seeds will sink to the bottom, while debris and bad seeds will float to the top.
Carefully pour off the top layer of floating material and any mold that may have formed.
Rinse the remaining seeds thoroughly with clean water using a fine-mesh sieve or strainer to remove any remaining gel or debris.
Dry the Seeds:
Spread the cleaned seeds in a single layer on a paper towel, coffee filter, or a glass or ceramic plate. Allow them to air dry for several days, usually about a week or until they are completely dry.
Make sure the seeds are not touching each other during drying to prevent sticking.
Store the Seeds:
Once the tomato seeds are completely dry, transfer them to a paper envelope, small glass jar, or airtight container. Label the container with the date and tomato variety. Store the seeds in a cool, dry place away from moisture, extreme temperature fluctuations, and direct sunlight.
Harvested tomato seeds can be used to grow new tomato plants in your garden or shared with other gardeners. Saving seeds from your favorite tomato varieties allows you to preserve the characteristics you love and grow them year after year.
Common Seed-Saving Questions
Should I freeze my seeds for next year?
Freezing seeds can be an effective method for long-term seed storage, helping to maintain seed viability and protect them from pests. However, whether or not you should freeze your seeds for next year depends on several factors, including the type of seeds, their storage conditions, and your specific needs. Here are some considerations:
Seed Type:
Some seeds, like tomatoes and peppers, have a natural tendency to retain their viability for several years when stored properly at room temperature. These seeds may not require freezing for short- to medium-term storage (1-3 years). In fact, it may be detrimental to freeze tomato seeds. (See note under next question.) However, for longer storage periods (3 years or more), freezing can help extend seed viability for other types of seeds.
Seed Moisture Content:
Seeds with higher moisture content may benefit from freezing, as it helps prevent moisture-related issues such as mold and seed deterioration. Seeds from fruits like cucumbers, squash, and melons often have higher moisture content. Dry seeds, like beans, peas, and many flower seeds, can often be stored successfully at room temperature, as they naturally have lower moisture content.
Pests and Pathogens:
Freezing seeds can help kill any potential pests or pathogens that might be present on or in the seeds, ensuring that you start with clean seeds for planting.
Storage Duration:
If you plan to store seeds for just one or two years, keeping them in a cool, dry place at room temperature may suffice. However, if you want to keep seeds for several years, freezing can be a good option.
Proper Packaging:
Regardless of whether you choose to freeze your seeds, it’s crucial to store them in airtight containers, such as glass jars or sealed envelopes, to prevent moisture and air from affecting seed viability.
What seeds cannot be frozen?
While freezing is a suitable method for preserving the viability of many types of seeds, some seeds may not tolerate freezing well due to their unique characteristics. Here are some seeds that are generally not recommended for freezing:
Seeds with High Moisture Content:
Seeds from fruits like watermelons, cucumbers, squash, and tomatoes tend to have higher moisture content. Freezing can cause ice crystals to form within the seeds, potentially damaging their cell structures and reducing viability. If you want to save these seeds long-term, it’s better to dry them thoroughly and store them at room temperature.
Seeds from Tropical Plants:
Seeds from tropical plants may be sensitive to cold temperatures. These seeds are adapted to warm and humid environments and may not tolerate freezing well. Examples include seeds from tropical fruit trees like mangoes and papayas.
Seeds with Thin Outer Coats:
Seeds with thin outer coats or those that are prone to shattering (breaking into small pieces) may not be suitable for freezing. Freezing can make these seeds more brittle, leading to potential damage during thawing or handling.
Seeds of Short-Lived Annuals:
Seeds from short-lived annual plants (plants that complete their life cycle within one year) are often best used in the same growing season. Freezing may not be necessary for these seeds, as they naturally have a shorter storage life. Examples would be cosmos or poppy seeds.
Seeds with Fleshy Outer Coverings:
Seeds that have fleshy outer coverings, like berries, can develop ice crystals within the flesh when frozen. This can affect seed viability. It’s better to extract and clean these seeds and store them separately.
Seeds with Special Storage Needs:
Some seeds, such as those from orchids and certain wildflowers, have specific storage requirements that may not align with freezing. These seeds may need special treatments or conditions, like cold stratification or scarification, for successful germination.
What is the best container for storing seeds?
The best container for storing seeds is one that provides airtight, moisture-proof, and light-blocking conditions to help maintain seed viability over time. Here are some suitable container options for storing seeds:
Glass Jars with Sealing Lids: Glass jars, such as mason jars with screw-on lids, are excellent for seed storage. They are airtight, moisture-resistant, and block out light. Choose jars that are clean and completely dry before adding seeds.

![]()
Plastic Containers with Tight-Fitting Lids: Food-grade plastic containers with tight-sealing lids can also work well for seed storage. Look for containers made of high-quality plastics that won’t easily allow moisture or air to penetrate.

![]()
Sealed Envelopes or Paper Packets: For small quantities of seeds, paper envelopes or packets are a traditional choice. Ensure they are sealed securely and that the seeds are thoroughly dry before placing them inside. Store the envelopes or packets in a larger airtight container to protect against moisture and pests. These also make great gifts or party favors, especially if you are hosting a pumpkin-themed or sunflower-themed party.

![]()
Airtight Bags: Some resealable plastic bags are designed to be airtight and can be suitable for seed storage. Choose high-quality bags and ensure they are sealed tightly.
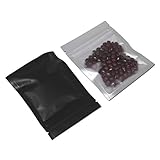
![]()
Vacuum-Sealed Bags: Vacuum-sealed bags or pouches can provide an extra layer of protection against moisture and air. Use a vacuum sealer to remove air from the bag before sealing it.

![]()
Tin Tie Bags: These are paper bags with a metal tie at the top. They can be useful for storing seeds because you can tightly seal the bag while allowing some air circulation to prevent excess humidity buildup.
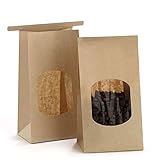
![]()
Metal or Tin Containers: Metal or tin containers with airtight lids can also work well for seed storage. Ensure the container is clean and dry before adding seeds.

![]()
Regardless of the container you choose, keep these important tips in mind:
Ensure that the containers are clean and dry before adding seeds. Moisture can reduce seed viability.
Label each container with the seed variety, date of collection or purchase, and any other relevant information.
Store seeds in a cool, dark place to protect them from temperature fluctuations and light. I have had success storing scarlet runner bean seeds in an open jar in our garage refrigerator. (You can also get a glimpse of my favorite refrigerator dill pickles in there as well.)

Consider using desiccant packets or moisture-absorbing materials like silica gel in the containers to help reduce moisture.
Periodically check stored seeds for any signs of mold, moisture, or pests and remove affected seeds promptly.
Store all seed containers in a larger container or box to help further protect them from light and temperature fluctuations. We keep our seeds in an old refrigerator in our garage.
How long can seeds be saved?
The longevity of stored seeds can vary widely depending on several factors, including the type of seed, how well they are stored, and their inherent characteristics. Here’s a general guideline for the potential lifespan of seeds under proper storage conditions:
Short-Lived Seeds (1-2 Years):
Seeds from short-lived annual plants, such as lettuce, radishes, and zinnias, typically remain viable for about 1 to 2 years under proper storage conditions. After this period, their germination rates may decline significantly.
Medium-Lived Seeds (3-5 Years):
Many common vegetable seeds, like tomatoes, peppers, beans, peas, and cucumbers, can remain viable for 3 to 5 years when stored correctly. These seeds often have a longer shelf life due to their lower moisture content and natural durability.
Long-Lived Seeds (5+ Years):
Some seeds are exceptionally long-lived when stored properly. Examples include seeds from herbs like basil, flowers like marigolds, and many tree seeds. Under ideal storage conditions, these seeds can remain viable for 5 years or more, with some even lasting for decades.
Factors that influence seed longevity include:
Seed Type: As mentioned above, the type of seed plays a significant role. Seeds with lower moisture content and natural durability tend to have longer lifespans.
Storage Conditions: Proper storage conditions are crucial for seed longevity. Seeds should be kept in a cool, dry place with consistent temperature and humidity levels. Protect them from temperature extremes, moisture, pests, and direct sunlight.
Initial Seed Quality: The quality of the seeds at the time of storage also matters. High-quality seeds from healthy parent plants are more likely to retain their viability.
Storage Containers: Using airtight, moisture-proof, and light-blocking containers helps preserve seed viability. As noted above, glass jars, plastic containers, and sealed envelopes are good options.
Seed Treatment: Some seeds may benefit from specific treatments before storage, such as drying or cold stratification, to enhance their longevity.
While seeds may remain viable beyond their recommended storage periods, germination rates can decline over time. To assess the viability of older seeds, consider conducting germination tests before planting. This involves sowing a sample of seeds and monitoring how many sprout. If the germination rate is lower than desired, you can plant more seeds to compensate for potential low germination.
Additional Tips About Storing Seeds
In western Oregon’s damp climate, making sure seeds are dry can be a challenge. It’s especially tough to dry seeds when everything outside is so wet and soggy. If you live in a damp climate like I do, you may need some extra help with drying your seeds. As previously noted, silica gel (available at craft stores) folded into tissue may be added to absorb moisture. You may also use powdered milk, which may also be folded into a tissue and used for the same purpose.
As previously noted, we have an extra refrigerator in our garage that I use for storing our saved seeds. If you don’t have an extra refrigerator, maybe you could reserve some space in a produce drawer. You could also see if any of your friends have an extra refrigerator with space for your seeds.
I like to save the extra envelopes that come with bills for storing seeds. The little clear windows can help me get a quick visual on the seeds inside if my handwriting when labeling the seeds was sloppy and difficult to read.
Seed Exchanges
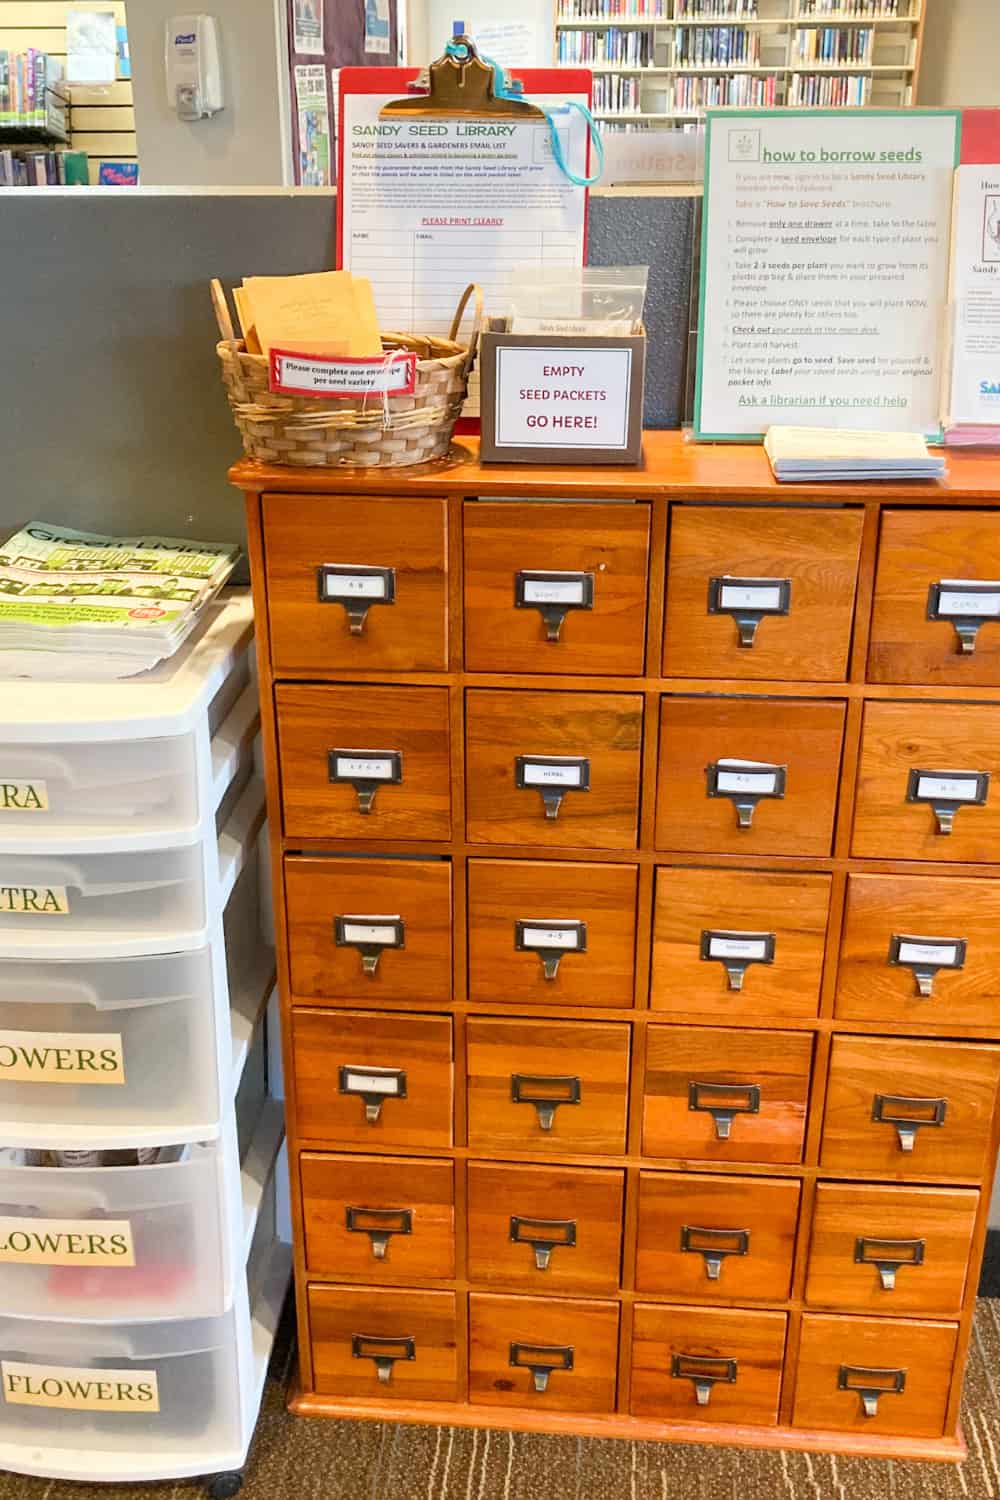
Our local public library has turned an old card catalog file into a storage space for seeds, pictured above. People come and share seeds that they have saved, then take seeds they might need. Each seed saver exchange has guidelines. Just follow the guidelines posted and increase the variety of seeds for your next year’s garden.
What Are Your Favorite Seeds to Save?
What about you, my gardening friends from far and near? Do you have a favorite seeds to save? I save the seeds from plants I am able to grow fairly easily. Maybe there are special plants you grow well in your area that are different from the plants grown in my area. I’d love to know about them, as well as any additional seed-saving tips you may have.
Free Online Garden Planner Layout Template
Now that you know how to save seeds for next year, you might need a way to plan your garden layout. Whether you are planting vegetables, flowers, or herbs near your hydrangea plant, this online garden planner can help you visualize your design and bring it to life. With garden tasks that need your attention, this is one way to save time.

It’s fully customizable when you make your own copy and includes two editable chart pages for noting planting specifications.
Get my free online garden layout planner template!
Organize Your Garden Tasks with a Free Garden Planner Notebook
As a result of needing to keep track of garden tasks throughout the year, I decided to begin a garden planner notebook. It has a page for each month, along with notes pages. If a garden planner notebook seems like a good idea to you, good news! You can get it here!

Get the garden notebook!
Have a wonderful week, and may all of your seed-saving endeavors meet with success!

Lisa Mitchell is a wife, mom, and school librarian who likes to grow fruit, vegetables, and flowers on her family’s small Pacific Northwest farm. To learn more about what this website has to offer gardeners, click on over to the Garden page.
Like what you read here? Please give it a share!
Want more great garden, food, or travel ideas? Follow FluxingWell on Pinterest, Facebook, Instagram, and X for the latest posts, tips, and inspiration.
Thank you for this great guide on how to save seeds from your garden for next year. This is a great resource for all gardeners. Also, it’s so cool your local library has an old card catalog file for people to come and share seeds.
Yes, that seed saving exchange is a great idea. Glad you found the post helpful.
I used to be a Gardner before life got too busy and saving your seeds can save you lots of money plus it is a way to learn another part of gardening. Great Ideas thanks.
Maybe you will have an opportunity to save seeds once again when you are in a different stage of life. Thank you for the kind words.
I really like the idea of saving the seeds for plants you have grown, the price of seeds every year keeps going up and this would help the plant budget in the spring.
Yes, saving seeds is definitely a fabulous, easy way to help the budget.
Really good tips. I have been meaning to start saving seeds to I can cut down on the cost of gardening and yet every year I have failed to do so. It’s a bit too late for me this year, as the garden has been cleared out, but I will make an effort next year to save as many seeds as I can.
Sarah,
Don’t feel badly. Sometimes I save them but forget to plant them! Thanks for your comment, and good luck with all of your gardening endeavors.
Lisa
I’m not a gardener, but you make this seem simple. Great info!
Paige,
I’m glad you thought my post made seed saving seem easy. It really is! Thanks for taking the time to comment, even if you’re not a gardener. I appreciate your kind words.
Lisa
What an interesting post, I confess I am not a gardener but we have had some amazing sunflowers in front of my bungalow this year, I am going to see what I can salvage.
Like you I would never have imagined you could save tomato seeds, I would love to hear how these turn out.
Rachael,
Oh, I wish my sunflowers would have bloomed! The nice thing about sunflowers is that their seeds are easy to save. I’ll plant the tomato seeds next spring and see what happens! Thanks so much for your comment, and happy seed saving!
Lisa
Wonderful tips! Pinning this for later and also sharing with my parents. They love this kind of stuff!
Jillian,
Thanks for pinning and commenting! I’m glad you think your parents will enjoy the post. I appreciate your kind words.
Lisa
Thanks for sharing the tomato seed trick! I’m so excited to try it! Also, good to know that there’s another reason to keep silica gel packets. Apparently they’re also good for your dashboard in the winter months. 🥶
Melissa,
Yes! I think I just threw away a silica packet the other day. I’m going to have to remember to start saving them. I didn’t know about the dashboard tip. Thanks for sharing, and thank you for commenting. Have fun trying the tomato seed trick!
Lisa
You make it look so simple! Love the trick to get the tomato seeds separated from the pulp. I’d love to start a garden but I’m intimidated. I’m not very good with house plants. But, I’m taking notes… Thanks for sharing your tips.
Ana,
I’m horrible with houseplants. They have to thrive on neglect to survive. I do better with a vegetable garden because I have more time in the summer to tend to it. I encourage you to start a garden, even if you just plant a few things. I never know what is going to do well from year to year, so I plant a variety. Maybe plant something you like to eat? If you give it a go, I’d love to know what you decide to try. Thanks so much for your positive words.
Lisa
Same here… I’m just horrible at houseplants (I even managed to send a snake plant to it’s demise). But my garden grows like crazy as long as I keep the bugs & weeds away.
I love to {try to} save okra, tomato, all kinds of cucurbits. I didn’t even know I could save marigolds! I’m gonna try it!
Nikki,
I’m so glad you got some new ideas. Just this past weekend I saved the seeds from hollyhocks, which I had never tried before. We’ll see how it goes after I plant them in the spring. Thanks for commenting, and good luck with all of your seed-saving endeavors!
Lisa