
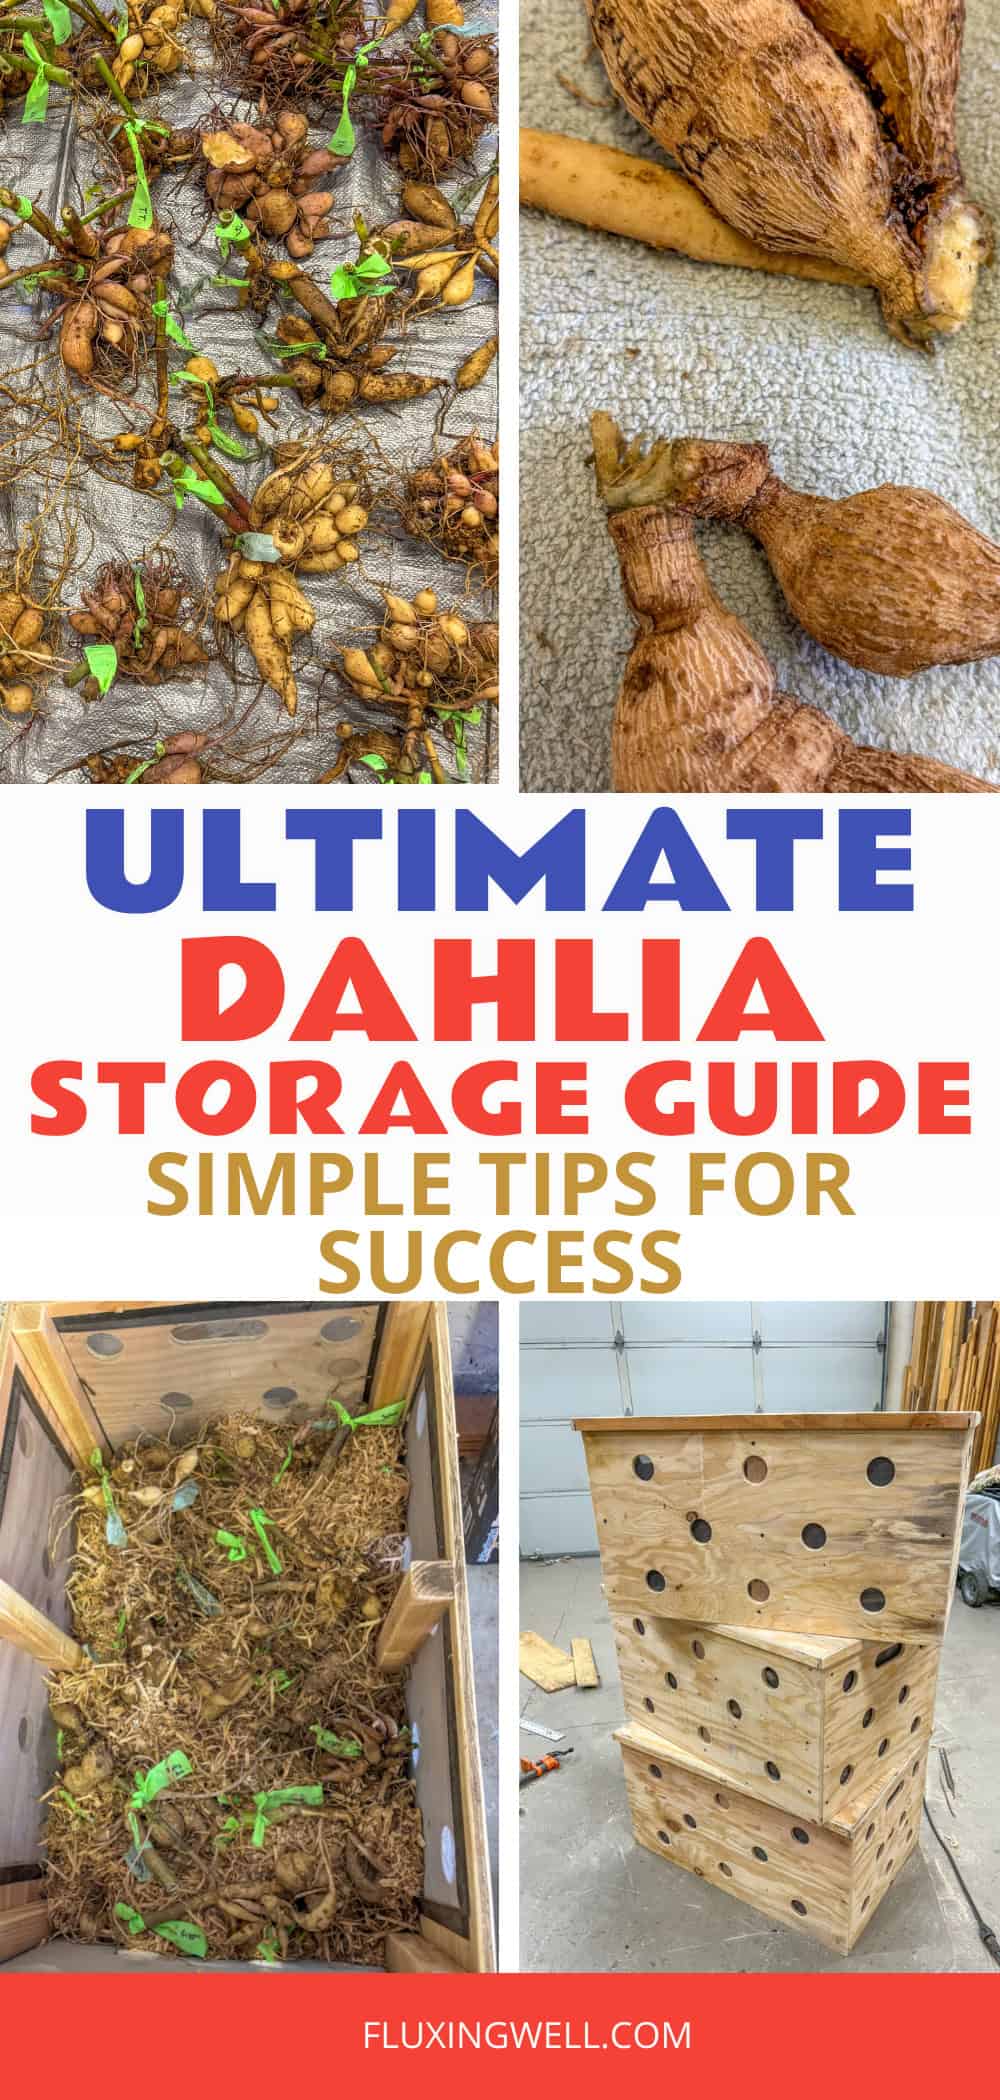
When the first frost hits, it’s time to think about dahlia storage! Proper dahlia tuber storage is the secret to enjoying bigger, healthier blooms year after year. Whether you’re new to overwintering dahlias or simply want to refine your dahlia care routine, learning how to store dahlias for winter makes all the difference. In this guide, you’ll discover easy steps for storing dahlias for winter, tips on how to store dahlia tubers for winter, and advice on keeping dahlia tubers size and quality in top shape. An easy-to-follow DIY tutorial for building your own dahlia tuber storage boxes is included. Let’s dive into saving dahlia tubers the right way so your garden bursts with color again next summer!
Digging and Dividing Dahlia Tubers in the Fall
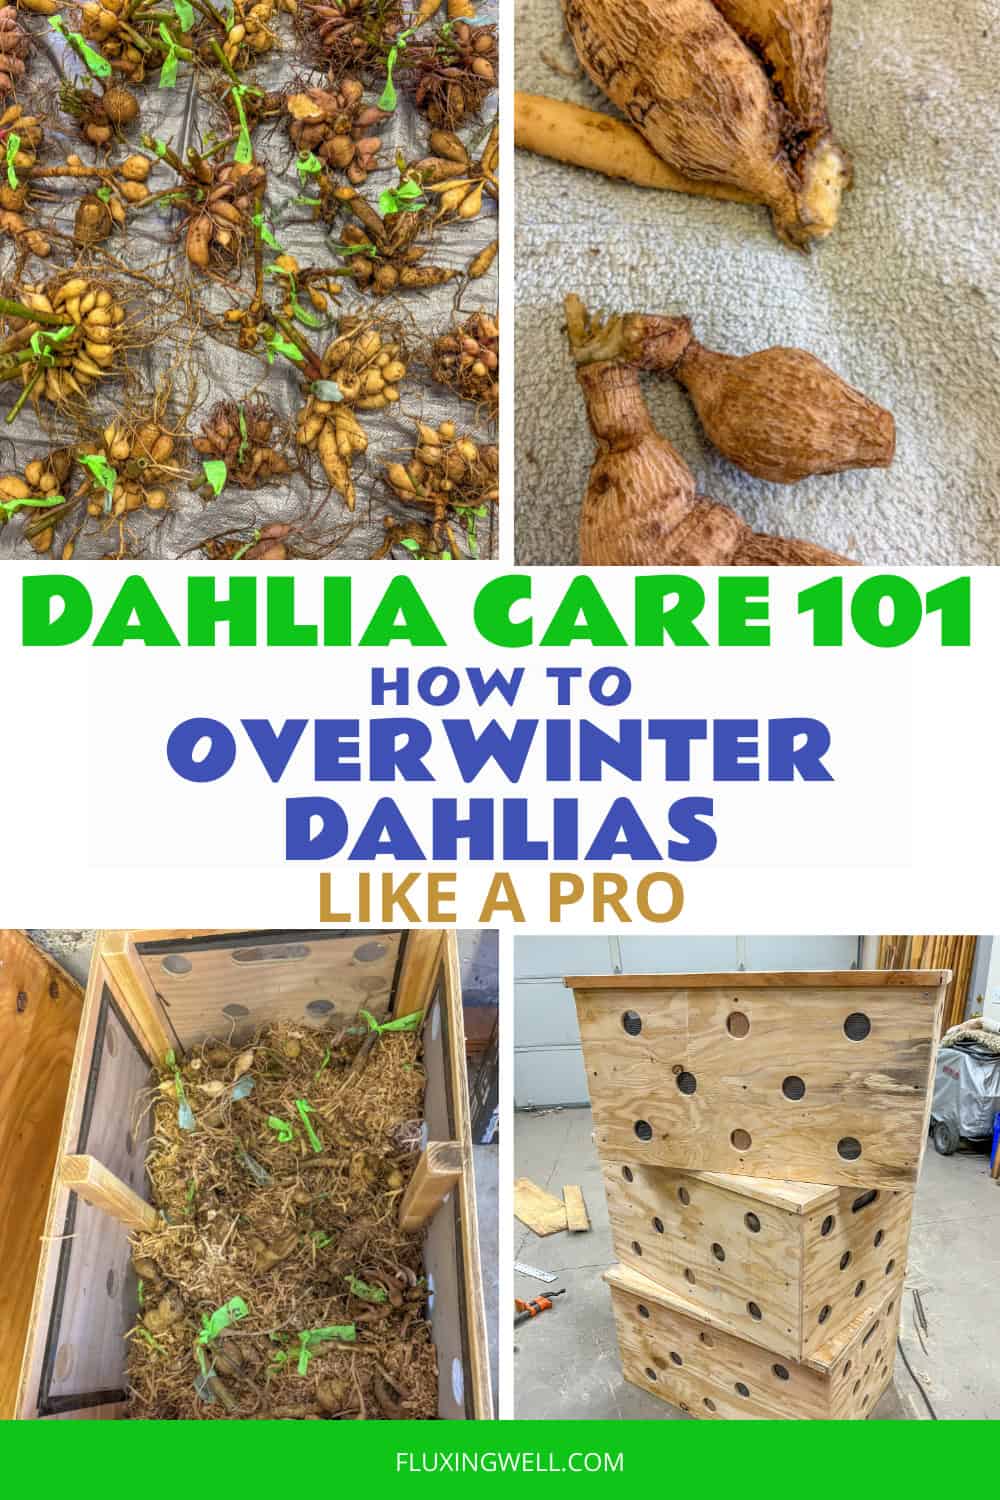
Digging and dividing dahlias begins once the foliage dies back after the first frost, signaling that the tubers have finished their growing cycle. The clump is carefully dug up and lifted from the soil, then rinsed to remove dirt so the crown, necks, and individual tubers are easy to see. After trimming the stalk and labeling the variety, I gently separate tubers using a variety of methods. To get the easy steps and photos for reference, read all about dividing dahlias in the fall.
Some may choose to wait until spring to divide (the eyes are easier to spot), so will store the entire dahlia crown over the winter. I prefer to keep all of my dahlia tubers in one specially-designed box (tutorial below). To ensure all of my tubers fit into one box, I divide in the fall. Do whichever works well for you!
Prepping Dahlia Tubers for Storage: To Wrap or Not to Wrap
A few gardeners I know choose to wrap their tubers in plastic wrap. There are advantages and disadvantages to this. I choose not to wrap mine because I live in a moist climate (western Oregon, USDA Plant Hardiness Zone 8b).
Advantages of Wrapping Dahlia Tubers in Plastic Wrap for Storage
Plastic wrap helps lock in just the right amount of moisture, keeping tubers from drying out during months of dormancy. It also creates an individual barrier around each tuber, reducing the chance of rot spreading from one to another and keeping varieties neatly separated. For gardeners with limited storage space, wrapped tubers can be stacked compactly, making organization simple and efficient.
Disadvantages of Wrapping Dahlia Tubers in Plastic Wrap for Storage
Wrapping tubers in plastic also comes with notable drawbacks. Because plastic limits airflow, any excess moisture trapped inside can quickly lead to rot, especially if a tuber wasn’t fully dry before wrapping. Condensation can build up unnoticed, creating a humid environment that encourages mold. The wrapping process itself can be time-consuming when dealing with many varieties, and the lack of ventilation means wrapped tubers need to be monitored closely for signs of trouble. For some gardeners, especially those in damp climates (such as where I live), the risks may outweigh the convenience.
Packing Materials
Gardeners have several effective packing material options for overwintering dahlia tubers, each offering its own benefits depending on climate and storage conditions.
Wood Shavings
Wood shavings are a popular choice because they provide gentle cushioning and good airflow while still holding a bit of moisture to prevent tubers from shriveling. I use wood shavings because my husband does a lot of woodworking, so that’s what we have on hand.
Vermiculite
Vermiculite is another reliable option, especially useful in damp regions, as it absorbs excess moisture and helps maintain a stable environment around the tubers.

Other Options
Some gardeners prefer peat moss or coconut coir for their lightweight texture and moisture-balancing qualities, while others use shredded paper or sawdust for a budget-friendly, easy-to-find alternative. Regardless of the material, the goal is the same: to surround the tubers with a medium that keeps them insulated, slightly moist, and safely separated until spring planting.
Dahlia Storage Containers
The ideal dahlia storage box is sturdy, breathable, and spacious enough to hold tubers without crowding them. A shallow wooden crate or a well-ventilated cardboard box works especially well because it allows gentle airflow, helping prevent moisture buildup that can lead to rot. The box should have enough depth to accommodate a layer of packing material, such as wood shavings, vermiculite, or shredded paper, beneath and around the tubers for cushioning and insulation. A loosely fitted lid or cover protects the contents from light and dust without sealing in humidity. You could create dividers or smaller interior sections with boxes or bags to help keep labeled varieties organized. When placed in a cool, dark, non-freezing location, an ideal storage box helps maintain the stable, slightly moist environment that dormant dahlia tubers need to last until spring.
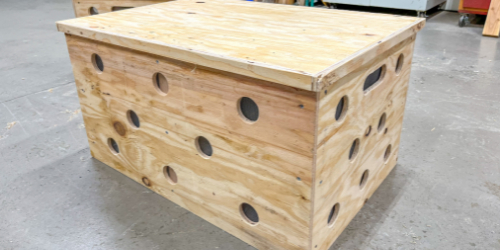
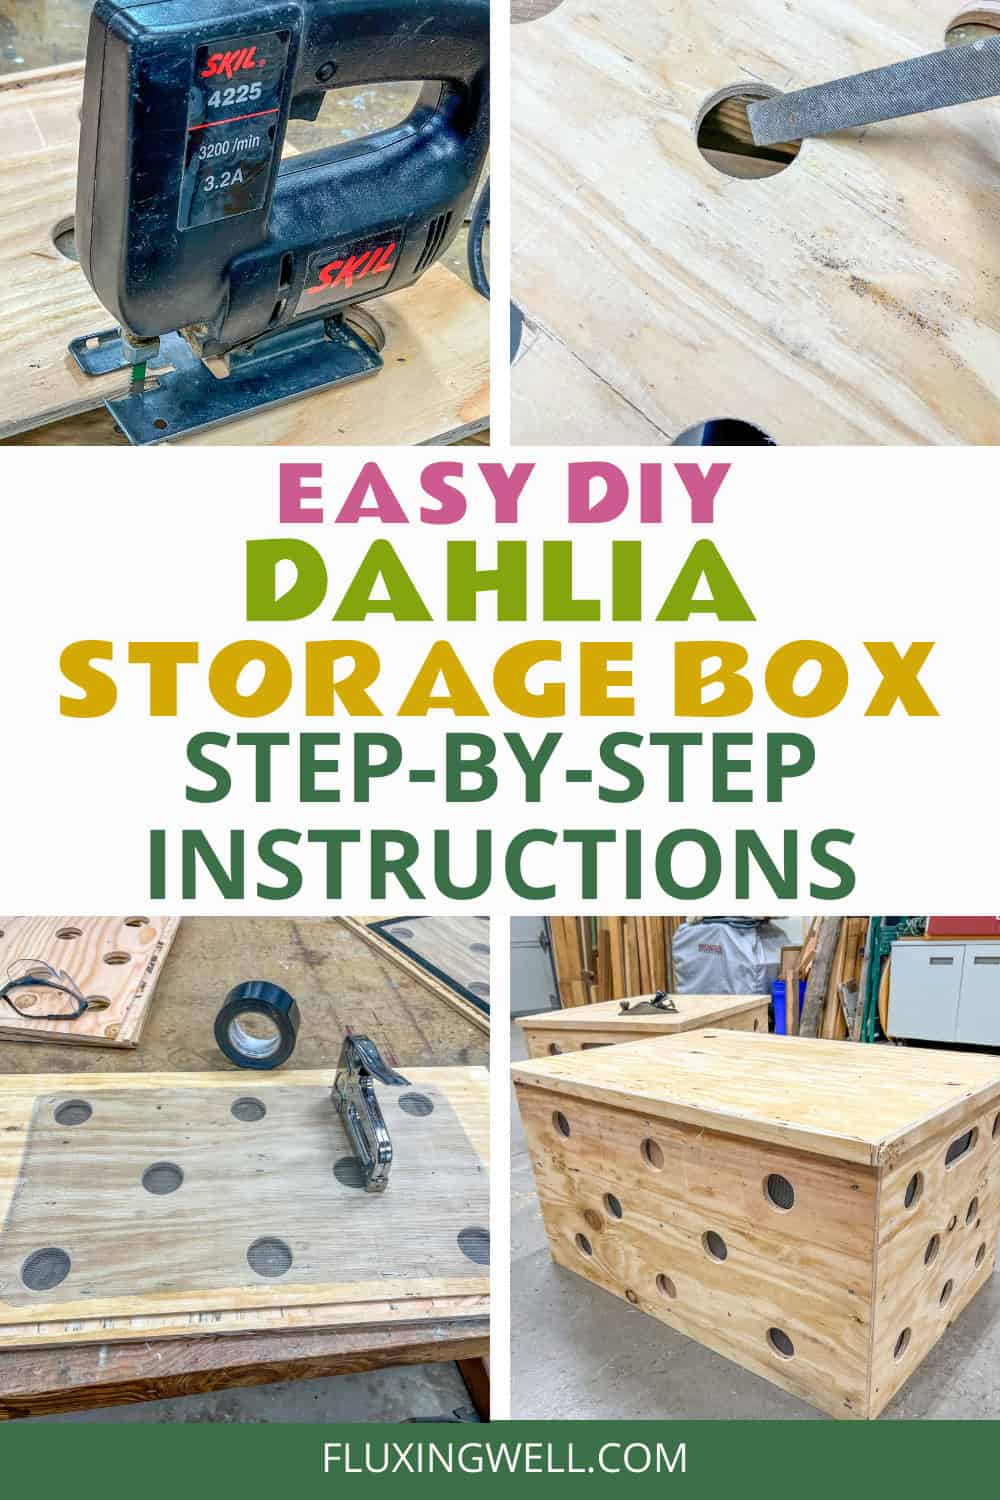
Easy DIY Dahlia Storage Box Tutorial
My husband made a special ventilated dahlia storage box for tubers, and it has worked so well I want to share the idea with you. He actually made three, but since I now have the goal of dividing tubers in the fall (I give a lot of them away), and only use one box, I use the other ventilated boxes for storing potatoes or onions from our garden.
Box Dimensions
The completed box turned out to be 30” long, 20” wide, and 16 ½” tall. The box lid is slightly larger, 31” by 21”. If my husband had to do it over again, he told me he would make the box smaller, but these boxes store a lot of dahlia tubers. Even if you choose to keep the clumps of tubers intact over the winter and divide in the spring, these boxes are generously sized to accommodate that. It’s kind of ironic that just after these boxes were made, I decided to divide my tubers in the fall, so I need much less storage now. That’s another reason why my husband might prefer to have smaller boxes were he to do this over again. I’ll give you the instructions for making the boxes as we have them, and if you wish to scale down, that could be easily done.
Supplies and Equipment
To make 3 dahlia storage boxes you will need:
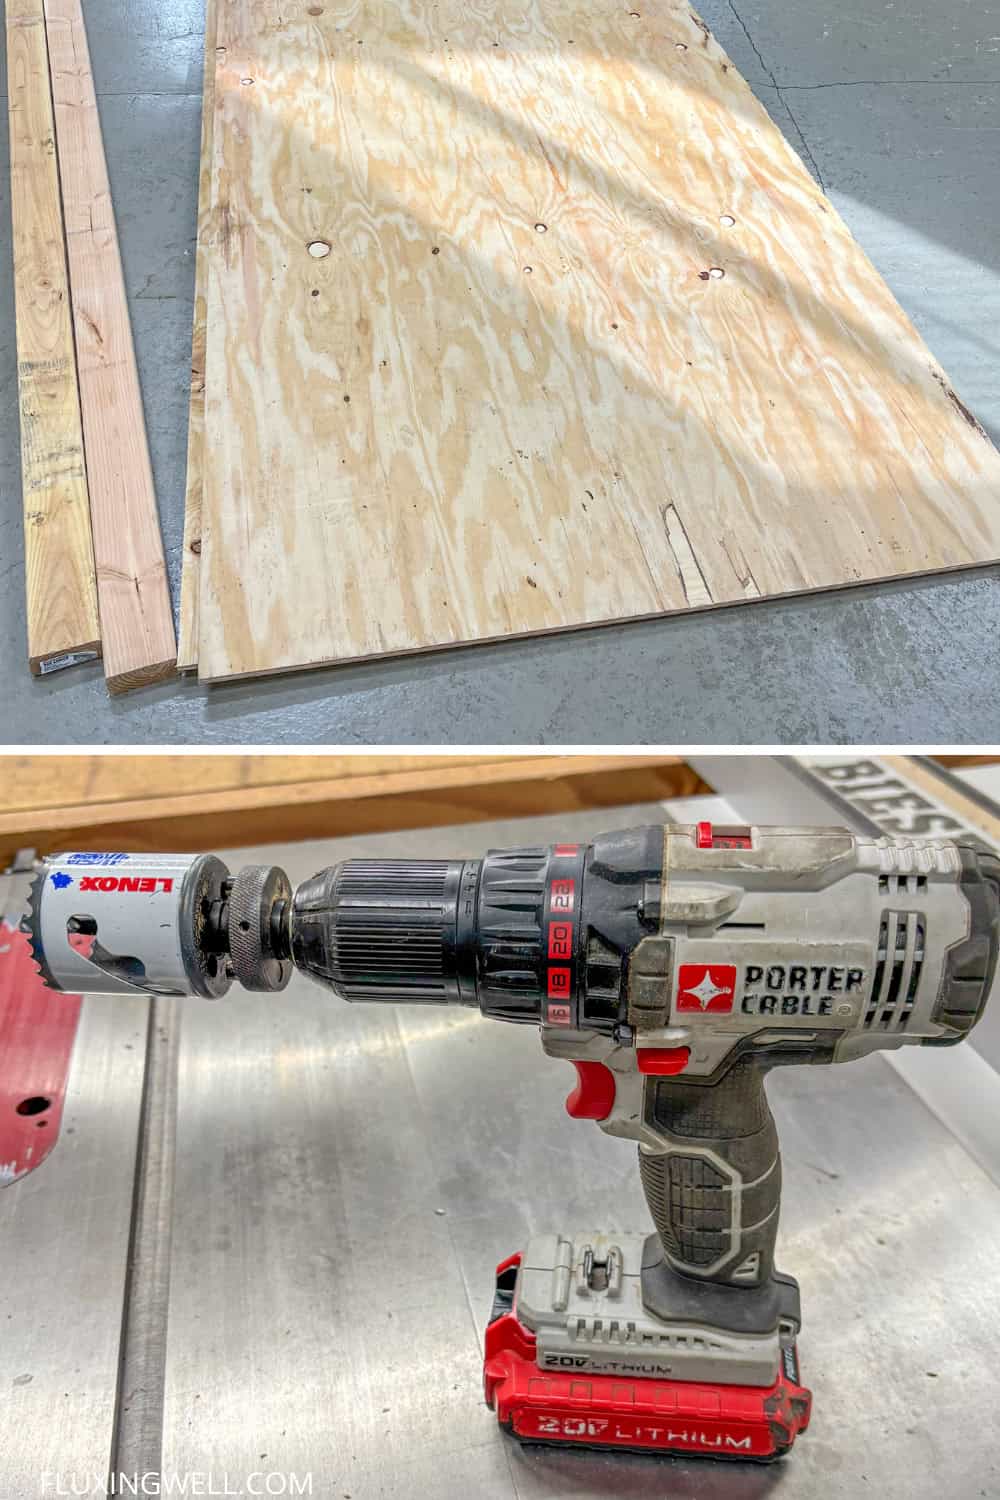
2- 4’ x 8’ sheet of plywood, ½ “ thick
3- 1 ½ ” x 1 ½ ” x 8’ piece of lumber (or 3- 2” x 4” x 4’ stud ripped down the middle)
1 roll 48 by 102 window screen mesh

90 screws (1 ½ – 1 ⅝)
Air stapler or small nails and hammer (to hold the top trim together until the glue dries)
Hole saw bits/blades

Hand-held drill or drill press
Table saw or circular saw
Jig saw
Wood glue
Wood rasp
Box cutter or utility knife
Duct or other sturdy trim tape
Instructions for Making Three Boxes
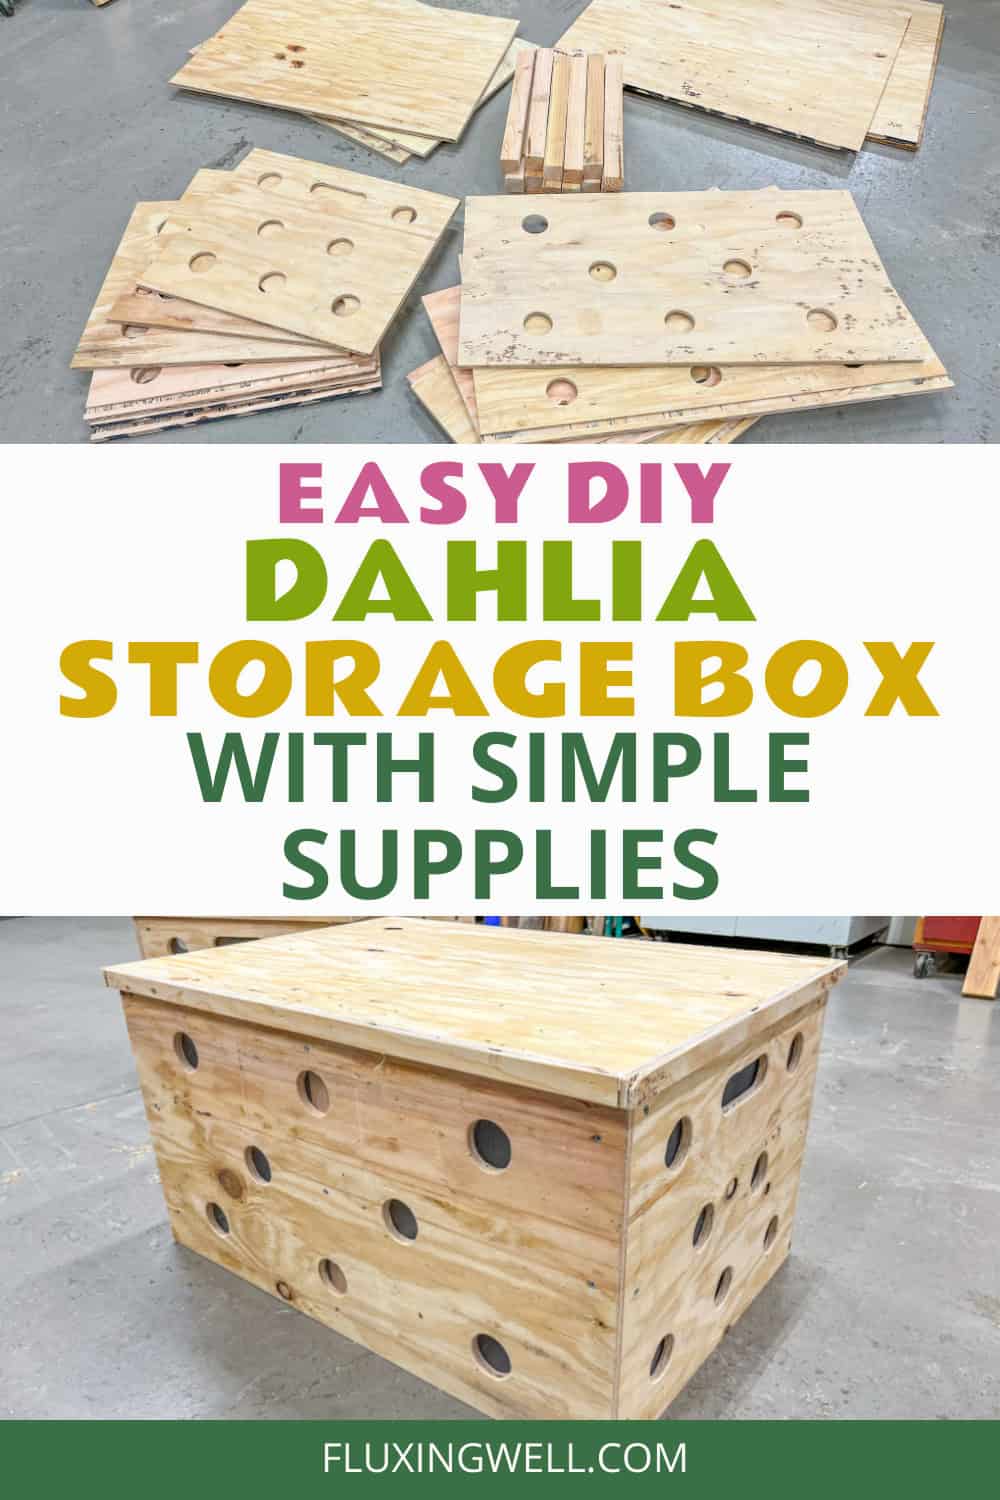
Cutting the Pieces
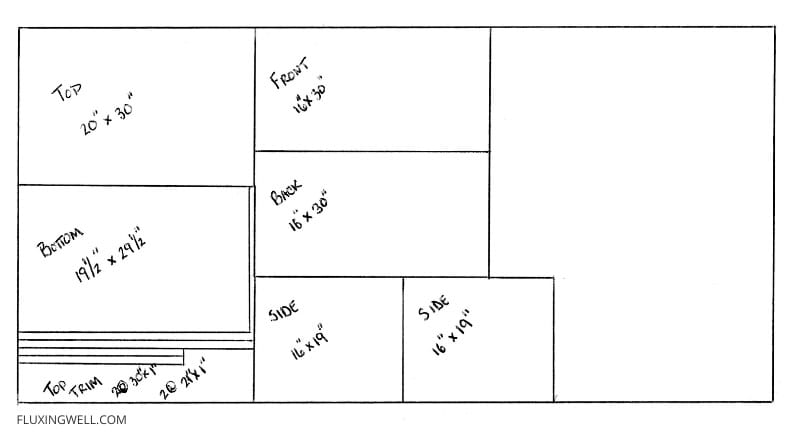
Using a table saw or circular saw, cut out the following pieces from the sheet of plywood:
6- 16” x 30” pieces (fronts and backs) **Cut a ½ ” groove/dado from ½”-1“ from the bottom to insert the bottom piece
6- 16” x 19” pieces (sides) **Cut a ½ “ groove/dado from ½”-1” from the bottom to insert the bottom piece
3- 20” x 30” pieces (lid)
3- 19 ½’” x 29 ½ ” pieces (bottom)
6- 1” x 21” x ½” (plywood) for trimming the lids
6- 1” by 30” x ½” (plywood) for trimming the lids
(The astute woodworker will notice that in order to get the front, back and one side from the plywood as diagrammed, that each piece would necessarily be slightly smaller by 3/32” in order to accommodate for the saw blade kerf/thickness. You might consider making the sides 15 ¾ “ to be safe if you are not sure of your saws kerf/thickness)
Using a table saw or circular saw, cut out these pieces from the 2” x 4” lumber:
18- 1 ½” x 1 ½” x 15”
Cut these pieces of screen using a box cutter, utility knife, or other sharp cutting tool:
6- 13” x 24” window screen mesh pieces
6- 13” x 15” window screen mesh pieces
Cutting the Holes
Using a hole saw, cut 8 2” diameter holes in each long side piece. The holes can be spaced however you like, but ours are spaced in three rows. The top row of three holes is spaced like this: 1 hole is centered 2 ¼” from top, and the side holes are 4 ½” from the edge of the piece. For the middle row of 2 holes, each hole is 9 ¼” from the edge. For the bottom row, the spacing is the same as the top row, with the middle hole being centered and cut 2 ¼” from the bottom edge.
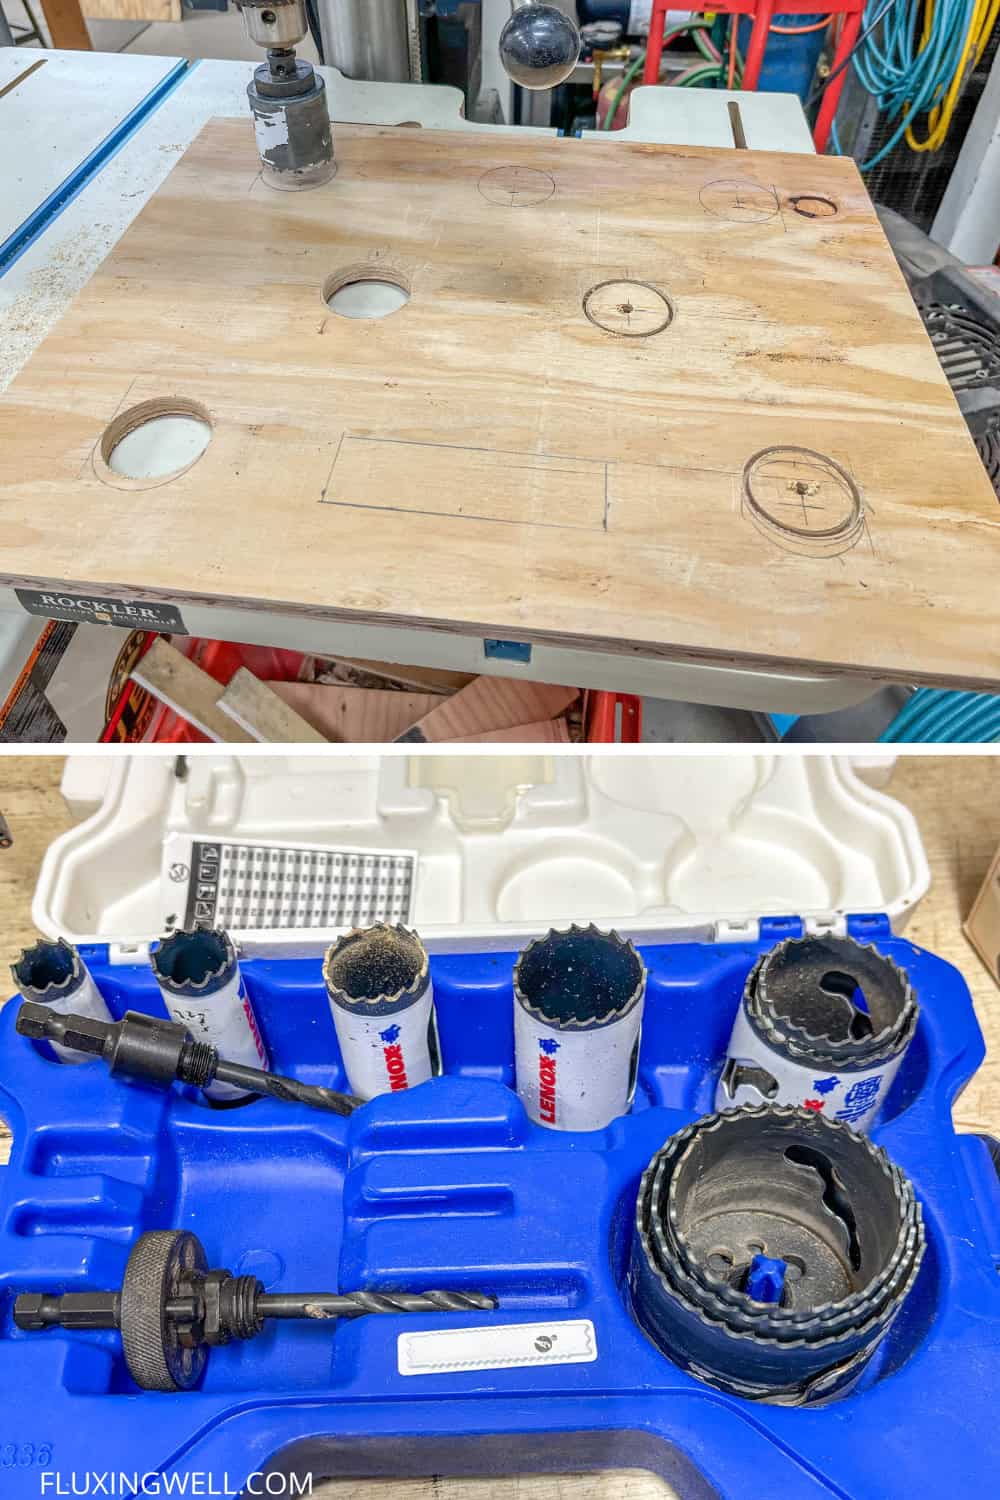
The holes can be spaced however you like, but ours are spaced in three rows. The top row of three holes is spaced like this: 1 hole is centered 2.25 inches from top, and the side holes are 4.5 inches from the edge of the piece. For the middle row of 2 holes, each hole is 9.25 inches from the edge. for the bottom row, the spacing is the same as the top row, with the middle hole being centered and cut 2.25 inches from the bottom edge.
Cut 7 2” diameter holes in each short end piece, plus an oval handle opening using a Jig saw. The top row of holes are 2 ½” from the side edge and 2 ¼” from top edge. The middle row of holes are 5 ½” from the side edge and 4” apart. The bottom row holes are 2 ½” from the side edge, 4” apart, and 2” from the bottom edge. The oval handle is 7 ⅛” from the side edges and 2” from the top edge.
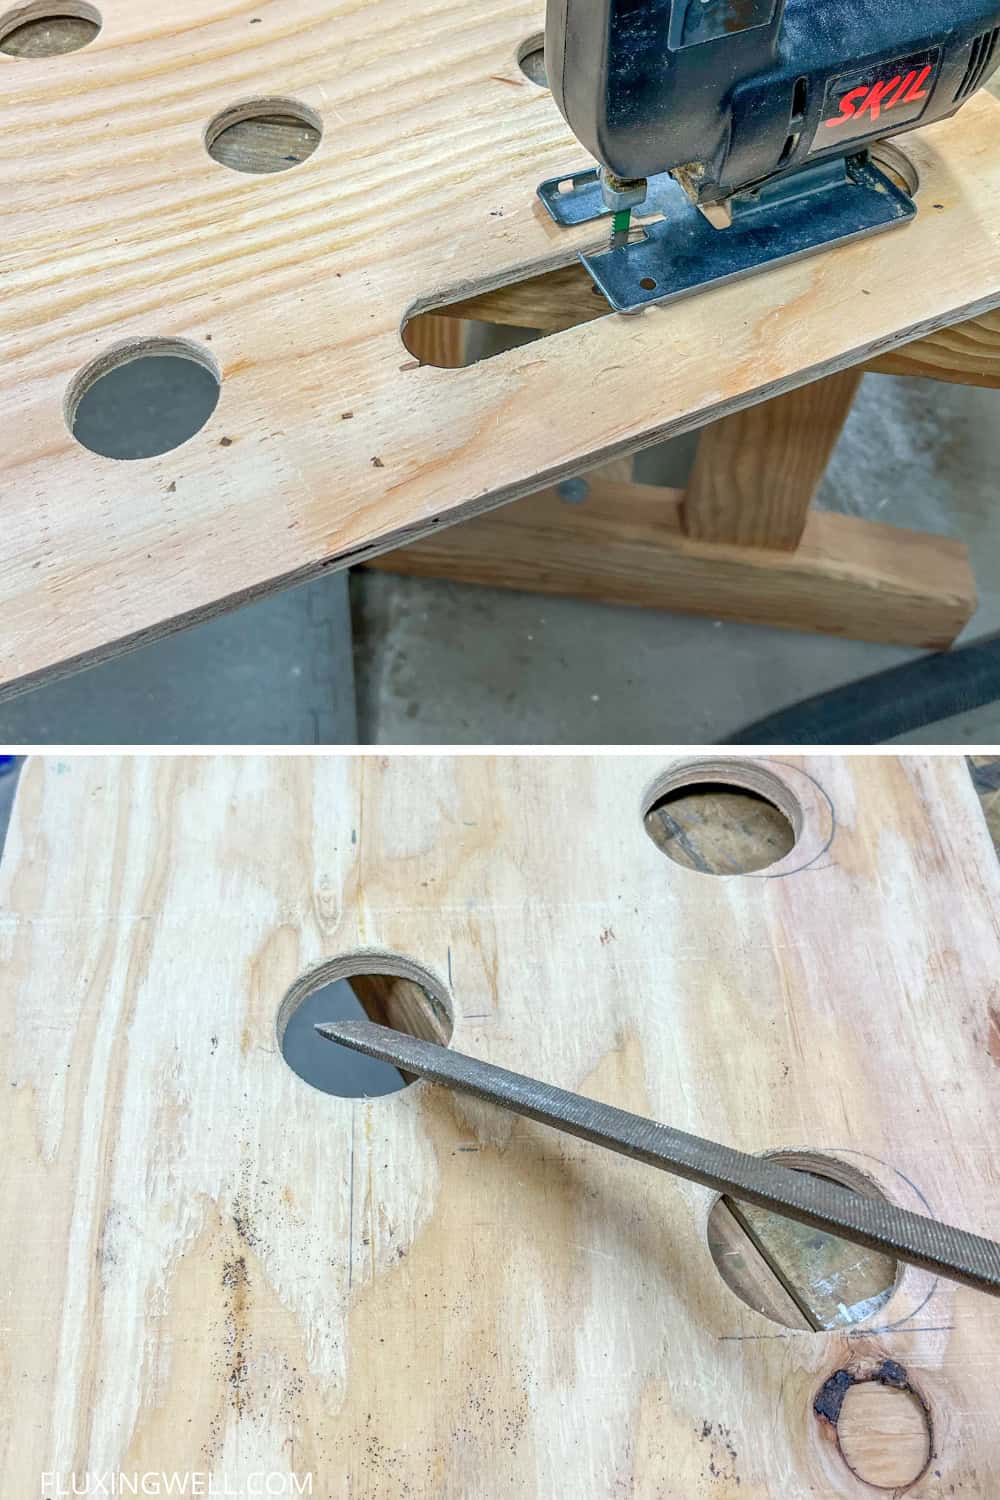
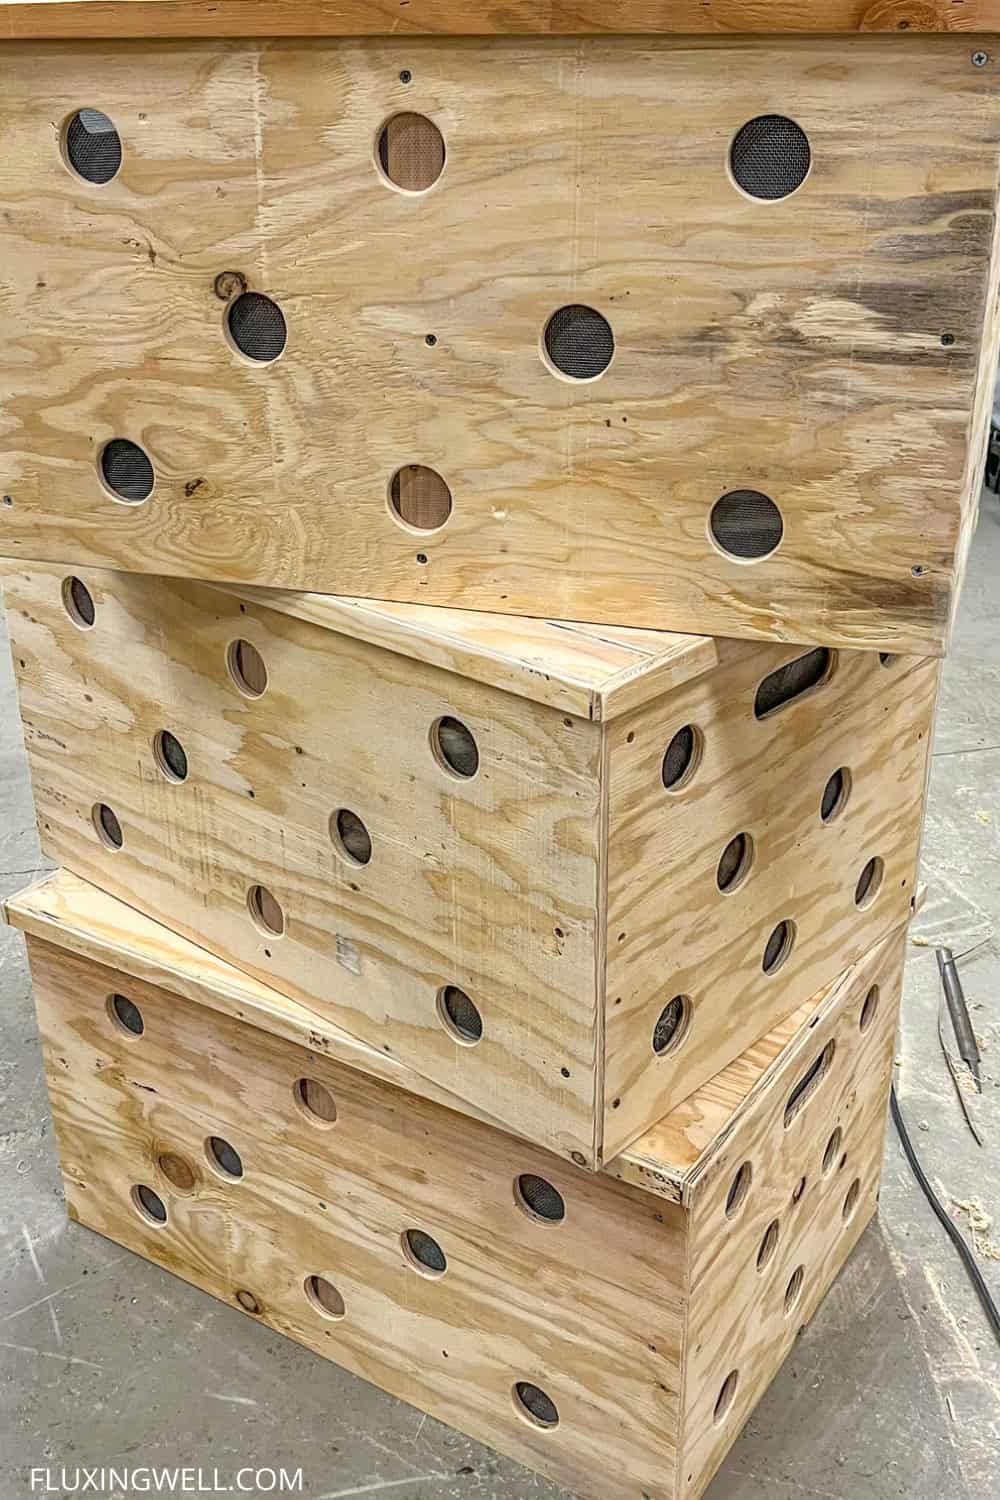
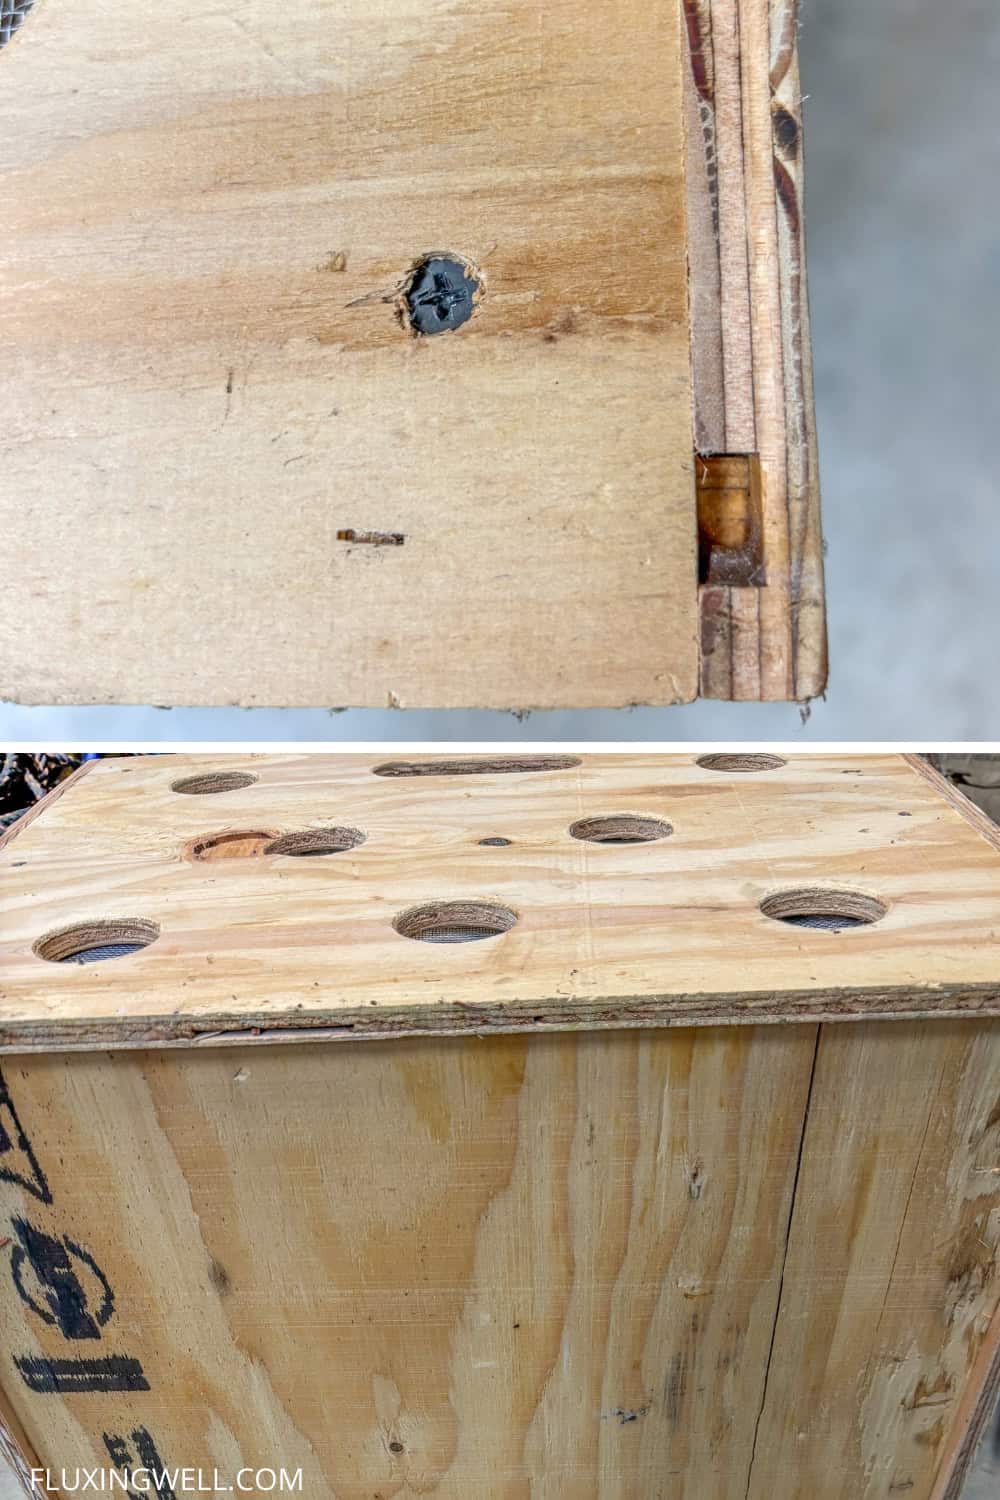
Finishing the Hole Edges and Adding the Mesh Screen
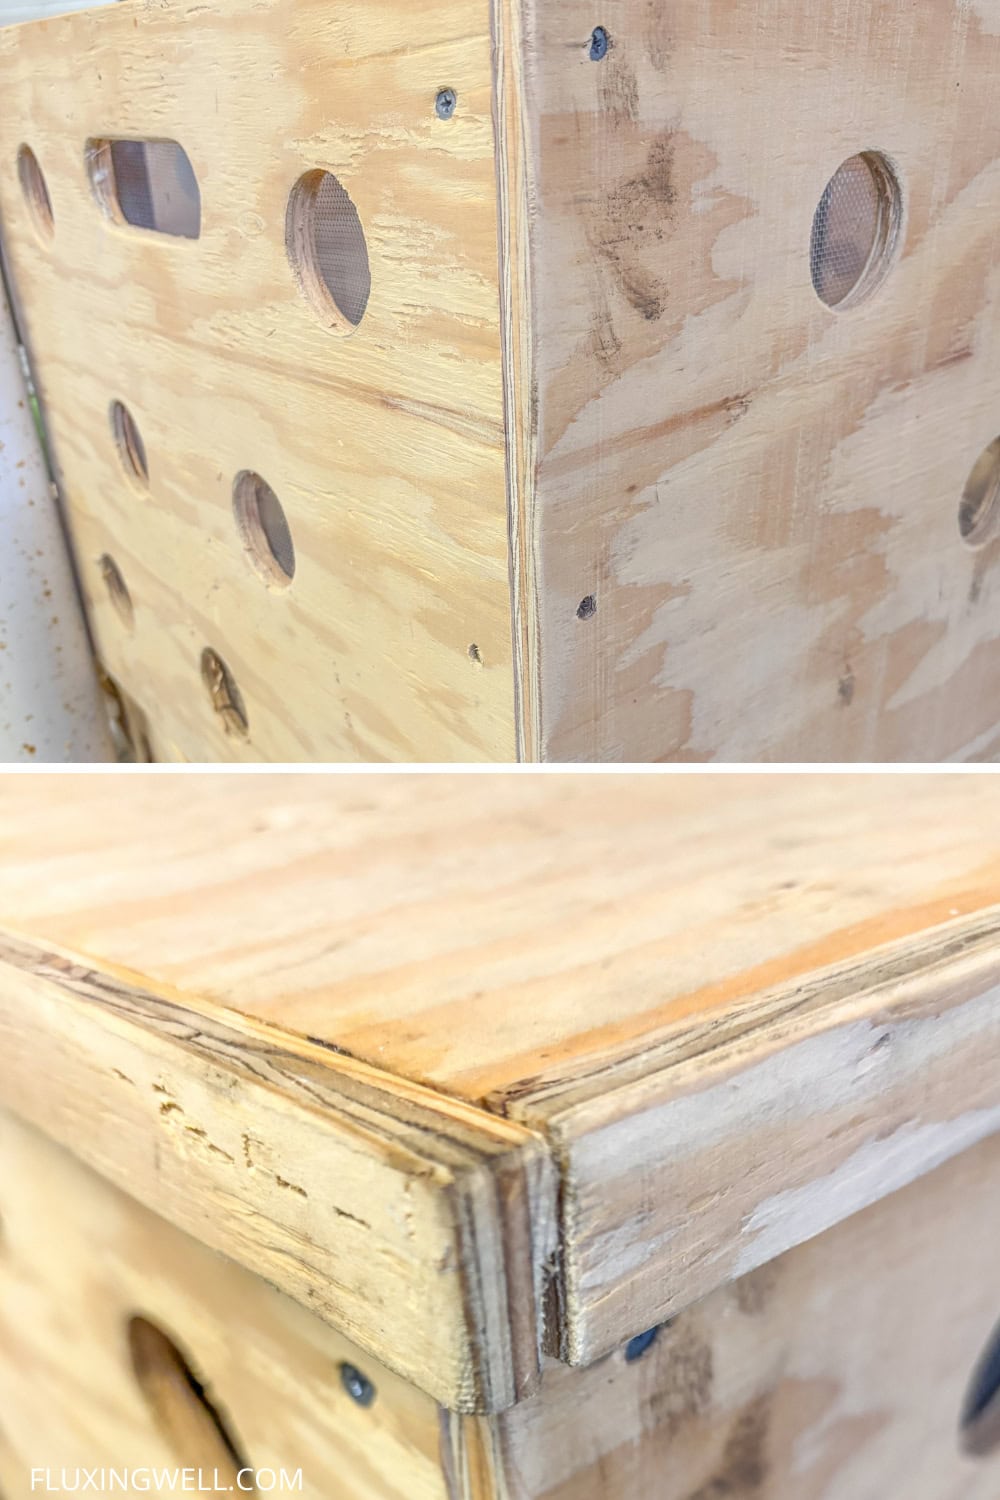
Use a wood rasp to file down the edges of the holes. Staple on the mesh screen pieces, edging with duct tape to cover the sharp edges and prevent fraying.
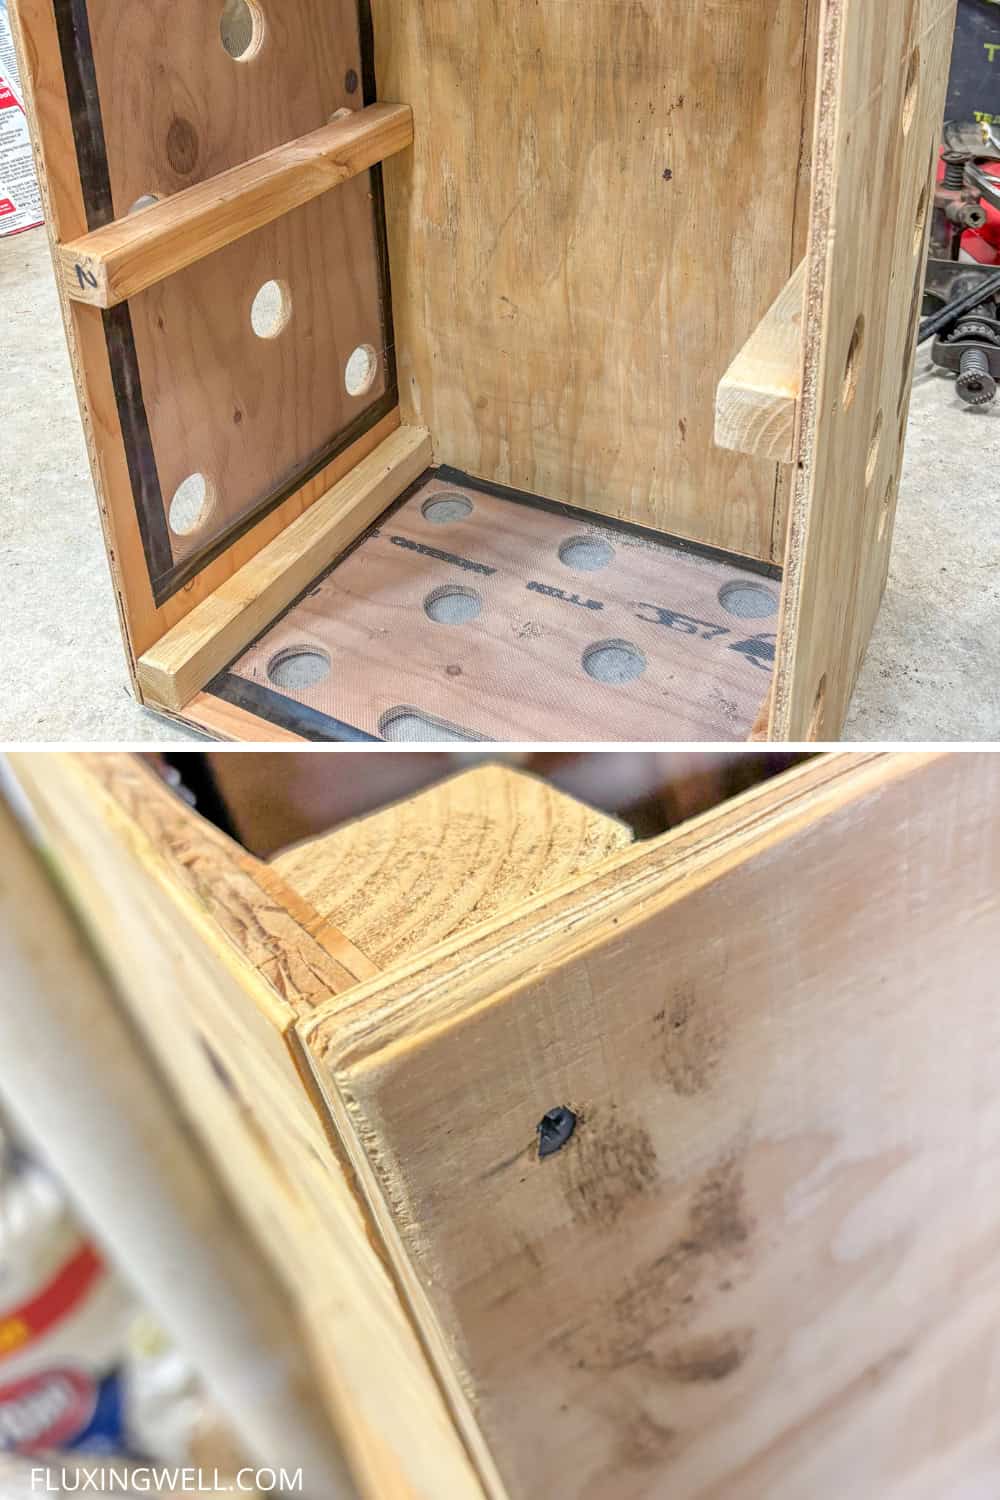
Putting the Box Together and Adding Finishing Touches
Insert the bottom piece to the front and back and side pieces using wood glue and staples to hold in place. Attach support posts to the sides and corners using screws. Attach the trim to the lid piece with staples and glue.
Use a wood rasp to file down all edges of the box and lid.
Other Storage Container Options

When choosing a dahlia container storage option, here are important characteristics to consider:
Not airtight, so you should avoid sealed plastic bins or containers that trap moisture.
Use a breathable material (e.g., cardboard, wood, slatted crate) or plastic with ventilation which allows air circulation so moisture doesn’t build up and cause rot.
Able to hold a packing medium with enough space to layer tubers with dampened peat moss, vermiculite, wood shavings, or other bedding.
Room for layering, so the container should be able to support putting down a base of medium, then tubers, then more medium, possibly with multiple layers without tubers touching.
Secure but not sealed lid or a way to stack multiple containers if needed.
Durable enough to handle storage, so the container should resist collapsing or breaking over winter.
Fits into a cool, frost-free storage space, so the box size should suit storing in a basement, garage, or shed where temperature stays ~ 40–50 °F (4–10 °C).
Slightly elevated (not on concrete) and ideally kept off a cold floor (like concrete), since concrete can draw moisture from the tubers. (This is why the bottom of my homemade crates is inset into the side pieces. You can also place the crates or boxes on wood pallets if needed.
Easy to inspect monthly, which means you should be able to open or check the box (or boxes) periodically to look for shriveling or rot.
Purchase or Use What You Have
Some people like to purchase collapsible plastic storage crates like these:

The advantage of being collapsible is that the crates store easily when not in use. These crates are also stackable.
Other storage options include:
Plastic milk crates
Cardboard file storage boxes with lids
Wooden crates
Where to Store Your Dahlia Tubers
Here are the key characteristics of a good location to store dahlia tuber crates over the winter:
Cool (ideally 40–50°F or 4–10°C)
Frost-free (never dropping below freezing)
Dark (darkness helps prevent premature sprouting)
Dry (low humidity to avoid mold, but not so dry that tubers shrivel)
Well-ventilated (some air movement without drafts)
Stable temperatures (no big swings from warm to cold)
Rodent-safe (protected from mice or critters that might chew tubers)
Off the concrete floor (concrete can get too cold and wick moisture) **That is why the bottom of the DIY dahlia storage box is inset and raised slightly off the ground.
Low-traffic area (not frequently opened or exposed to light/heat)
Accessible for monthly checks (you’ll need to inspect for rot and dehydration)
Common spaces that fit these conditions: basements, insulated garages, root cellars, crawlspaces, and cool storage rooms.
Common Dahlia Tuber Storage Questions
Here are some additional questions you may have that have not been addressed specifically yet:
Do you rinse dahlia tubers before storing?
Most gardeners do rinse dahlia tubers after digging to remove soil, which makes it easier to inspect for damage, rot, and eyes before storage. After rinsing, the tubers must be fully dried, usually for a day or two in a cool, shaded, well-ventilated spot, because any remaining moisture can lead to rot in storage. Once dry, they can be packed in a slightly moist medium like peat moss, wood shavings, or vermiculite and stored in a cool, dark, frost-free location for the winter, as discussed previously.
When to take dahlia tubers out of storage in winter?
Take dahlia tubers out of winter storage when you’re ready to start waking them up, typically in late winter to early spring, about 4–6 weeks before your planting date. In most regions, this means March or early April, but the timing depends on your local last frost date and when you plan to pot them up or plant them outdoors. I usually don’t take mine out until I’m ready to plant them, which is in late April or early May, since I live in Zone 8b.
Can I store dahlia tubers in plastic bags?
It’s generally not recommended to store dahlia tubers in plastic bags because they trap moisture and greatly increase the risk of rot. Tubers store best in a breathable container with a slightly moist packing medium, such as wood shavings or peat moss, that allows airflow and helps regulate humidity.
Do you cut the roots off dahlia tubers when storing?
Yes, most gardeners trim off the thin, hair-like feeder roots before storing dahlia tubers. Removing these roots helps prevent excess moisture from lingering, reduces the risk of rot, and makes the clumps (or tubers, if divided) easier to pack.
Unique Gifts for Dahlia Lovers
Looking for the perfect dahlia gift for someone? If you have a dahlia-lover in your life, here are some fun gift ideas. Show an affection for dahlias with these creative dahlia-themed gifts.

![]()

![]()

![]()
| Dahlias: Beautiful Varieties for Home & Garden |
Especially for those who enjoy growing these prolific summer-blooming plants. This book can help ease the off-season blues.
|
| Kate Spade New York Foldable Reusable Shopping Tote |
Use this foldable bag time and again to add a splash of color to a shopping trip. Lightweight and packable!
|
| Pop-up Dahlia Flower Greeting Card | The perfect card for a dahlia-lover on Mother’s Day or a birthday, this pop-up card is a day-brightener. |
| Painted Dahlias Stainless Steel Tumbler with Lid | This unique, pretty 30-ounce tumbler is insulated to keep a drink hot or cold for up to 24 hours. |
| Double Layer Inverted Dahlia Print Umbrella |
Show your love of dahlias with this waterproof, windproof, UV protector umbrella with a colorful print of a dahlia bloom.
|
Referring Back to My Garden Planner Notebook
A few years ago, as a result of needing to keep track of what kind of dahlia we planted where, I decided to begin a garden planner notebook. I planned to have tasks and notes for each month. I sort of kept up with it. One thing I definitely included in the notebook was the list and description of each dahlia variety we owned at the time. Now that we have a few more varieties, thanks to our generous gardening friend, I’m going to add them to the list as well. If a garden planner notebook seems like a good idea to you, good news! I added the 16 master pages to the free resource library for subscribers to the Fluxing Well blog.

Get the garden planner!
Free Online Garden Planner Layout Template
Now that you know how to divide dahlia tubers, you might need a way to plan your dahlia bed layout. This online garden planner can help you visualize your design and bring it to life. With garden tasks that need your attention, this is one way to save time.

It’s fully customizable when you make your own copy and includes two editable chart pages for noting planting specifications.
Get my free online garden layout planner template!
Other Gardening Posts You Might Enjoy
Do you struggle with knowing what to plant in flower containers? Get some great flower container ideas you can use, even if you’re artistically challenged. Learn about easy-care perennials and fabulous flowering shrubs. Get some easy tips for growing fragrant old garden roses or make your own DIY pole bean tower. If you are looking for simple, low-maintenance gardening tips, I’m here for you!
Have a wonderful week, and may all of your dahlia storage endeavors meet with success!

Lisa Mitchell is a wife, mom, and school librarian who likes to grow fruit, vegetables, and flowers on her family’s small Pacific Northwest farm. To learn more about what this website has to offer gardeners, click on over to the Garden page.
Like what you read here? Please give it a share!
Want more great garden, food, or travel ideas? Follow FluxingWell on Pinterest, Facebook, Instagram, and X for the latest posts, tips, and inspiration.
I love this Dahlia storage guide, your helpful tips, and detailed explanations. Thanks for sharing!
You are most welcome. I hope it helps you store your dahlia tubers worry-free.
Thank you for this ultimate dahlia storage guide. I appreciate the step by step tutorial to create a storage box as well as the simple tips for dahlia storage success.
You are welcome! I hope this helps you store your dahlias with confidence.
I love dahlias, and this is packed with wonderful storage ideas. Thanks for explaining pros and cons so clearly, and the DIY storage boxes look amazing!
Thank you for the kind words. I hope you get to test out the dahlia storage box for yourself.
Thank you for this excellent dahlia storage guide. I especially like the unique dahlia storage boxes tutorial. Great idea to put mesh screen over the holes!
I’m so glad you liked the ideas. Here’s to overwintering dahlias with success!