
Learn how to make easy cake pops from leftover cake. It’s one of the best leftover cake recipes because it helps you to use something you may already have in a fun, delicious way. Leftover cake can be a delicious treat on its own, but if you find yourself with more cake than you can eat in one sitting, make some easy cake pops. As a veteran member of school and church social committees, I have planned and attended a plethora of fun party functions and have had to deal with a lot of leftover cake. Cake pops are the perfect addition to any party. Just change up the color or decorations to fit the theme. Making cake pops from leftover cake is easier than you might think. Just follow this cake pop recipe with leftover cake detailed below, and you will have delicious cake pops using leftover cake in no time.
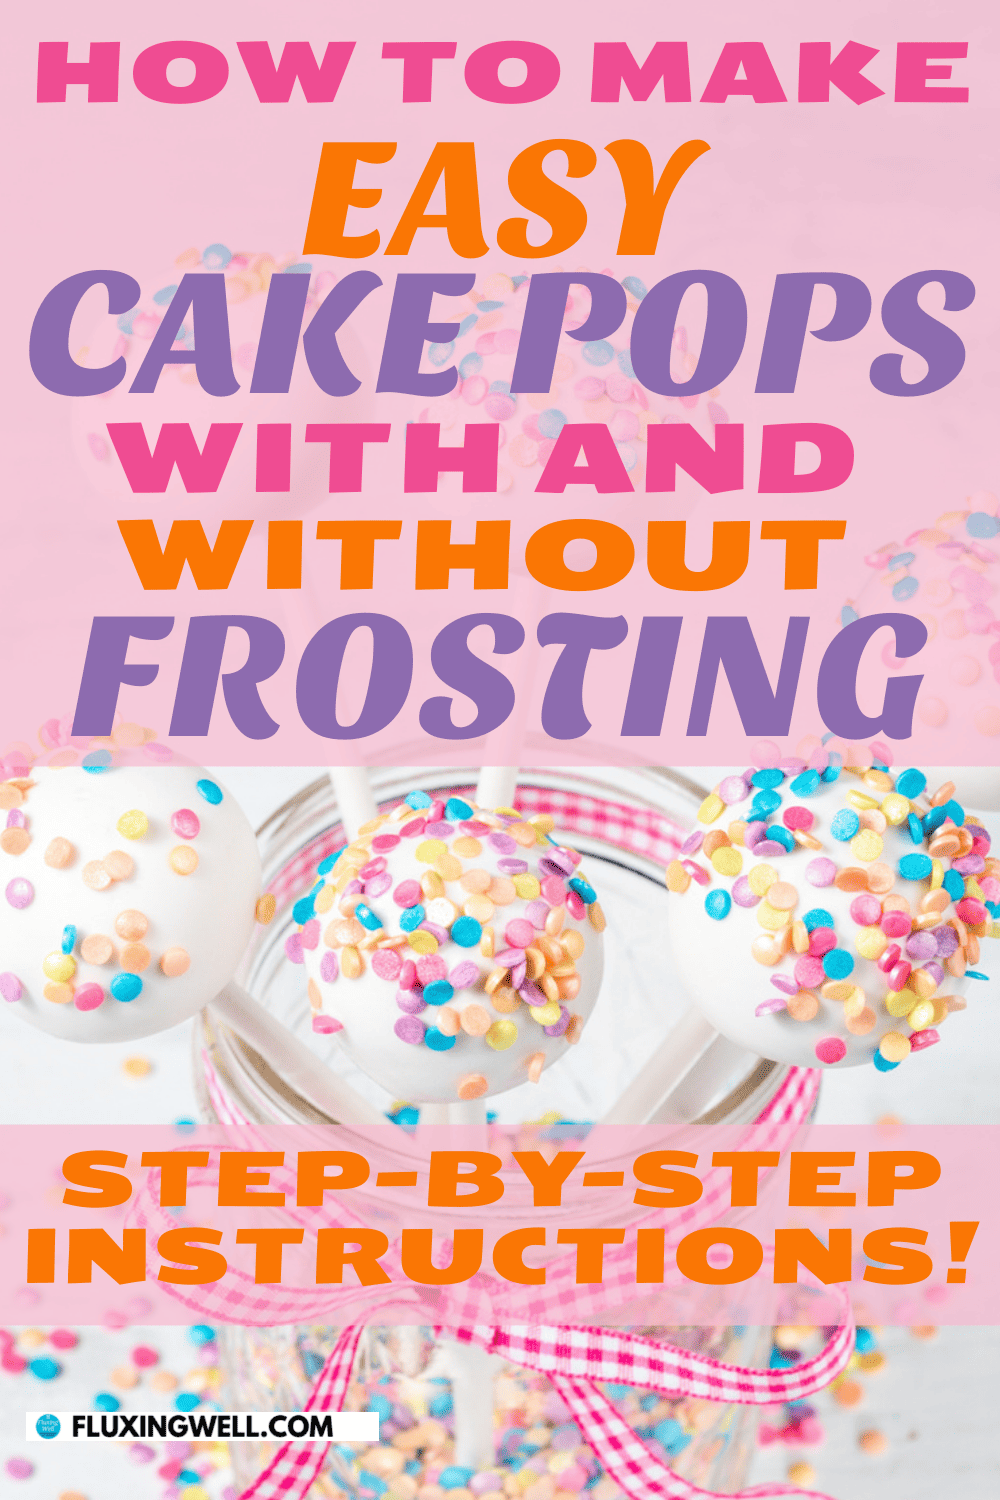
In order to develop the best cake pop recipe, I tried using some different ingredient variations besides frosting to make the leftover cake stick together. Easy cake pops from leftover cake will revolutionize the way you think about cake leftovers. Ready to learn how to make cake pops from leftover cake? Let’s go!
My Cake Pops from Leftover Cake Backstory
I am fond of writing about parties, including tea parties, lemon-themed parties, sunflower-themed parties, blueberry-themed parties, and more.
I had finished baking a cake to use as a demonstration for cutting a cake into a butterfly cake shape and had some leftover cake. I did not want to eat it all by myself, so I went to the store and bought some frosting as well as some marshmallow creme. As a kitchen experiment, I tried making 5 different types of cake pops out of leftover cake. I took them on a camping trip, and they were a big hit. Here’s how you can make your own cake pops from leftover cake.
Cake Pops from Leftover Cake: Equipment
This post contains affiliate links, which means I may earn a small commission from qualifying purchases at no additional cost to you. Please read my Policies page for more information.
First, you will need some cake pop sticks. If you are using an entire cake made from a cake mix, for example, you will need about 2 dozen cake pop sticks. Cake pop wrappers and twist ties are optional, but if you are transporting your cake pops, wrappers, and twist ties are nice to have.

![]()
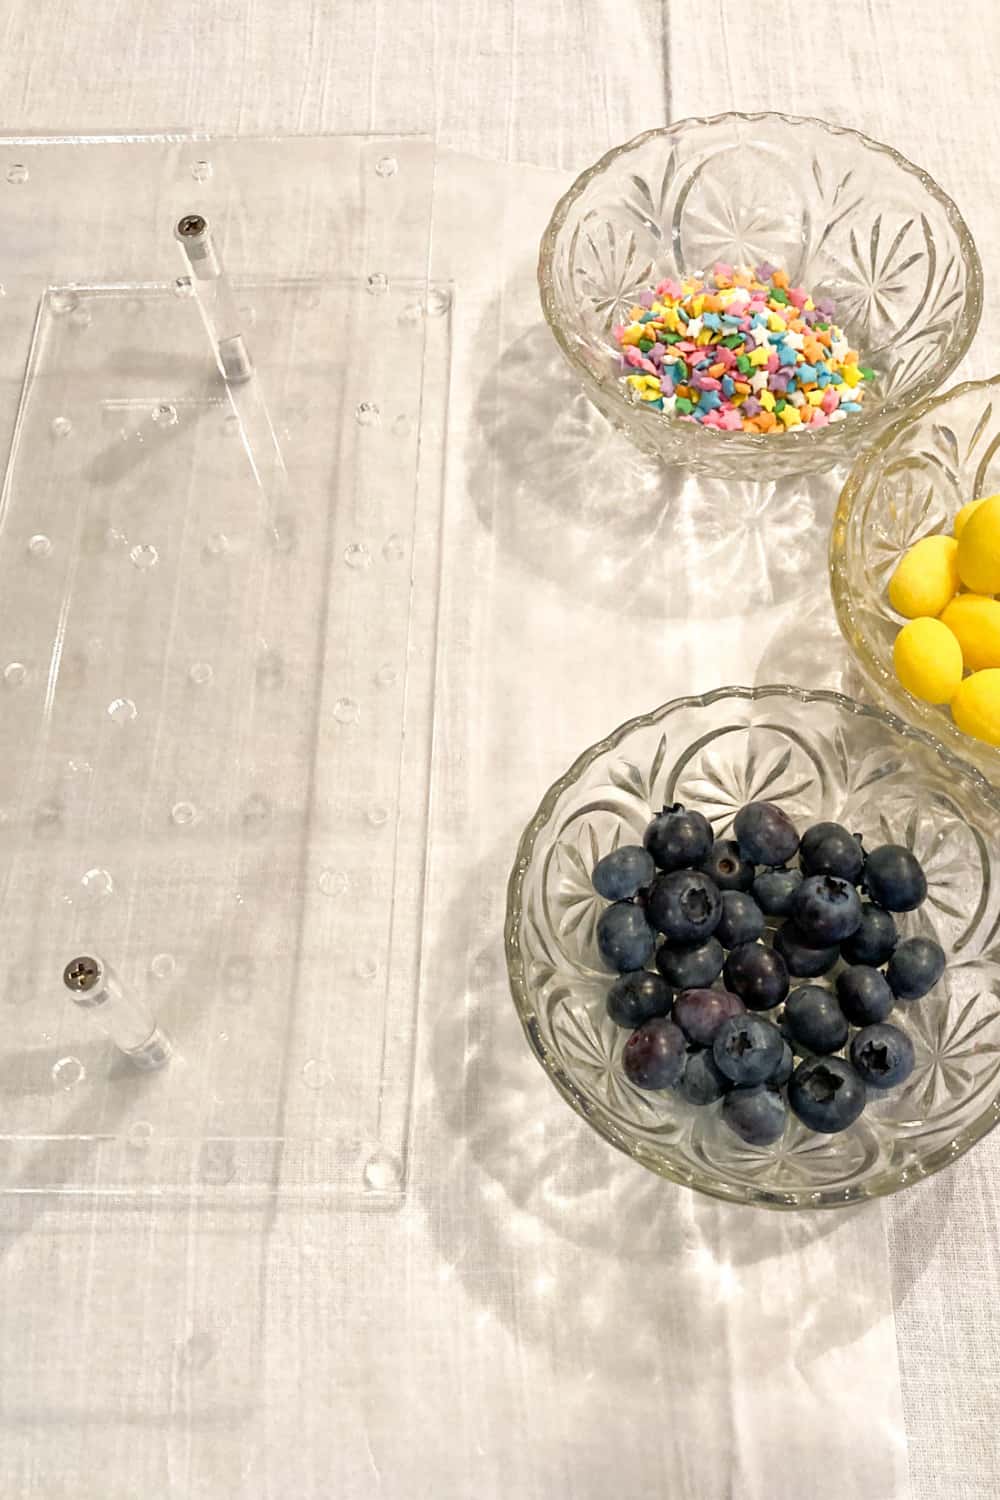
You will also need a way to hold your cake pops upright as they are drying. You can use a block of styrofoam or green florist’s foam. Another way to hold the cake pops upright is to buy an inexpensive cake pop stand. This is the one I have.
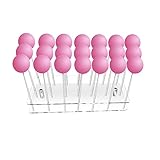
![]()
Even though it has 21 holes, it will not actually hold 21 cake pops if they are too big in diameter. If the ball parts of your cake pops are less than 2 inches around, then you will be able to fit 21 in there. There are also other designs to choose from that hold more.
In addition to these specialized pieces of cake pop equipment, you will also need basic kitchen equipment like a mixing bowl, mixing spoon, a small bowl, and a small saucepan for melting the chocolate coating. To chill the cake pops before dipping, you will need parchment paper and a baking sheet.
Cake Pops from Leftover Cake: Ingredients
Since I was working with one whole leftover, unfrosted cake, I will share the basic ingredients as if you had a similar situation. If you are working with a leftover cake that is already frosted, you can skip the part about baking the cake from a cake mix.
1 cake baked from a box of cake mix, prepared according to package instructions
1 cup of frosting
2 dozen cake pop sticks or lollipop sticks
1 cup of white chocolate chips, candy melts, or other cake pop coating option
Vegetable oil
Sprinkles, chopped nuts, or other decorations (optional)
Cake Pops from Leftover Cake: Directions
Remove the cake from the cake pan(s). Place into a large mixing bowl and crumble into crumbs using a mixing spoon, your hands, or a food processor.
Add frosting to the cake crumbs to bind them together and create a moist, dough-like consistency. Start with a few tablespoons of frosting and add more as needed. The amount of frosting required can vary, but the mixture should hold its shape when pressed together without being overly sticky.
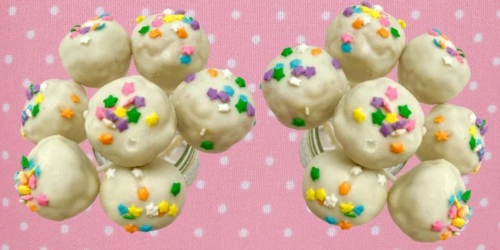
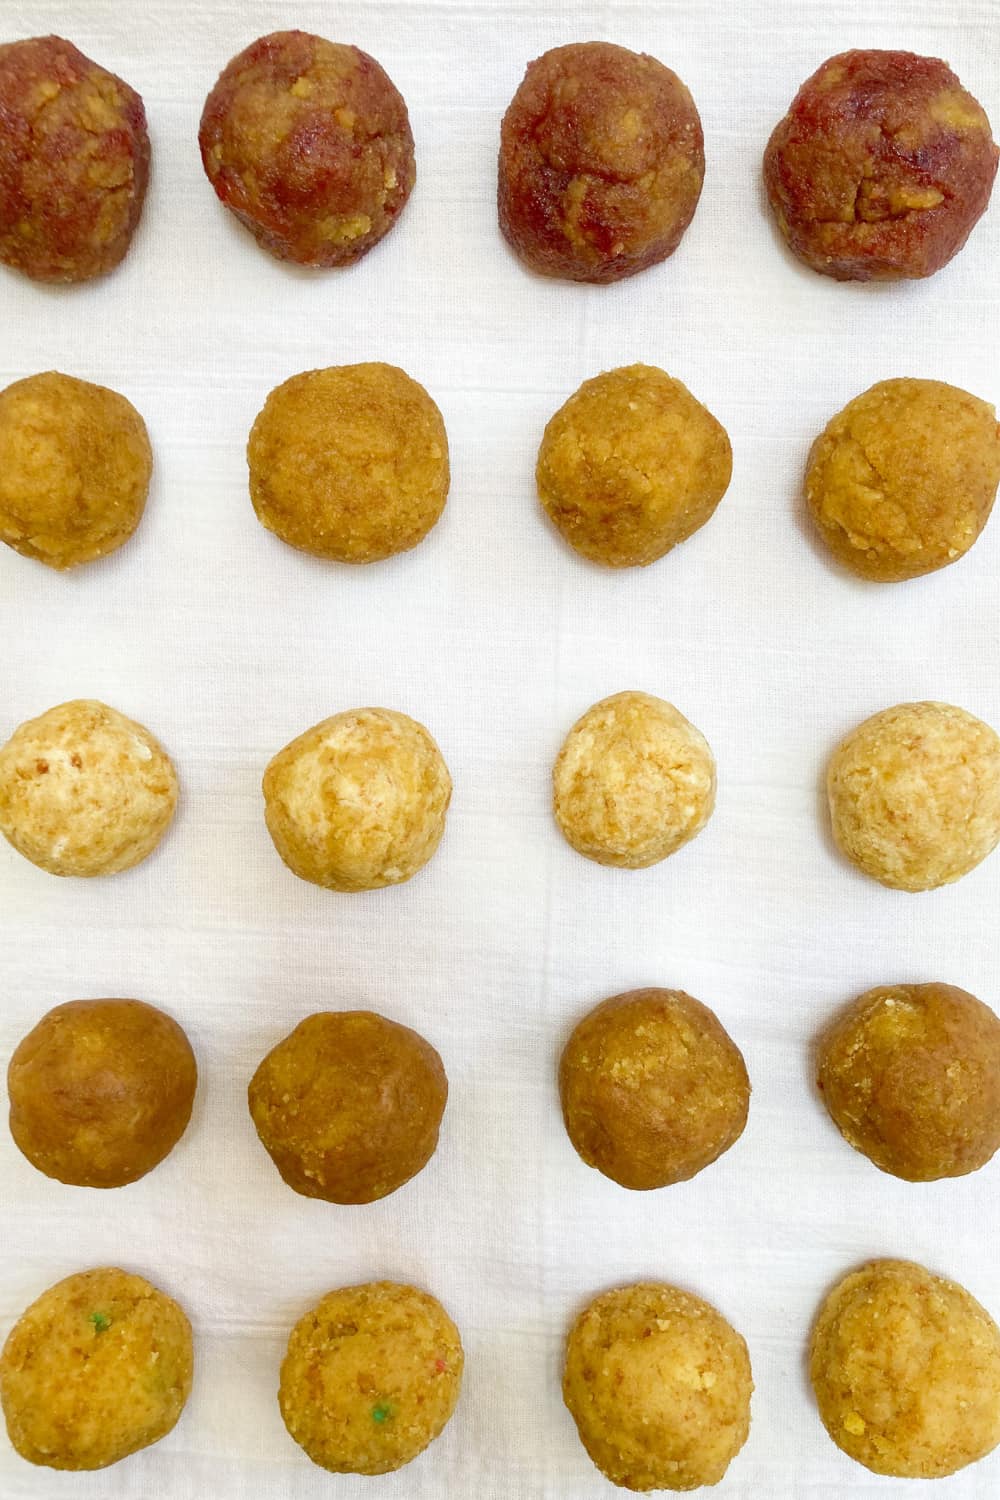
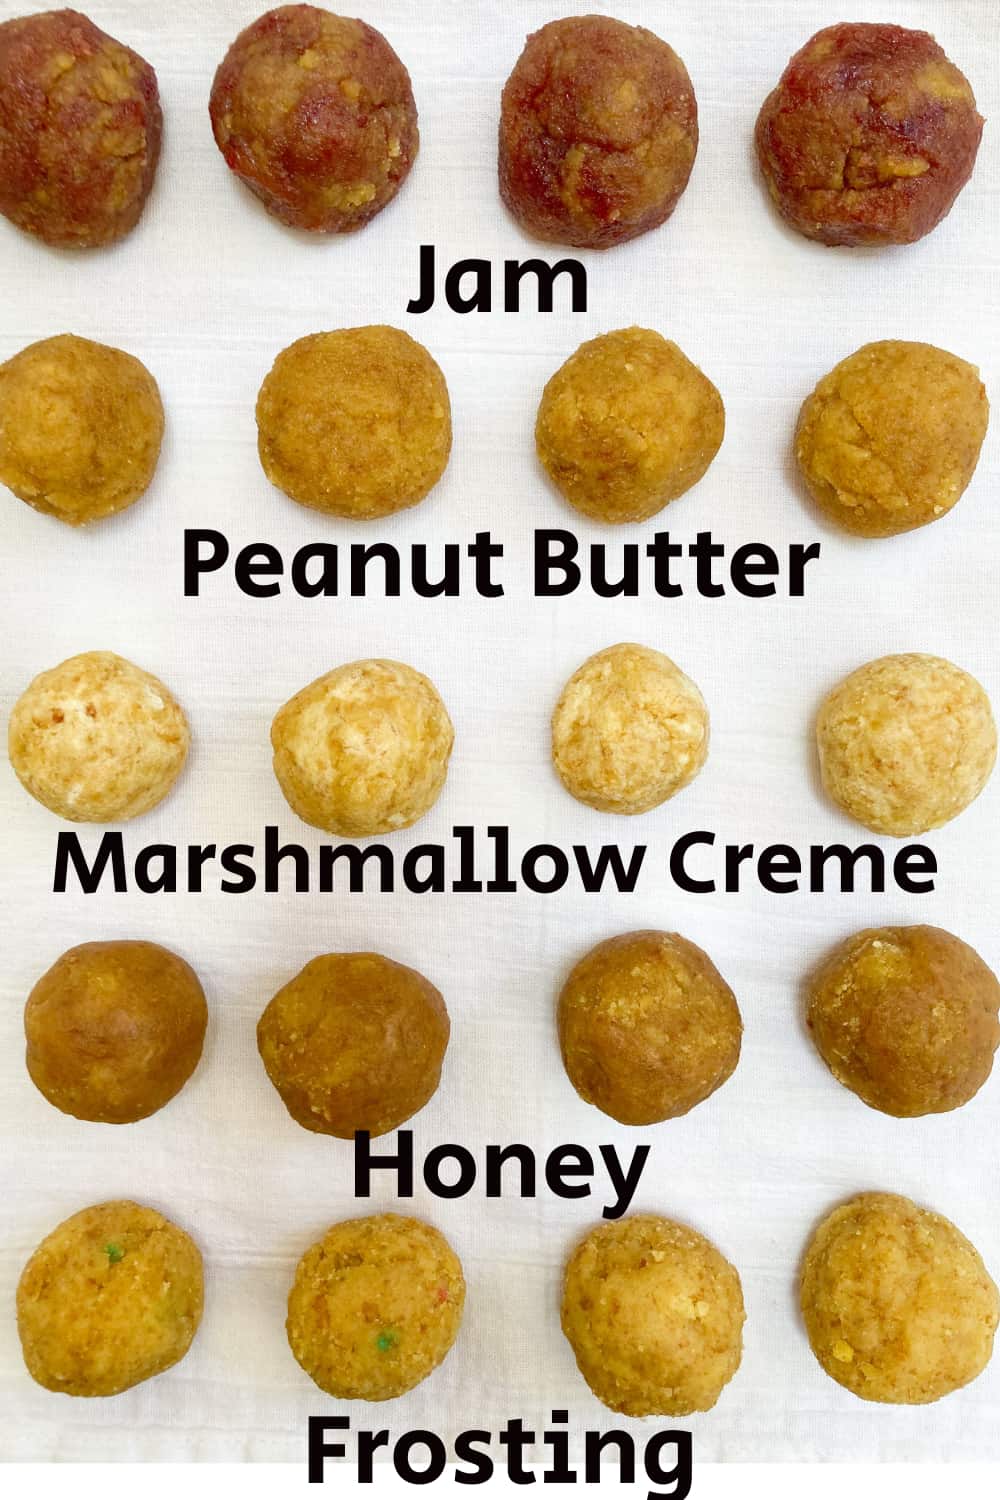
Take small portions of the cake mixture and roll them into uniform-sized balls. The size is up to you, but cake pops are typically about the size of a large cherry or small golf ball. Here are some cake pop balls made with different types of sticky binding ingredients. I explain each one further on down.
Place the cake balls at least 1/2 inch apart on a piece of parchment paper on a baking sheet. Melt a small amount of your chosen coating (chocolate or candy melts) and dip the end of a cake pop stick into it. Insert the coated end into the center of each cake ball, about halfway through. This helps the sticks adhere to the cake.
Refrigerate the leftover cake cake pops for at least 30 minutes to allow them to firm up. This will make them easier to handle and dip.
Melt your chocolate or candy melts according to the package instructions. You can melt the coating in the microwave 30 seconds at a time, stirring in between intervals. You can also melt the chocolate coating in a bowl over a pan of water. If the chocolate or candy melts are too thick, add some vegetable oil, one teaspoon at a time, until the desired dipping consistency is reached.

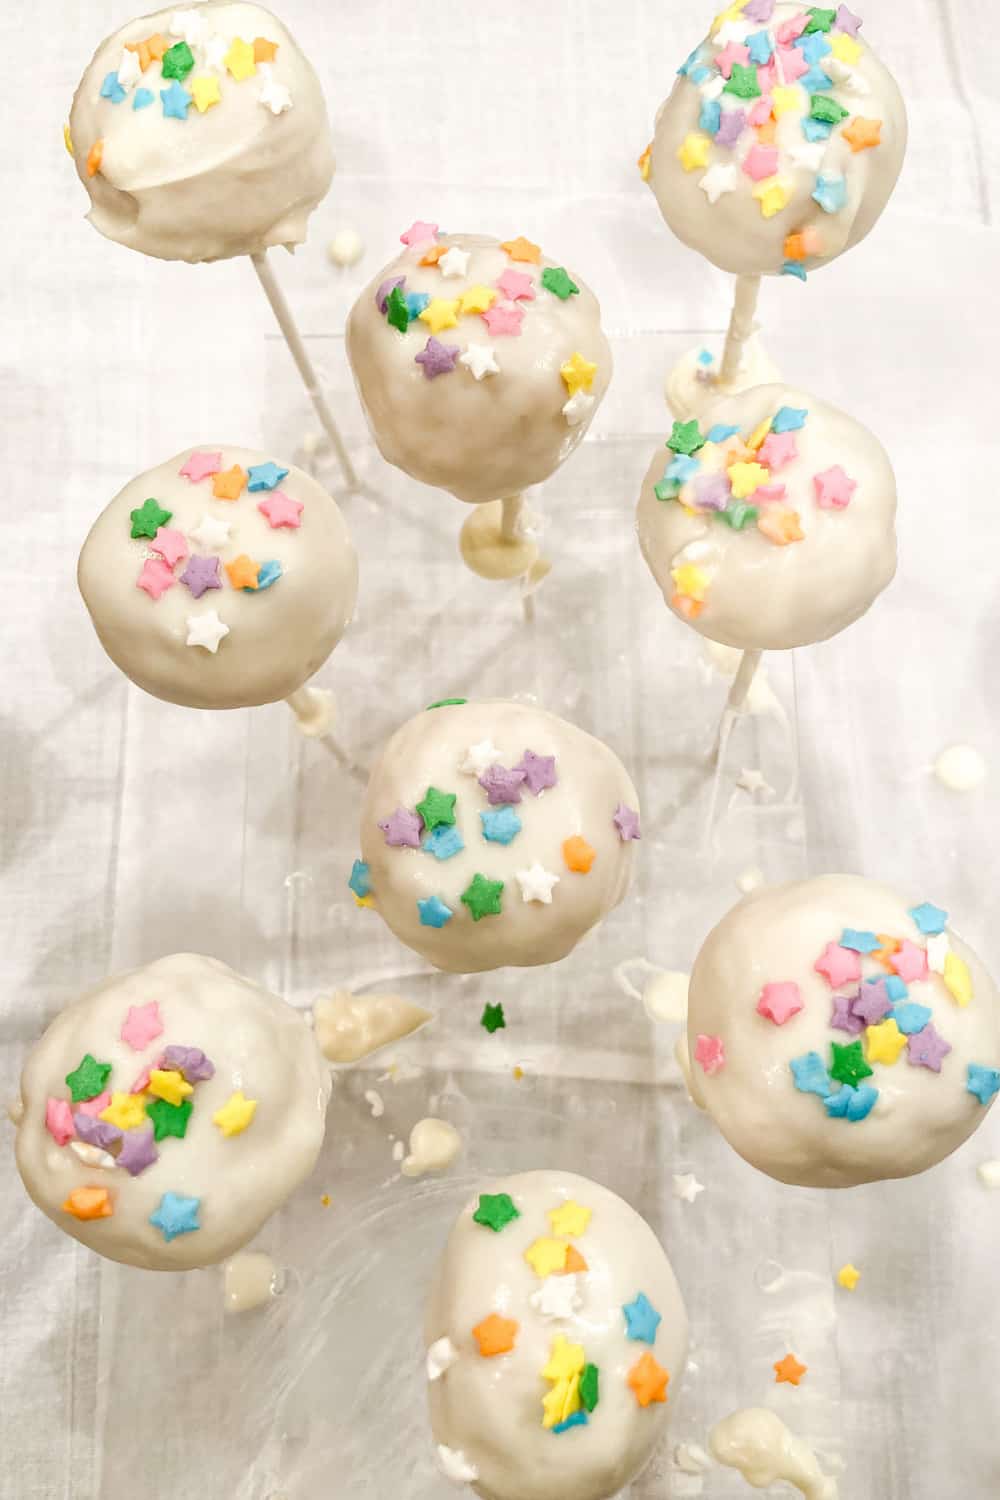
Dip each cake pop into the melted chocolate, ensuring it’s fully coated. You can tap off any excess coating. While the coating is still wet, you can decorate your cake pops with sprinkles or other toppings of your choice.
Place the cake pops upright in a piece of foam or a cake pop stand and allow to dry. Allow the coating to set at room temperature for a few minutes, then refrigerate if you are not eating them right away. The cake pops will be ready to eat in about 10 minutes.
If you are transporting the cake pops, wrap each in a cake pop wrapper and fasten the wrapper with a twist tie. Carefully lay the cake pops in a container and keep them chilled until you are ready to display them in a stand or serve them to guests.
Cake Pops with Store-Bought Cake
Wondering how to make cake pops from leftover cake from the store? Cake pops made with store-bought cake from a bakery are a convenient and time-saving option for creating delicious treats. Using store-bought cake as the base for your cake pops simplifies the process and allows you to focus on the fun part: shaping, dipping, and decorating. Follow the same instructions as above, but begin the steps by crumbling the cake in a bowl. Mix the frosting and cake together, adding extra frosting if needed.
Follow the same steps as above in the basic recipe for shaping, dipping, and serving the cake pops with store-bought cake. Enjoy!
Cake Pops from Cake Scraps
Cake pops made from cake scraps are a fantastic way to use up leftover cake and create a fun and delicious treat. Whether you have cake trimmings from leveling a cake or leftover cake pieces, you can turn them into cake pops following the same steps as given in the basic recipe above. This is a fabulous way to use leftover cake from an office party, baby shower, bridal shower, birthday party, or any other celebration that involves cake. You can make cake pops with leftover cake of your choice. There are many possibilities.
How to Make Cake Pops Without Frosting
What can I use instead of frosting for cake pops?
Cake Pops with Marshmallow Fluff
Marshmallow fluff (also known as marshmallow creme) is a favorite ingredient when it comes to making fudge or other candy. Good news! It can be used in place of frosting to make delicious cake pops. In fact, when I tested out some cake pops with marshmallow fluff, the cake pops kept their shape better when dipping than the cake pops made with frosting. If you are a fan of marshmallow fluff, just substitute marshmallow fluff for the frosting in the basic recipe from above.
Cake Pops with Peanut Butter
If you have peanut butter on hand, you can use peanut butter to make tasty cake pops without having to buy or make frosting. When you substitute peanut butter for frosting in the recipe, just follow the rest of the steps as directed. The mixture does not stick together quite as well when dipping, but if you chill the cake pops after shaping, you should be able to dip them with success. The flavor is slightly less sweet, which suits the taste of some who are not a fan of frosting.
Cake Pops with Honey
Cake pops may also be made with honey instead of frosting as a binding ingredient. Honey is a bit more sticky when shaping it into balls with your hands, but the chilled cake pops with honey retain their shape well when dipping. Making cake pops with honey offers a slightly less sugary binding option, which might be welcomed by some.
Cake Pops with Jam
If you don’t have any of the other binding options listed above, you can use jam as a binding option. Substitute jam instead of frosting in the basic cake pop recipe. Then (this is important) instead of refrigerating the cake pops after shaping, you should pop them in the freezer for about 30 minutes. After freezing for 30 minutes, dip into the melted coating, then put back into the freezer. If you do not do this, they will fall apart. They taste great, but are a bit more fragile and tend to fall apart easily. Thaw slightly before serving.
Cake Balls with Leftover Cake
If you prefer making cake balls instead of cake pops, the basic idea for shaping the cake balls out of leftover cake is the same. Since you do not have a stick to attach, you can use a fork for dipping the cake balls in the melted coating. If you wish to dry the cake balls on a cake pop drying rack, you could use a cake pop stick for dipping and drying the cake pops. When the coating is dry, just gently slip the cake ball off of the stick.
Cake Pops on a Cake
You might wish to add cake pops to the top of a cake for decoration purposes. If you try this, you might want to use cake balls without the cake pop stick. That way, the cake pop sticks would not sink into the cake. Here is an example of what cake balls on a cake might look like.
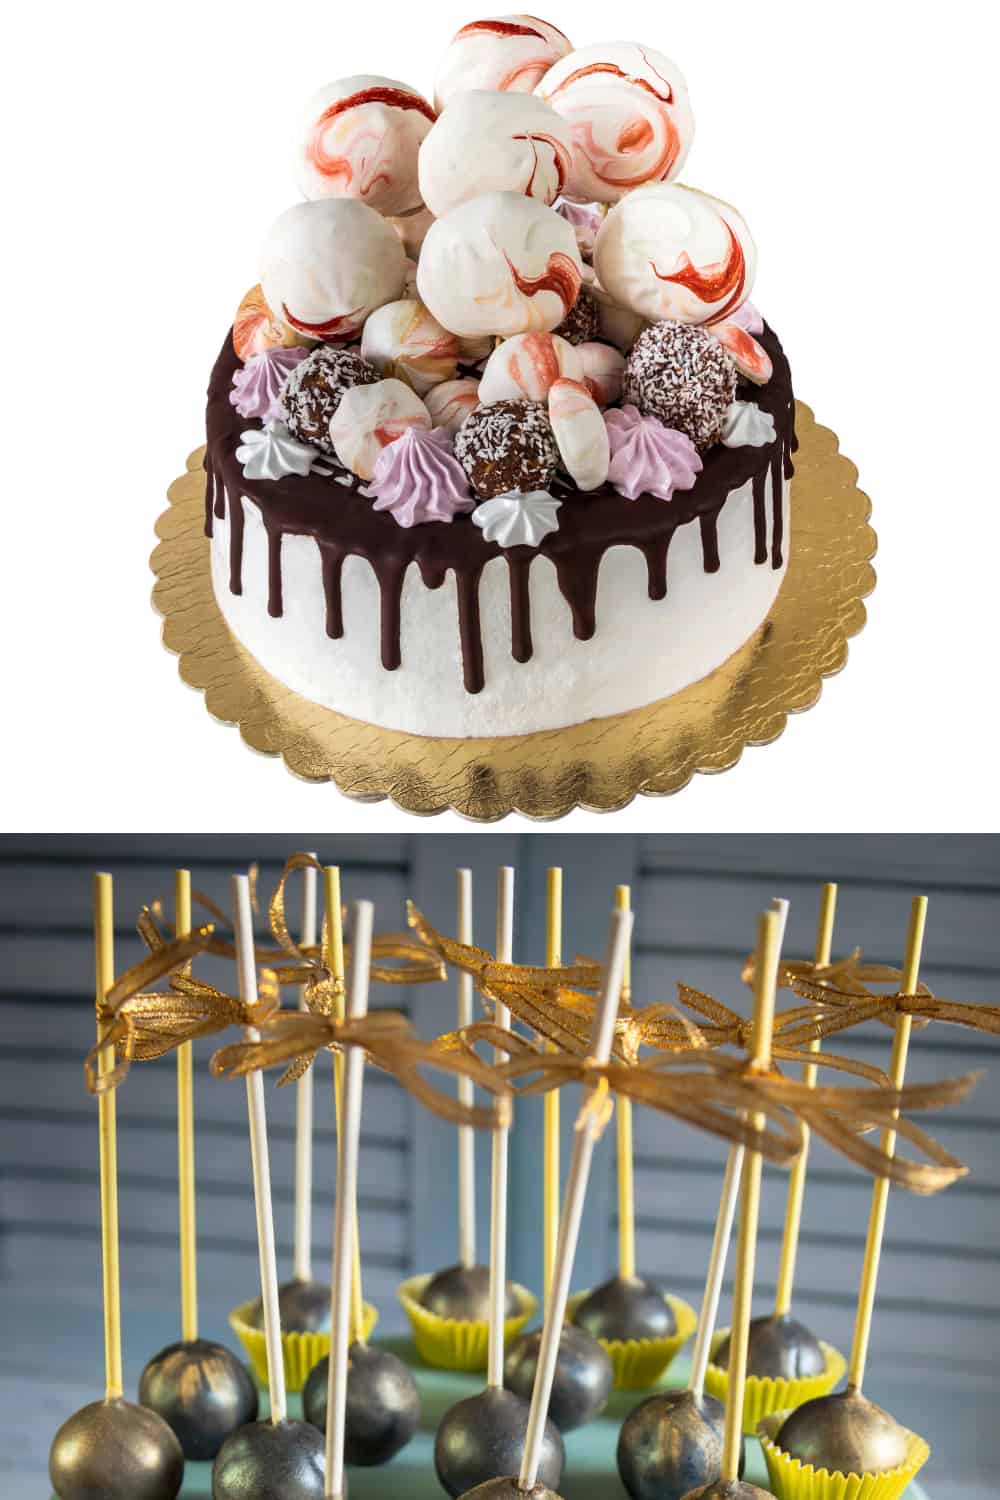
You could also put cake pops on a cake upside down, with or without mini cupcake papers. Placing cake pops on a cake is an easy way to add a decorative flair, and may be customized to fit many party themes.
Holiday Cake Pops
Cake pops from leftover cake are a very versatile party food and can be decorated to fit different holidays. Here are some cute holiday cake pop ideas you could use throughout the year.
Valentine Cake Pops
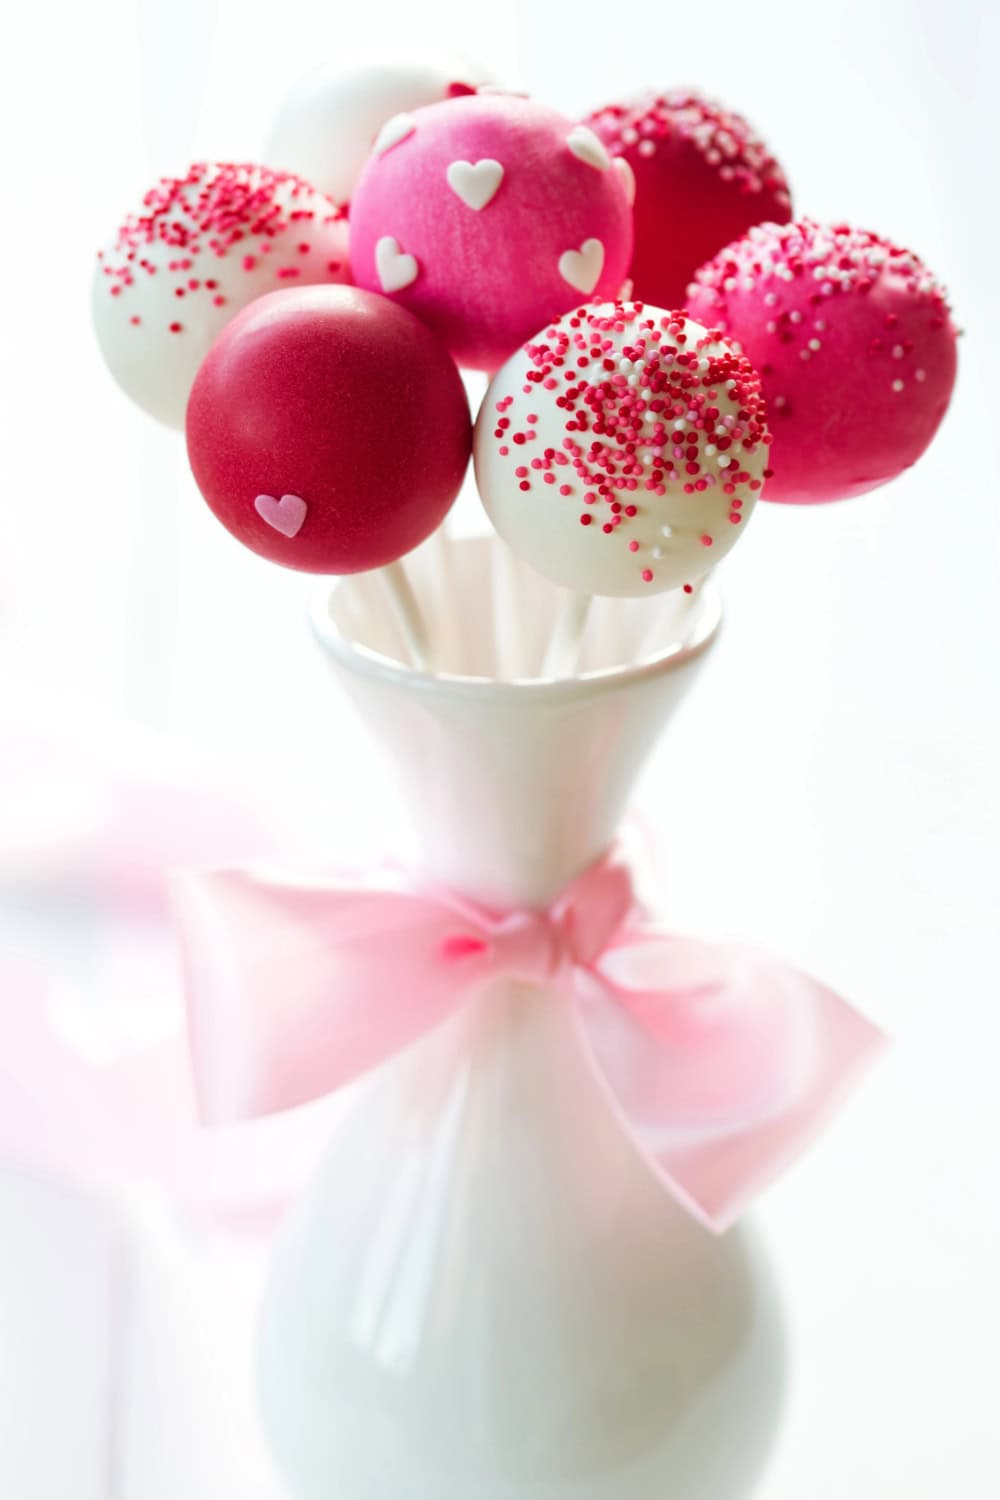
Dip cake pops in melted chocolate and decorate the outside of the cake pops with heart-shaped sprinkles.
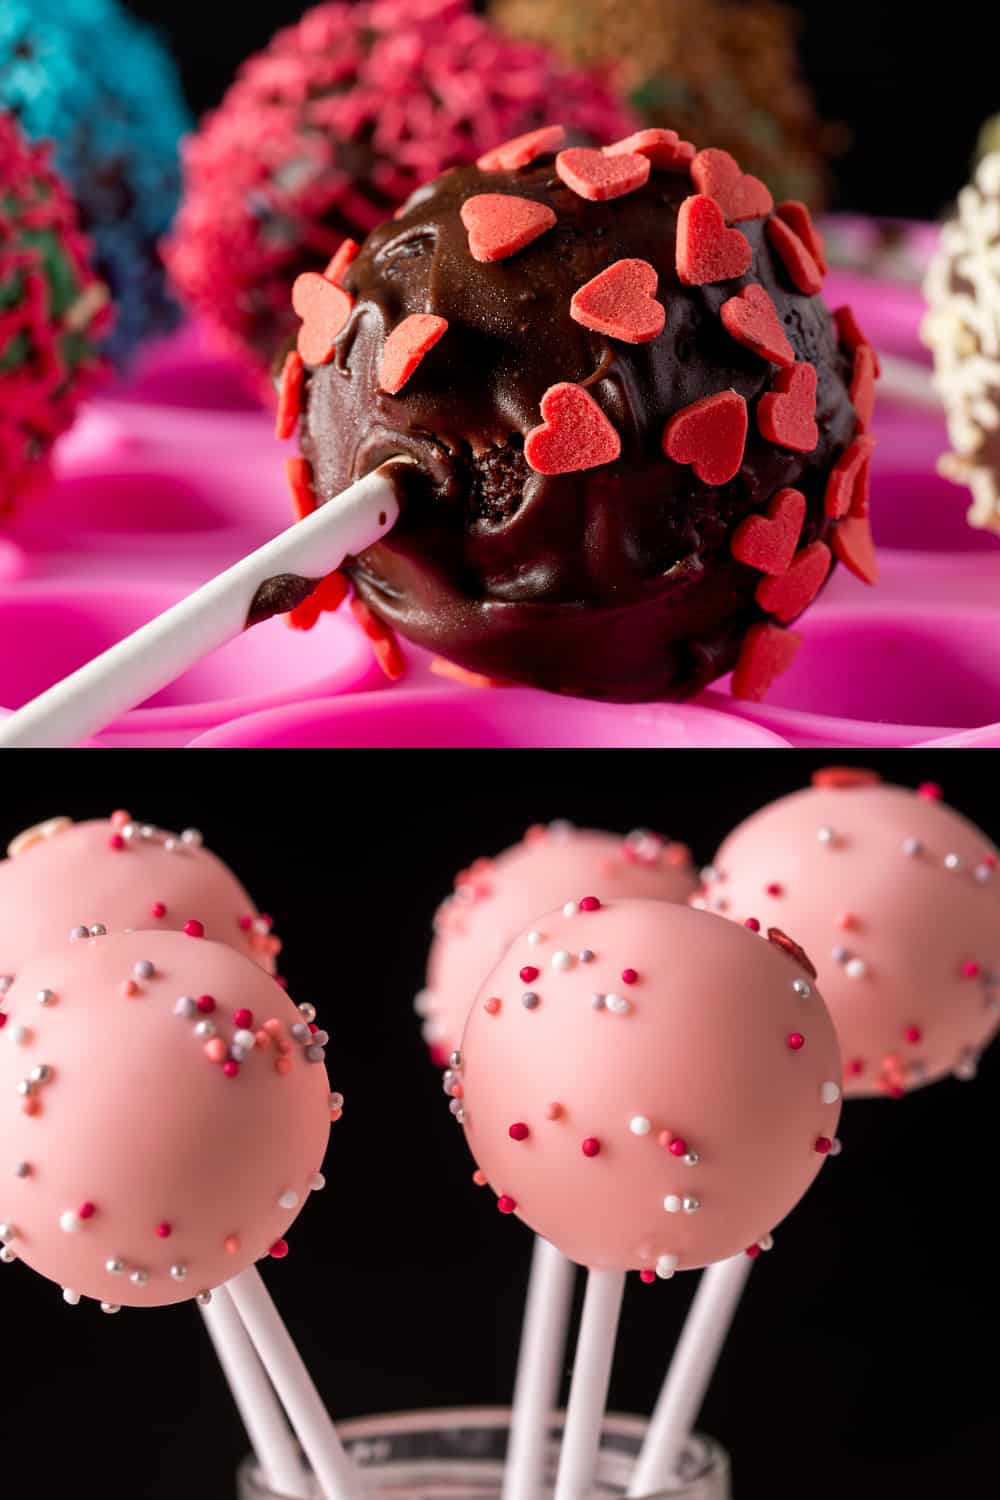
You could also dip the cake pops in melted white chocolate with a few drops of red food coloring mixed in for a pink and white cake pop theme. Decorate the outside with red, white, or pink sprinkles.
Easter Cake Pops
Dip leftover cake cake pops into white or pastel coating, then decorate as desired. You could make little Easter bunnies and chicks with just a few simple embellishments. Place them upright in a container filled with green Easter grass for a festive table centerpiece.

You could also shape the leftover cake cake pops into egg shapes. To make that super easy, you could use an egg-shaped mold, or you could shape the cake pops by hand.

Dip into coatings of various colors, then add decorative striping and sprinkles for a colorful display.
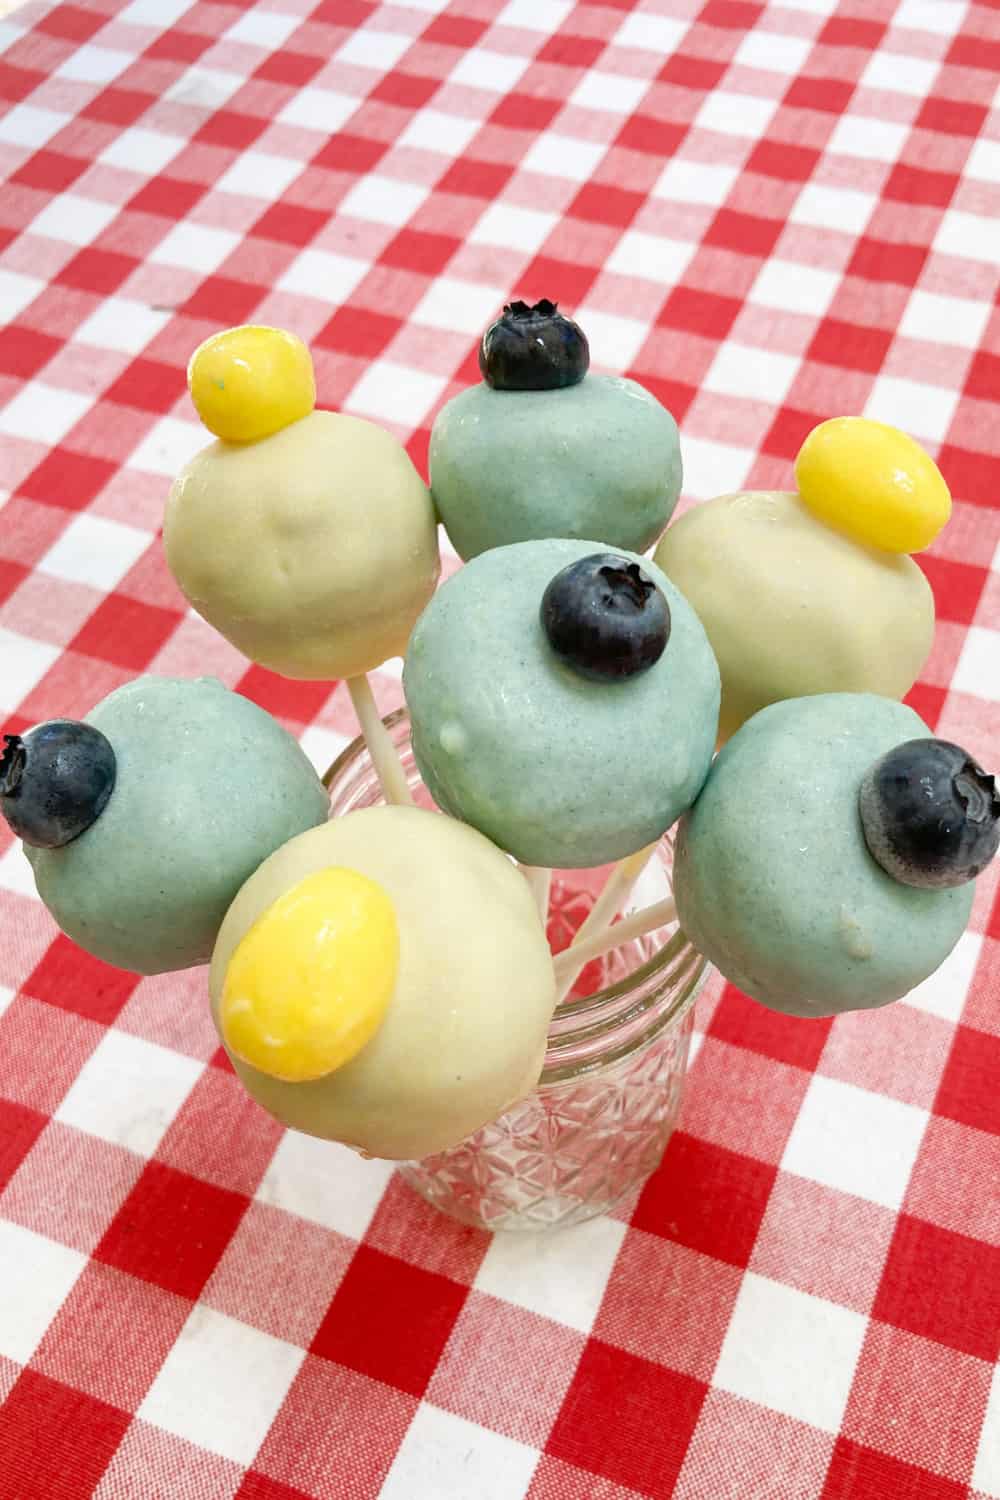
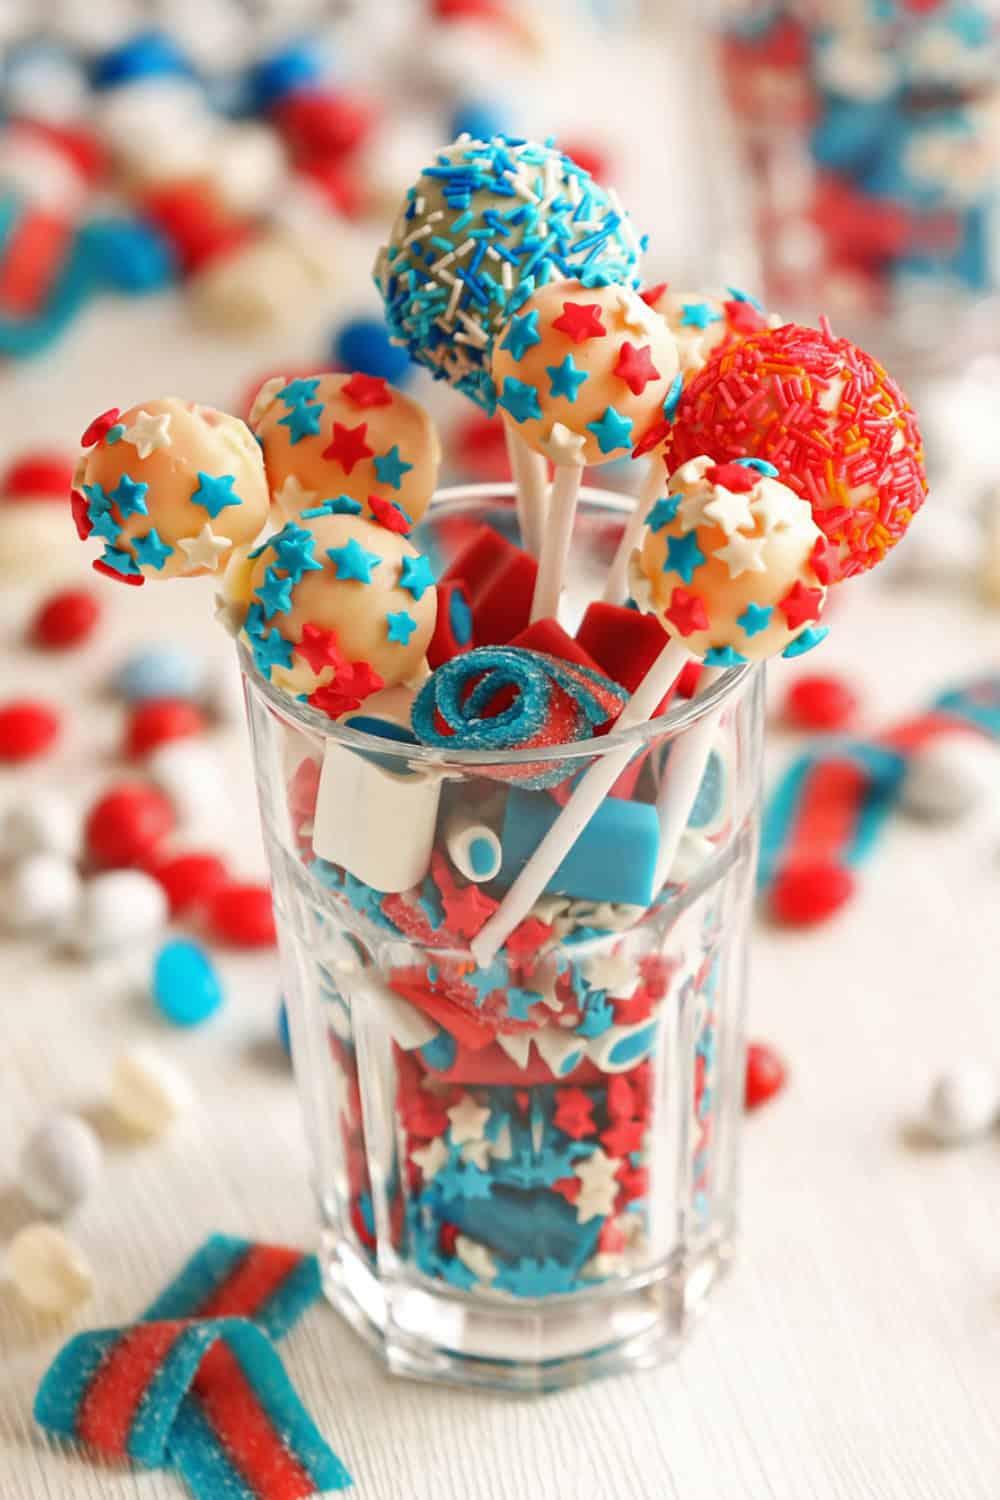
Patriotic Cake Pops
These festive red, white, and blue cake pops are perfect for any patriotic celebration, from Memorial Day to the 4th of July. You can use these colorful cake pops to celebrate special holidays in the UK as well. If you don’t have any leftover cake, you could make a white cake or a strawberry cake from cake mix, then use whichever binding ingredient (frosting, honey, peanut butter) you have on hand to shape the cake balls. After the cake balls are formed, follow the steps detailed previously. Dip the cake pops into red, white, or blue coating, then decorate with stars or red, white, and blue sprinkles.
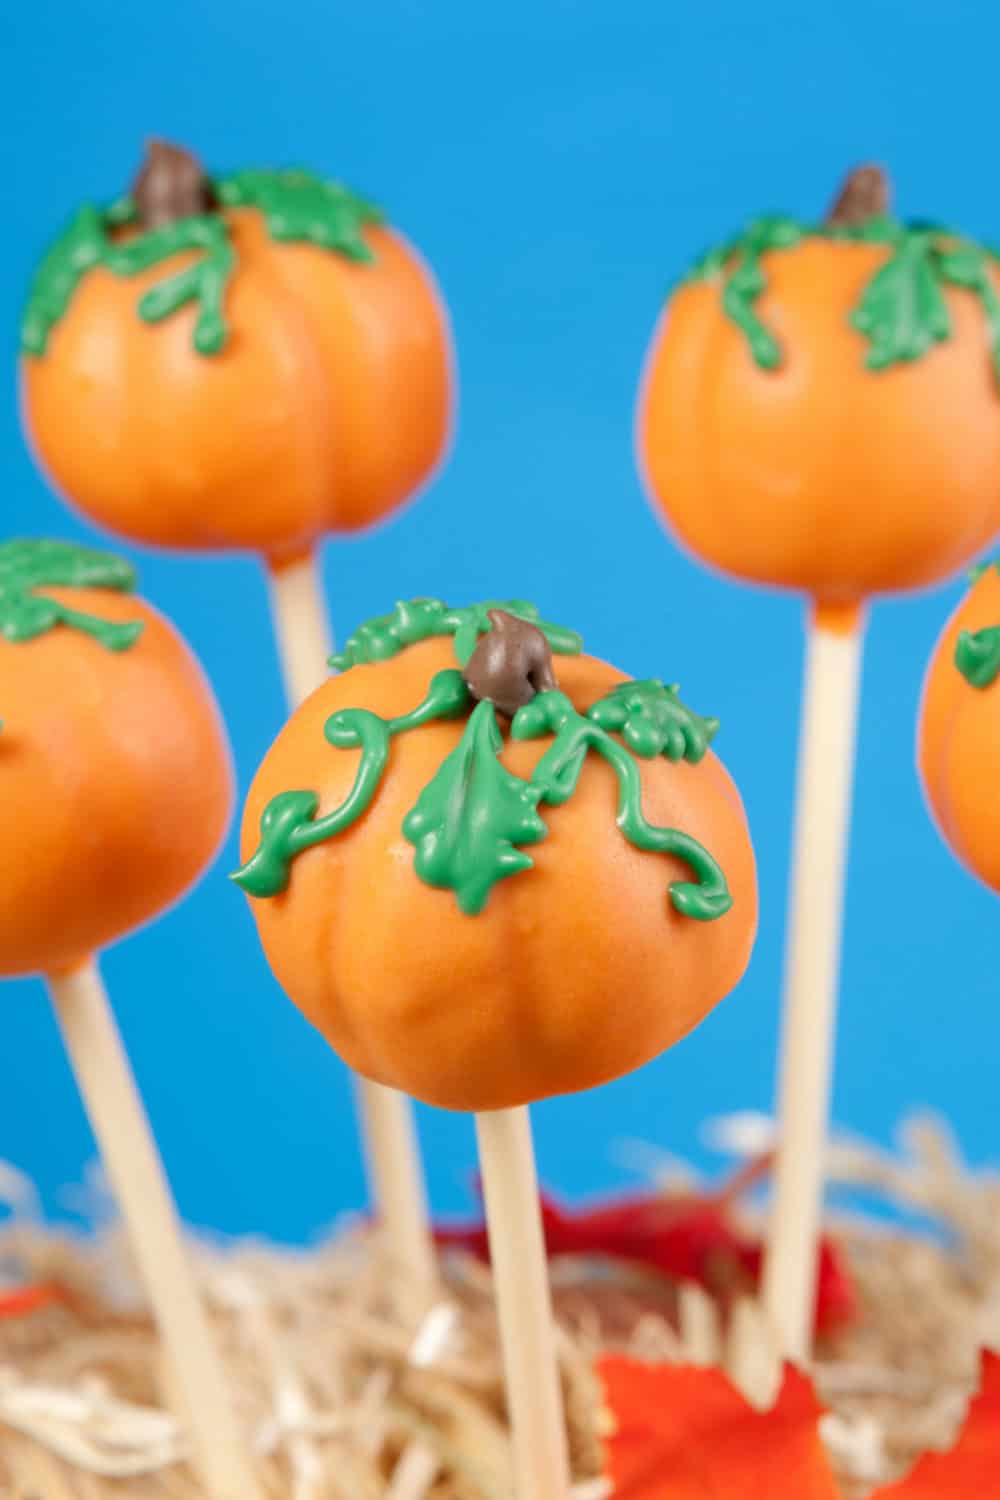
Halloween Cake Pops
To make cake pops for Halloween, use any of the methods to make your cake balls stick together. Melt some white chocolate chips for dipping, then add some orange food coloring. You could either create pumpkins with some green frosting in a squeeze tube, or use some black frosting in a tube to create a jack-o-lantern face. For both options, you could put a touch of brown frosting or melted milk chocolate on top of the cake pop for a pumpkin stem.
Christmas Cake Pops
There are many possibilities for making cake pops part of a Christmas celebration. If you are hosting a reindeer-themed party, you could dip a cake ball into melted chocolate, then decorate using similar items as you would for these reindeer cookies. With pretzels for antlers, all you need is a red hot for the nose and some mini chocolate chips for eyes.
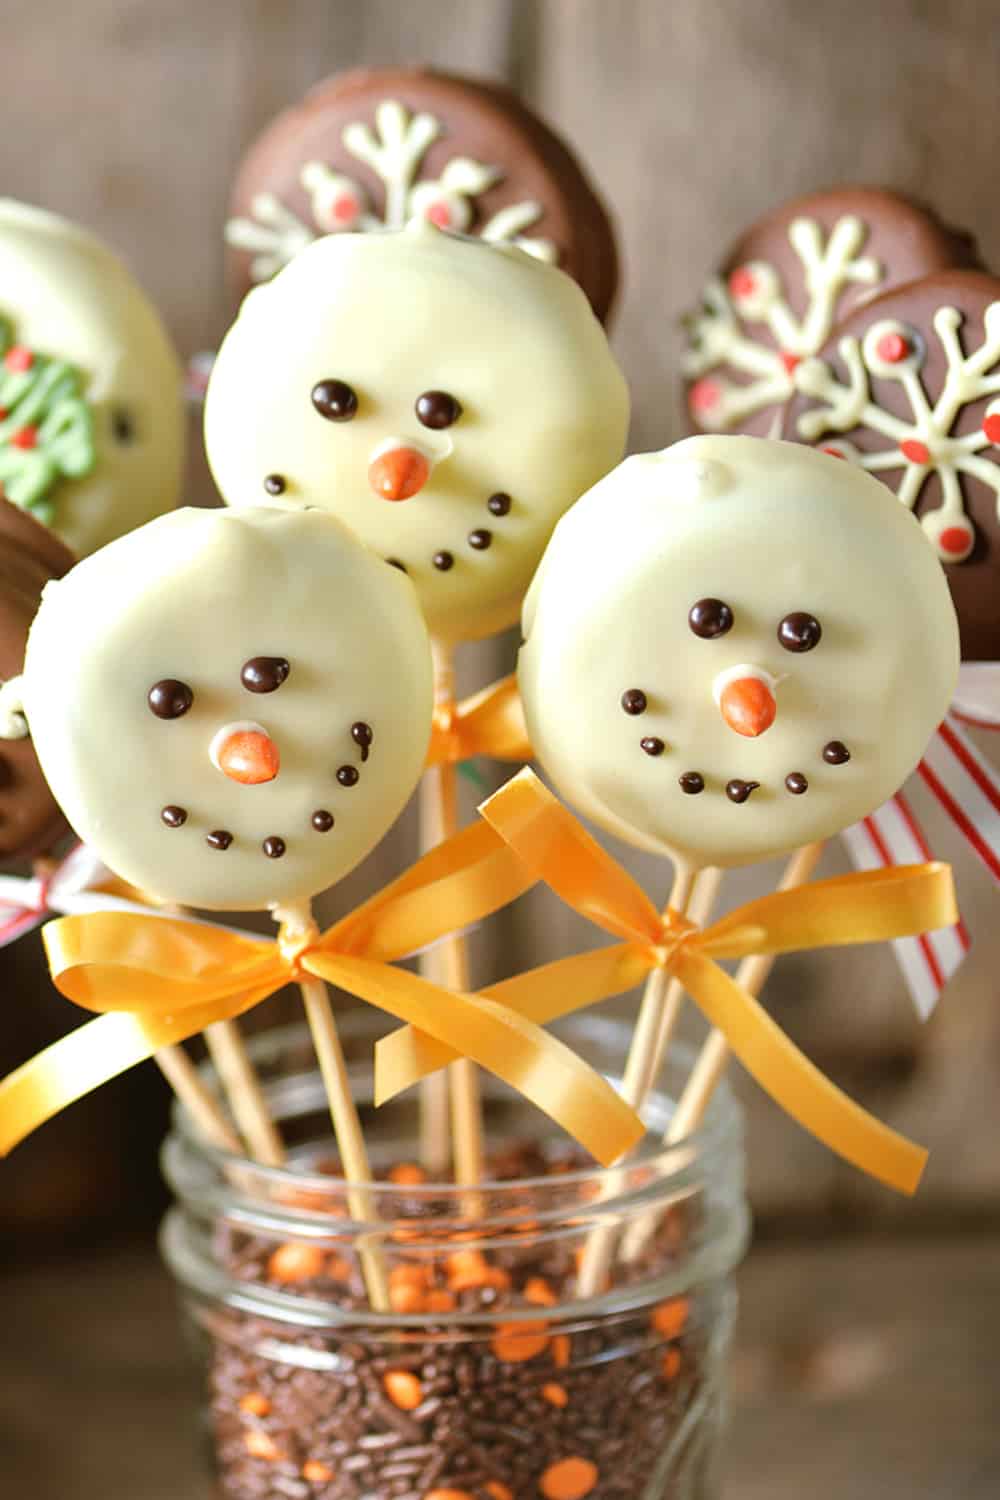
A snowman cake pop would be another fun option. Dip the cake pop into melted white chocolate, then add decorations similar to this snowman cookie. Place in a jar with fairy lights for a decorative centerpiece.
Common Questions About Cake Pops from Leftover Cake
Can I use refrigerated cake in cake pops?
Yes, you can use refrigerated cake to make cake pops. In fact, using refrigerated cake can make the process easier because the cake is already chilled, which can help the cake pop mixture hold its shape better.
Can you freeze cake to make cake pops later?
Yes, you can freeze cake to make cake pops later. Freezing cake is a convenient way to store it for future use, especially if you have leftover cake that you want to repurpose into cake pops at a later time. Here’s how to freeze cake for making cake pops:
Allow the Cake to Cool: If you’ve just baked the cake, let it cool completely at room temperature before proceeding. If you have leftover cake, ensure it’s also at room temperature before freezing.
Cut into Portions: Slice the cake into portions or cubes. You can cut it into pieces that are convenient for making cake pops later.
Wrap Tightly: Individually wrap each portion or cube of cake in plastic wrap. Make sure the cake is wrapped tightly to prevent freezer burn and to maintain its freshness.
Place in a Freezer Bag or Container: Once wrapped, you can place the cake portions into a heavy-duty freezer bag or an airtight container. This provides an extra layer of protection against freezer burn.
Label and Date: Don’t forget to label the container or freezer bag with the date so you can keep track of how long the cake has been in the freezer.
Freeze: Put the cake in the freezer, ensuring it’s in a flat and even layer to freeze evenly. If you have multiple layers, separate them with parchment paper to prevent sticking.
When you’re ready to make cake pops:
Thaw: Remove the cake from the freezer and allow it to thaw in the refrigerator. Thawing overnight is usually best, but you can also use the microwave on low power to speed up the process if needed.
Proceed with Cake Pops: Once the cake is thawed, you can crumble it and follow the steps for making cake pops as described in the basic recipe above.

Why are my cake pops falling apart when dipping?
Cake pops falling apart when dipping can be a common issue, but it can be resolved with some adjustments to your technique and ingredients. Here are some common reasons why cake pops might fall apart and how to fix them:
Cake Mixture Too Dry: If your cake mixture is too dry and crumbly, it won’t hold together well when you try to dip it. To fix this, add a bit more frosting to the cake crumbs until you achieve a mixture that’s moist enough to hold its shape but not overly sticky.
Overmixing: Overmixing the cake crumbs and frosting can lead to a dense, crumbly mixture that doesn’t hold together. Mix just until the crumbs and frosting are combined, being careful not to overdo it.
Cake Balls Too Large: If your cake balls are too large or heavy, they may not stay on the stick when you dip them into the coating. Try making smaller cake balls that are easier to handle.
Inadequate Chilling: Properly chilling the cake balls before dipping is crucial. If they’re not chilled long enough, they may not hold their shape when dipped. Refrigerate the cake balls for at least 30 minutes or until they are firm.
Dipping Technique: When you dip the cake pops into the melted chocolate or coating, make sure to do so gently and without undue force. A smooth, gentle motion will help prevent the cake from falling apart. Hold the cake pop at an angle, not straight up and down. You can also tap off excess coating before the chocolate sets to avoid excessive weight on the cake.
Chocolate or Coating Too Hot: If the melted chocolate or coating is too hot, it can cause the cake to soften and fall apart. Allow the melted coating to cool slightly before dipping.
Inadequate Coating: Ensure that the cake pops are coated evenly with a sufficient layer of chocolate or candy coating. This helps to hold them together and adds stability.
Thick Coating: Applying a very thick layer of chocolate or coating can make it difficult for the cake pops to stay on the stick. Try to achieve a thin, even coating.
Letting the Coating Pool at the Base: When you dip the cake pops, make sure you don’t let the coating pool at the base of the stick. Gently rotate and tap the cake pop to allow excess coating to drip off evenly.
Using a Dull Stick: If you’re using sticks that are too dull or thin, they may not provide enough support for the cake pops. Consider using sturdier sticks. If you buy sticks specially designed for cake pops, you should have no problem.
How long does leftover cake last in the fridge?
The shelf life of leftover cake in the fridge depends on various factors, including the type of cake, how it’s stored, and the specific ingredients used. Here are some general guidelines for how long you can expect the leftover cake to last in the refrigerator before you need to do something with it, like make cake pops:
Homemade Cakes: Homemade cakes, including frosted cakes, typically last for about 3 to 5 days when stored in an airtight container in the refrigerator. The cake’s moisture and freshness may vary depending on the recipe and ingredients.
Store-Bought Cakes: Store-bought cakes, like those from bakeries or supermarkets, often contain preservatives and stabilizers that can extend their shelf life. They can last for up to 1 to 2 weeks in the refrigerator if properly stored in an airtight container.
Cream or Custard Fillings: Cakes with cream or custard fillings can spoil more quickly. It’s generally advisable to consume these cakes within 1 to 2 days when refrigerated.
Fruit-Filled Cakes: Cakes with fresh fruit fillings may have a shorter shelf life due to the perishable nature of the fruit. Consume these cakes within 2 to 3 days when stored in the refrigerator.
To maximize the shelf life of leftover cake in the fridge:
Wrap the cake in plastic wrap or aluminum foil to prevent it from drying out and absorbing other odors in the fridge.
Place the wrapped cake in an airtight container or resealable plastic bag for added protection.
If the cake has a delicate frosting or icing, use a piece of wax paper or parchment paper to prevent the frosting from sticking to the wrapping.
Store the cake in a cool and consistent temperature zone in the refrigerator, away from items that may give off strong odors.
Remember that these are general guidelines, and the actual freshness of the cake may vary based on the specific ingredients and conditions. Always use your judgment and perform a visual and smell check to determine if the cake is still safe to eat. If you notice any signs of spoilage, such as mold, off odors, or a change in texture, it’s best to discard the cake to avoid any risk of foodborne illness.
Does leftover cake need to be refrigerated?
Whether leftover cake needs to be refrigerated depends on several factors, including the type of cake, the ingredients used, and how long you plan to store it. Here are some guidelines to help you determine whether refrigeration is necessary:
Frosting and Fillings: Cakes with perishable frosting or fillings, such as cream cheese frosting, whipped cream, custard, or fruit fillings, should be refrigerated. These ingredients can spoil or become unsafe to eat if left at room temperature for an extended period.
Dairy-Based Frosting: Cakes with frosting made from dairy products, like buttercream or cream cheese frosting, should be refrigerated to prevent the frosting from melting or becoming overly soft. Cold temperatures help maintain the frosting’s texture.
Fresh Fruit: If your cake has fresh fruit on it or as a filling, it’s advisable to refrigerate it. Fresh fruit can spoil quickly at room temperature.
Non-Perishable Cakes: Cakes that are made with ingredients that are less prone to spoilage, such as butter-based frosting or dry toppings like fondant or royal icing, can typically be stored at room temperature for a short period, usually up to 2-3 days. However, refrigeration can help extend the cake’s freshness.
Safety Considerations: If you live in a hot and humid environment or your kitchen is particularly warm, it’s safer to refrigerate cakes to prevent the growth of bacteria or mold.
Remember that these guidelines are general recommendations, and the specific requirements for storing leftover cake can vary based on the recipe and ingredients used. Always use your judgment and perform a visual and smell check to ensure the cake is still safe to eat. If you have doubts about the cake’s freshness or safety, it’s best to err on the side of caution and refrigerate it or consume it promptly.
What not to do when making cake pops?
When making cake pops, there are several common mistakes to avoid to ensure your cake pops turn out delicious and visually appealing. Here’s a summary of what not to do when making cake pops:
Don’t Overmix: Avoid overmixing the cake crumbs with the binder (such as frosting or cream cheese). Overmixing can result in a dense or overly moist cake pop mixture.
Don’t Use Too Much Binder: Be cautious not to add too much binder to the cake crumbs. The mixture should hold its shape without being overly sticky.
Don’t Skip Chilling: Do not skip the chilling step. Chilling the cake pops before dipping them helps them hold their shape and prevents them from falling apart.
Don’t Rush the Chilling Process: Allow the cake pops to chill for the recommended time. Rushing this step can make the cake pop mixture difficult to work with.
Avoid Unevenly Sized Cake Balls: Try to make sure your cake balls are uniformly sized. This helps ensure even cooking and a consistent appearance.
Don’t Skip Proper Melting: When melting chocolate or candy melts for coating, follow the package instructions. Avoid overheating, which can result in a thick or clumpy coating.
Avoid Excessive Coating Drips: After dipping the cake pops, gently tap off the excess coating. Too much coating can make the cake pops heavy and cause them to slide off the sticks.
Don’t Overcrowd the Coating: Avoid overcrowding the container when dipping cake pops. This can cause them to touch each other and the coating to stick together.
Avoid Decorating Wet Coating: If adding decorations like sprinkles, make sure the coating is still wet when you apply them. Decorating on dry coating won’t secure the decorations properly.
Don’t Refrigerate Immediately: Allow the cake pops to set at room temperature briefly after dipping before refrigerating. Placing warm cake pops directly in the fridge can lead to condensation and affect the coating’s texture.
Avoid Storing at Inconsistent Temperatures: Store your cake pops in a consistent temperature environment to prevent issues like cracks or moisture on the surface.
Don’t Skip Quality Check: Before serving or gifting your cake pops, visually inspect them and ensure they have a good texture, are free from any issues like mold, and are fresh and safe to eat.
What can I use instead of candy melts for cake pops?
If you don’t want to use candy melts for coating cake pops, there are several alternatives you can consider. Here are some options:
Chocolate: You can use melted chocolate, either milk, dark, or white, as a coating for cake pops. It’s a popular and delicious alternative to candy melts. Make sure to temper the chocolate properly for a smooth and shiny finish.
Chocolate Chips: Chocolate chips, whether semi-sweet, milk, or white (I used white chocolate chips as a coating when testing the different binding options for this recipe), can be melted and used for coating cake pops. Add a small amount of vegetable oil or shortening to thin the chocolate if needed.
Colored Chocolate: You can find colored candy melts that work well for cake pops. If you prefer not to use candy melts, you can color white chocolate or white chocolate chips with food coloring or oil-based candy coloring. This allows you to customize the colors to match your theme.
Ganache: Ganache is made from chocolate and heavy cream. It can create a luscious, glossy coating for cake pops. Adjust the ratio of chocolate to cream to achieve your desired consistency.
Frosting: If you’re looking for a different taste and texture, you can use frosting as a coating. Melted frosting will create a smoother finish but may not harden as much as chocolate or candy melts. It works well for a creamy, cake-like exterior.
Peanut Butter: Melted peanut butter can be used for a unique flavor and texture. It pairs exceptionally well with chocolate cake pops.
Caramel: Melted caramel is another flavorful option. It creates a rich, sweet coating for cake pops.
Yogurt or White Chocolate Yogurt Coating: Yogurt or yogurt coating, similar to white chocolate, can be used as an alternative to candy melts. It adds a slightly tangy flavor.
Royal Icing: Royal icing is a classic choice for sugar cookie decoration, but you can also use it for cake pops. It dries hard and can create a smooth, glossy finish.
Glaze: You can make a simple glaze using powdered sugar and liquid (water, milk, or juice) and flavor it with extracts or fruit zest. It won’t harden as much as chocolate but can be a tasty option.
When using alternatives to candy melts, be aware that the texture and appearance of your cake pops may vary. It’s essential to adjust the thickness of the coating to achieve the desired finish and ensure that it adheres well to the cake pops. Experiment with different coatings to find the one that suits your taste and the overall theme of your cake pops.
How long are cake pops good for?
The shelf life of cake pops depends on various factors, including the ingredients used, how they are stored, and whether they contain perishable fillings or coatings. Here are some general guidelines for how long cake pops are good for:
Room Temperature: Cake pops made with ingredients like buttercream frosting and non-perishable coatings (e.g., chocolate or candy melts) can typically be stored at room temperature for up to 2 to 3 days. However, their freshness may start to decline after the first day.
Refrigeration: Cake pops with perishable fillings or frostings, such as cream cheese frosting or fruit fillings, should be stored in the refrigerator. When refrigerated, they can last for about 3 to 5 days.
Freezing: Cake pops freeze well and can be stored in the freezer for an extended period. Properly wrapped and stored cake pops can maintain their quality for up to 2 to 3 months in the freezer.
To maximize the shelf life of cake pops:
Wrap them individually or place them in an airtight container to prevent them from drying out or absorbing odors.
Store them in a cool, consistent temperature zone away from direct sunlight and temperature fluctuations.
Label and date the container or wrapping so you can keep track of how long they’ve been stored.
When you’re ready to enjoy cake pops that have been refrigerated or frozen, allow them to come to room temperature for a short period to improve their texture and flavor.
It’s essential to consider the specific ingredients and fillings used in your cake pops when determining their shelf life. Perishable ingredients can spoil more quickly, so it’s crucial to follow proper storage guidelines to ensure the safety and quality of your cake pops.

Cake Pops from Leftover Cake
Equipment
- 1 set of at least 24 cake pop or lollipop sticks
- 24 cake pop wrappers and twist ties optionsl
- 1 Baking sheet
- parchment paper
- 1 mixing bowl
- 1 small bowl or saucepan for melting the coating
- 1 piece of styrofoam or cake pop stand
Ingredients
- 1 cake baked from a box of cake mix prepared according to package instructions
- 1 cup frosting
- 24 cake pop sticks or lollipop sticks
- 1 cup white chocolate chips, candy melts or other cake pop coating option
- vegetable oil optional, as needed
- sprinkles, chopped nuts, or other decorations optional
Instructions
- Remove the cake from the cake pan(s). Place into a large mixing bowl and crumble into crumbs using a mixing spoon or your hands.
- Add frosting to the cake crumbs to bind them together and create a moist, dough-like consistency. Start with a few tablespoons of frosting and add more as needed. The amount of frosting required can vary, but the mixture should hold its shape when pressed together without being overly sticky.
- Take small portions of the cake mixture and roll them into uniform-sized balls. The size is up to you, but cake pops are typically about the size of a large cherry or small golf ball.
- Place the cake balls at least 1/2 inch apart on a piece of parchment paper on a baking sheet. Melt a small amount of your chosen coating (chocolate or candy melts) and dip the end of a cake pop stick into it. Insert the coated end into the center of each cake ball, about halfway through. This helps the sticks adhere to the cake.
- Refrigerate the cake pops for at least 30 minutes to allow them to firm up. This will make them easier to handle and dip.
- Melt your chocolate or candy melts according to the package instructions. You can melt the coating in the microwave 30 seconds at a time, stirring in between intervals. You can also melt the chocolate coating in a bowl over a pan of water. If the chocolate or candy melts are too thick, add some vegetable oil, one teaspoon at a time, until the desired dipping consistency is reached.
- Dip each cake pop into the melted chocolate, ensuring it’s fully coated. You can tap off any excess coating. While the coating is still wet, you can decorate your cake pops with sprinkles or other toppings of your choice.
- Place the cake pops upright in a piece of foam or a cake pop stand and allow to dry. Allow the coating to set at room temperature for a few minutes, then refrigerate if you are not eating them right away. The cake pops will be ready to eat in about 10 minutes.
- If you are transporting the cake pops, wrap each in a cake pop wrapper and fasten the wrapper with a twist tie. Carefully lay the cake pops in a container and keep them chilled until you are ready to display them in a stand or serve them to guests.
More Food Inspiration
Thinking of working this easy cake pops recipe into your tea party , picnic, potluck, snack, or dessert recipe collection? It’s always nice to have a plan when it comes to meals or parties. If you’re looking for a way to get more organized with your meal-planning efforts, I’ve got something for you. Free, editable meal planners! The templates can be used over and over, as often as you need them. You can make as many duplicates as you like, and you’ll be able to save old meal plans for future reference. I hope it simplifies things for you.

Get my digital, editable, printable templates!
I hope you enjoy making this cake pops recipe with leftover cake. May all of your homemade cake pops endeavors meet with great success!

Lisa Mitchell is a wife, mom, and school librarian who likes to create recipes and entertain guests, often using fresh ingredients from her family’s small Pacific Northwest farm. For more delicious, easy recipes, click on over to the Food page.
Want more great garden, food, or travel ideas? Follow FluxingWell on Pinterest, Facebook, Instagram, and X for the latest posts, tips, and inspiration.
love the idea of using left over cake, sadly I never have this problem but I like the idea of using it when you have it. my kids love cake pops sounds like a fun idea on a weekend.
Haha, totally get it! Leftover cake is a rarity sometimes. That’s okay, you can make cake pops using the cake mix option and decide whether you want to use frosting to form the cake balls or not. Have fun!
These are amazing instructions on how to make cake pops with and without frosting. I’ve never made cake pops, but with these easy to follow instructions I’m inspired to try!
Awesome! Have fun making cake pops with or without frosting.
Thanks for sharing these interesting and helpful ideas and recipes for cake pops from leftover cake. I love how many variations there are and the possibilities to get creative! Love it!
Great! I hope you get to use cake pops often for your parties.
Cake pops from leftover cake is a genius idea. Thank you for sharing this easy way to make them at home. I made them for my nieces and nephews. They loved them!
I’m so glad your family liked the cake pops made with leftover cake. It’s a fun treat for sure.