
Sometimes, in the busyness of life, someone else’s birthday sneaks up on me. When I realize I’ve forgotten to buy a card, I make one. One of the easiest cards to make is one with pressed flowers. If you have read any of my previous posts about my being artistically challenged, you know that if I say something is easy, it really must be true. Any DIY project I attempt has to be an easy one, like these pole bean towers. Also, if you have ever received a pressed flower greeting card from me, you might be thinking I gave it to you because I forgot to buy you a card. Not necessarily true! I enjoy making pressed flower greeting cards. I make them even when I have store-bought greeting cards on hand. Here are the easy instructions for how to make pressed flower greeting cards yourself.

Table of Contents
The Pressed Flower Backstory
I first became interested in pressing flowers when I was teaching a wildflowers unit to third graders. Once I realized how easy it was to press flowers, I was hooked. There are so many lovely varieties, and it was something the kids could enjoy. We even bought a simple flower press for our classroom. No flower press? You can use a big old dictionary with paper towels tucked in between the flowers to protect the pages.
This post contains affiliate links, which means I may earn a small commission from qualifying purchases at no additional cost to you. Please read my Policies page for more information.
Materials Needed for Pressed Flower Greeting Cards
Flower press or heavy book
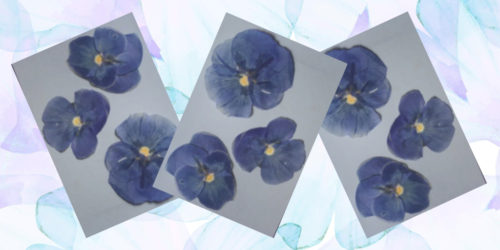
Dried flowers (pansies or violets work very well)
Glue stick
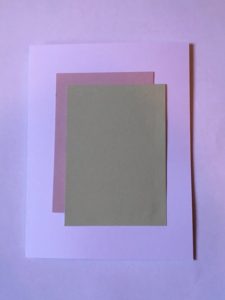
Colored card stock scraps in rectangular shapes (optional)
Blank greeting cards and envelopes (I buy mine in a value pack of 50 cards and envelopes)
Directions for Making Pressed Flower Greeting Cards
Select a blank card from your supply. Arrange colored card stock rectangles, if using, and glue to your flower press card. Sometimes I use a heavy book to flatten the card stock on to the glue to make it stick better.
Select the dried flowers you are going to use. Carefully lift the dried flowers from the drying paper. Go slowly, because the petals are extremely fragile.
Try different arrangements of the flowers before gluing down on the card. Ready to glue the flowers down? Here’s how to attach pressed flowers to cards. Position the flowers where you would like them. If you don’t want to displace the flowers while gluing, lift up one half of each flower at a time. Place glue on the cardstock under petals, then gently press the petal down on the glue. Your flower press card is almost done!

Glue stick doesn’t take very long to dry. It would be a good idea to wait 24 hours before writing on the card and putting it in the envelope. You could also store the card in a safe place for future use.
Some Notes About Drying Flowers
This is not a last-minute type project, unless you already have dried flowers on hand. If you need to dry flowers, plan on about two weeks of drying time in a flower press or heavy book. I always try to plan ahead and save enough flowers each spring and summer to use all year.
Types of Flowers to Dry
The flowers which work best for gluing to greeting cards are those without heavy centers. As previously noted, pansies are ideal, and violets are easy to use as well. If you want to dry larger flowers, such as roses, you could dry individual petals.
Tips About Using a Flower Press
These tips apply to those who use heavy books to dry flowers as well. Be sure to place flowers between sheets of absorbent paper. If you use regular plain printer paper, you might want to double the layers. Most flower presses come with absorbent paper to layer with the flowers, which becomes stained with time.
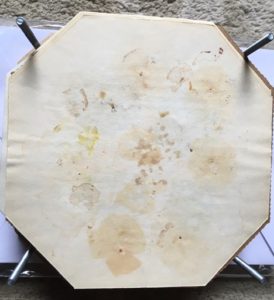
Some people prefer to use fresh paper each time new flowers are dried. Since the papers that came with my flower press are a special size and type, I have just kept using the original papers. Here’s a flower press similar to the one I have, which I’ve used for years.

Ideally, each layer of the flower press should contain the same type of flower. For example, the pansies should not be combined with rose petals. However, this is not always possible. I’ve dried different types of wildflowers in a single layer before, when it was the last available layer in my flower press.

My flower press has eight layers. If I want to stock up on dried flowers for the cold months, the layers are filled to capacity. One other limitation to space is that the petals of the flowers should not touch while they are drying.
How About You?
I hope you’ve enjoyed reading about how to make pressed flower greeting cards. This simple craft is something even a non-crafty person like me can complete with success. If you are looking for a unique card to send to someone special, these are a terrific, inexpensive option. I encourage you to try them yourself and discover how easy they are to make.

Other DIY Projects
If your creative juices are now flowing and you need another DIY project, consider trying an easy pointillism painting project. You could also make a simple origami greeting card to brighten a day. If you are looking for ideas for a special keepsake, you could make a fun and functional DIY garden stepping stone. For a special gift that kids can make, a fish print t-shirt is a fabulous option. There are many ways to get creative.
Planning to Make a Pressed Flower Card?
Do you think you might like to try making a pressed flower greeting card? Perhaps teach a lesson about pressing flowers? Whatever your level of artistic expertise, a marvelous creation will result. That’s my kind of art project, and maybe it’s yours as well. It’s always nice to have a place to jot down ideas and schedules for projects. With this 16-page planner, all of your art lessons, appointments and lists can be in one well-organized place. Just download and print the file to get started.
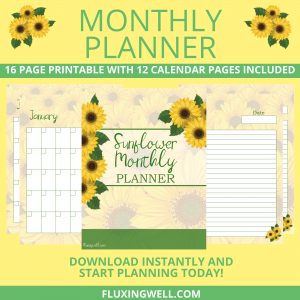
Get the planner!
Have a wonderful week, and may all of your artistic endeavors meet with success!

Lisa Mitchell is a wife, mom, and teacher who gets inspiration for art projects from the beautiful outdoors surrounding her family’s small Pacific Northwest farm. To learn more about what this website has to offer, click on over to the Welcome page.
Like this post? Please give it a share! =)
Want more great food, garden, or party ideas? Follow FluxingWell on Pinterest, Flipboard, Facebook, Instagram, and X for the latest posts, tips, and inspiration.
I did not know how to do this. I will be going back to this article. Thank you! Me and my kids love making homemade gifts or drawings.
You are very welcome! Pressed flower greeting cards are my go-to solution whenever I need a card in a hurry.
How do you protect the cards from being crushed in the mail? Do you add a piece of tissue or bubble wrap? Is there a way to protect the fragile flowers from breaking up? Or do you hand-deliver the cards, rather than mail them?
Usually the cards are just fine going through the mail in the regular envelope, but if you would like extra protection, you could use tissue or put the card in a clear cellophane sleeve before placing in the envelope. Pansies and violets are quite flat and adhere well to cards without breaking. Hope this helps!
Cynthia, choose envelopes that are slightly larger than your greeting cards to avoid crushing the pressed flowers. Ensure that the envelopes provide adequate protection and are made of sturdy material to maintain the integrity of the pressed flowers during mailing or gifting.
Yes, good tips for mailing without causing damage to your precious pressed flower cards.
I tried once, and the glue stick ruined the petals. I thought a more liquid glue would be even worse. I must try again, perhaps with just a smear of glue stick. Your cards are beautiful1
Thank you! I hope you have more success when trying just a light smear of glue stick. The dried flowers for the cards are indeed fragile!
I love to give and receive cards! This is such a great idea! The best gifts come from the heart!
Sandra,
I agree! I think these days it’s pretty special to give and receive greeting cards. Thanks for your positive words and enthusiasm.
Lisa
Love it. This is what I called creativity. Thank you for sharing.
Fadima,
You are most welcome! I’m glad you liked the post and appreciate your comments.
Lisa
These are absolutely gorgeous!
Beryl,
Thank you! I always enjoy making them.
Lisa
What a lovely craft! I’m looking forward to trying this.
Heidi,
I hope you do get to try it, and I’m glad you like the look of it. Thanks for commenting!
Lisa
I always wonder how drying flowers was possible. This is a really neat idea. I would actually consider making some to frame and display as art decor!
Monique,
I love the idea of framing them. I haven’t tried that yet, but you totally could. If you end up doing that, I’d enjoy seeing how it turns out. Thanks for the idea!
Lisa
I used flowers from my Dad’s funeral. I dried them and put in a shadow box with a poem. Then I gave to my mother as a gift.
What a beautiful idea! I’ve never made a shadow box, but I have admired those made by others. Dried flowers seem like a perfect keepsake to include.
I’ve seen this more and more lately it’s coming back as a postcard train thank you for this tips I would like to do some of this
Jessica,
I’m glad you liked the idea and I hope you get to try it. It’s definitely an easy craft!
Lisa
They look so pretty…
Sonali,
Thanks so much! I’m glad you like them.
Lisa
These are lovely! I love the idea of adding a touch of nature, something real and raw, to make something beautiful. I bet other types of plants could work as well. I personally never use, make, or send cards, if I’m being honest. I have a friend who makes her own cards though so I will pass this along!
Tiffany,
Yes, sending cards is not something everyone does these days. It is fun to include natural materials in an art project. Thanks for passing along the idea to your friend!
Lisa
This is a great idea I can make with my little one.
Britnee,
Yes, this would be a great craft for wee ones to try. I hope you do!
Lisa
Great idea! I have dried flower for various other reasons but never think of making a card. Haha, all my next cards will be so creative and crafty! I am not so crafty too, but as you said it’s easy to make! Thanks a lot Lisa. Lovely post 😊
Nilakshi,
You are so kind. I appreciate the affirmation, and I hope you get to try this. It’s a great project for non-crafty people like us!
Lisa
How beautiful! I want to try this!
Laura,
I hope you do get to give this project a try. Thank you for the positive words.
Lisa
This is such a beautiful way to make a card, thank you!
Jessa,
I’m glad you like the idea, and I appreciate your taking the time to comment!
Lisa
So creative, I am surely gonna try this!
Pragati,
I hope you do get to give it a try. Thanks for your enthusiasm!
Lisa
This is a fun craft! I love dried flowers but I’ve never used them to make cards. It’s a thoughtful and creative way to share a sweet sentiment. Thanks for the tips.
Ana,
I love pressed flowers as well, and enjoyed teaching a wildflower unit when I taught fourth grade. One day, I realized how easy it would be to attach some to greeting cards, and presto! An easy craft, which is the only kind I am able to do! Thanks so much for your comment!